Easy Tech Tuts
How To Deploy GitHub Project on Vercel in 2026 Easily
By Impran M N
Vercel makes it possible to take a project sitting in a GitHub repository and turn it into a live, hosted website in just a few clicks, with no backend required. This guide walks through uploading a project to GitHub, connecting it to Vercel, and configuring the deployment settings, using a simple to-do list app as the example. It applies just as well to React apps, Next.js projects, or any static site you want hosted for free, and by the end you'll have both a live URL and a dashboard for managing future deploys.
01Upload your project to GitHub
Before Vercel enters the picture, your code needs to live in a GitHub repository. Create a new repo, name it something descriptive like "to-do," and use the Quick Setup screen's "Upload files" option to add your project directly from your file manager rather than dragging and dropping — for a simple static project this can be as small as a single index.html file. Commit the changes, and your code is now live on GitHub and ready to be connected to a hosting platform.
02Start deploying from Vercel
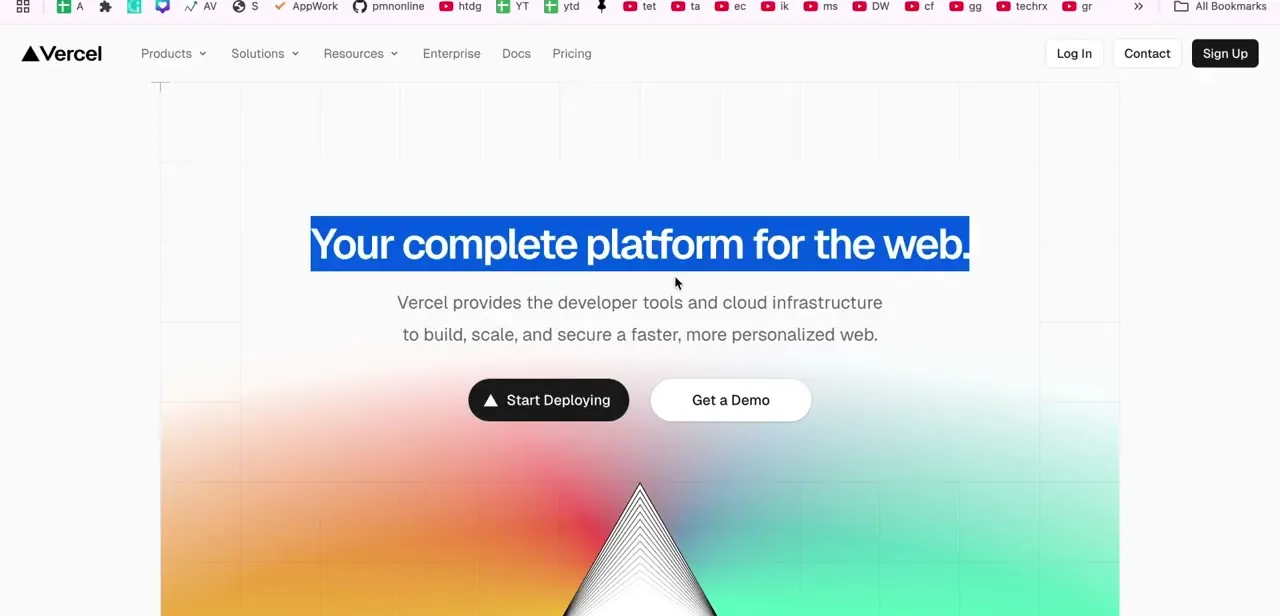
Head to vercel.com, a platform widely used for free hosting of GitHub projects, especially for front-end developers and static or JAMstack apps. Click Start Deploying from the homepage, then continue with GitHub to authenticate — if you're already signed into GitHub in another tab, Vercel typically detects and links the account automatically without asking you to log in twice.
03Import your repository and grant access
After authenticating, click Import Git Repository. Vercel gives you a choice between granting access to all of your GitHub repositories or just specific ones — selecting only the specific repository you're deploying is the safer option, since it means Vercel never sees the rest of your GitHub account. Select the repo (to-do in this example) and click Install to finish linking it.
04Configure the project and deploy
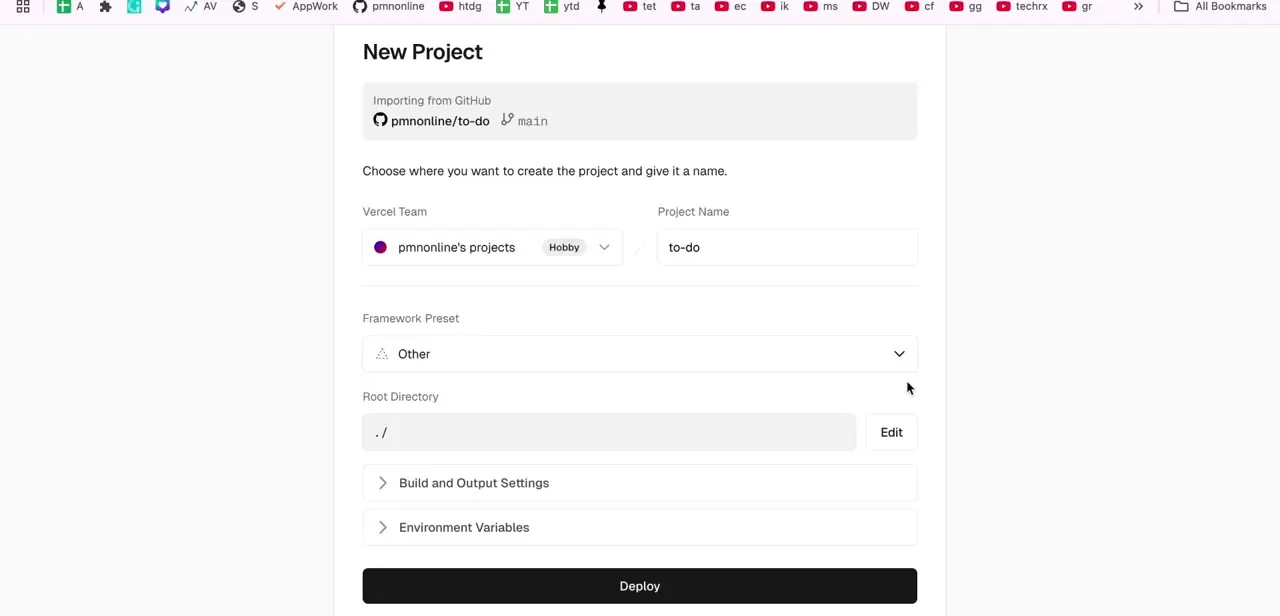
Vercel's New Project screen shows exactly what it's importing — the repository name and branch (pmnonline/to-do on main, for instance) — plus a form for the Vercel Team, Project Name, Framework Preset, and Root Directory. For a plain HTML project with no framework, set the Framework Preset to "Other" rather than guessing at a specific framework; Build and Output Settings and Environment Variables stay collapsed and can be left alone for a simple static site. Click Deploy once everything looks right.
05Confirm the deployment finished
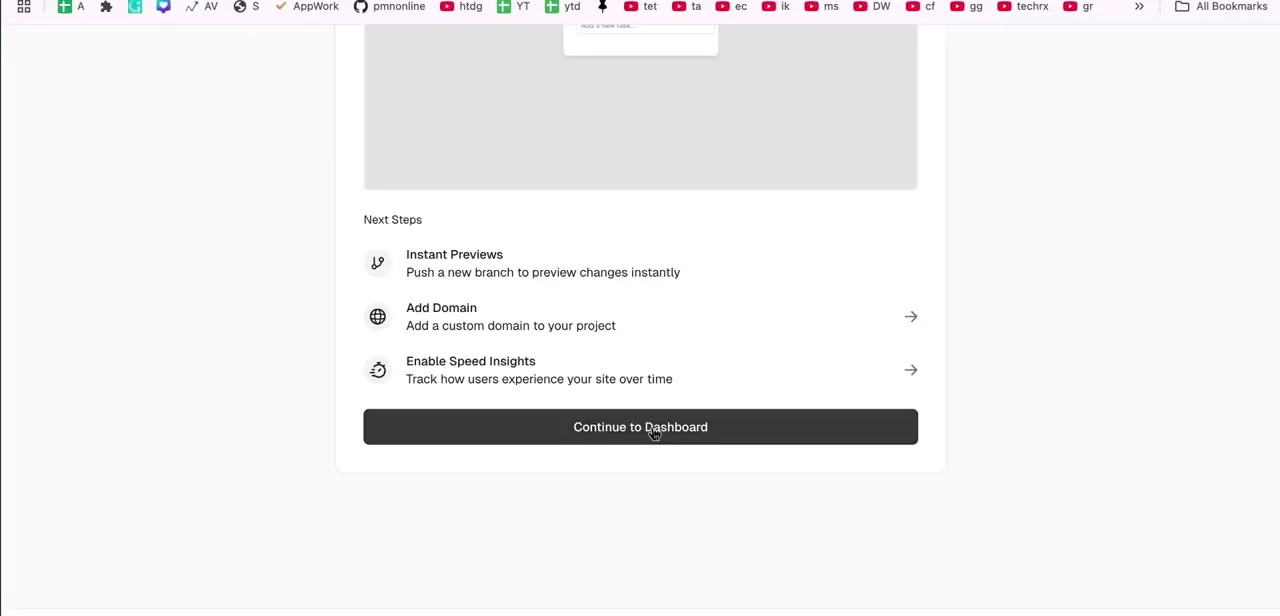
When the build completes, Vercel shows a Next Steps panel with shortcuts for what to do now that the site is live: push a new branch for Instant Previews, add a custom domain, or enable Speed Insights to track how real users experience the site over time. None of these are required to have a working deployment — they're the next layer of polish once the basic hosting is confirmed working. Click Continue to Dashboard when you're ready to move on.
06View and manage your deployed site
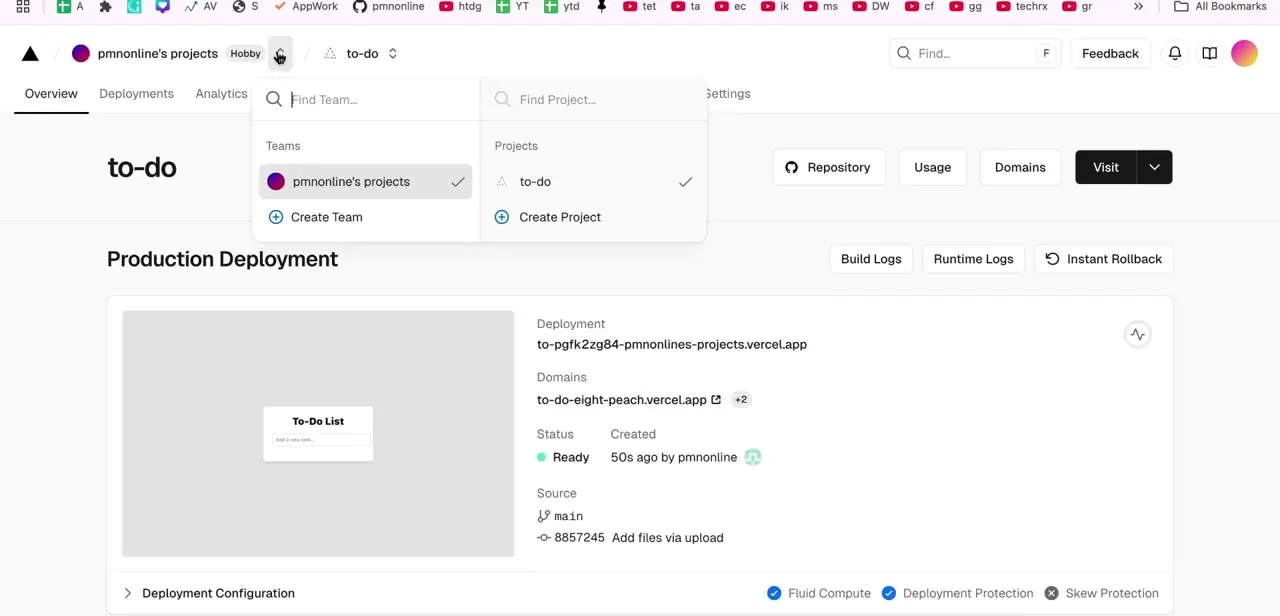
The Vercel dashboard's Production Deployment view is where everything about the live site comes together: the generated deployment URL, any custom domains attached, the current status (Ready, in this case), who deployed it and when, and which commit it was built from. From here you can also open Build Logs and Runtime Logs, or use Instant Rollback if a future deploy breaks something and you need to revert to this working version quickly.
07Let future pushes redeploy automatically
The real payoff of connecting GitHub to Vercel rather than uploading files manually is that any future push to the connected branch triggers an automatic redeployment — you edit code locally, push to GitHub, and the live site updates on its own within a minute or two. That makes this setup genuinely suited to ongoing projects, not just a one-time publish, whether it's a static HTML site, a React app, or a full Next.js project.
Frequently asked questions
Is deploying a GitHub project on Vercel really free?
Yes, Vercel offers free hosting for personal and small projects deployed directly from GitHub, under its Hobby plan.
Does Vercel automatically update my site when I push new code?
Yes, once connected, any push to your GitHub repository triggers an automatic redeployment on Vercel, which is what makes the GitHub integration more useful than a manual upload.
Can I deploy a React or Next.js project the same way?
Yes, the same GitHub-to-Vercel connection process works for React, Next.js, and other front-end frameworks — just choose the matching Framework Preset instead of "Other" during setup.
Can I add a custom domain to my Vercel deployment?
Yes, custom domain settings are available from the Vercel project dashboard's Domains tab, and Vercel also surfaces an Add Domain shortcut right after your first deployment finishes.
Watch the full walkthrough
The same steps, demonstrated on screen from start to finish.