Easy Tech Tuts
How to Create a New Ticket in Zendesk Easily 2026
By Impran M N
Not every support issue arrives as an inbound email — a phone call, a walk-up conversation, or an issue you spot yourself still needs to be logged so it shows up in the same queue and reporting as everything else. This guide covers manually opening a new ticket in Zendesk, registering the person it's for if they aren't already a contact, filling in the subject and category fields, and submitting it with the right status. It's the same New Ticket form the 2026 agent workspace uses for every manually created case.
01Open a new ticket tab
The "+ Add" control in the top navigation bar opens a fresh, blank ticket in its own tab, separate from whatever tickets you already have open. It lands on a New Ticket form with an empty Requester field, an Assignee defaulted to your own name once you click "take it," and a Subject line at the top of the conversation panel waiting to be filled in. Because it opens as a tab rather than replacing your current screen, you can start it, switch back to an active ticket, and return to finish it later without losing anything.
02Register the requester if they're new
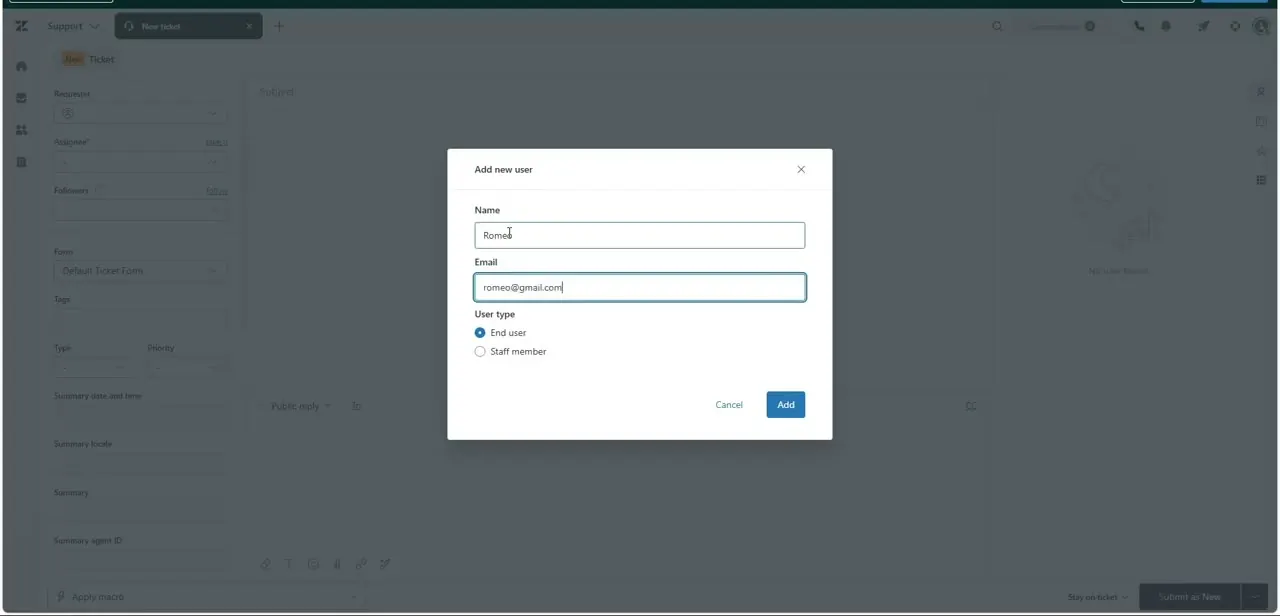
If the person calling or messaging you isn't already a contact, typing their name into the Requester field triggers an "Add new user" modal instead of a normal search result. It asks for a Name and Email, plus a User type choice between End user and Staff member — End user is selected by default, which is correct for an ordinary customer. Filling this in and clicking Add both creates the contact record and sets them as the requester in one step, so you don't need to jump to a separate contacts screen first.
03Confirm the requester, assignee, and followers
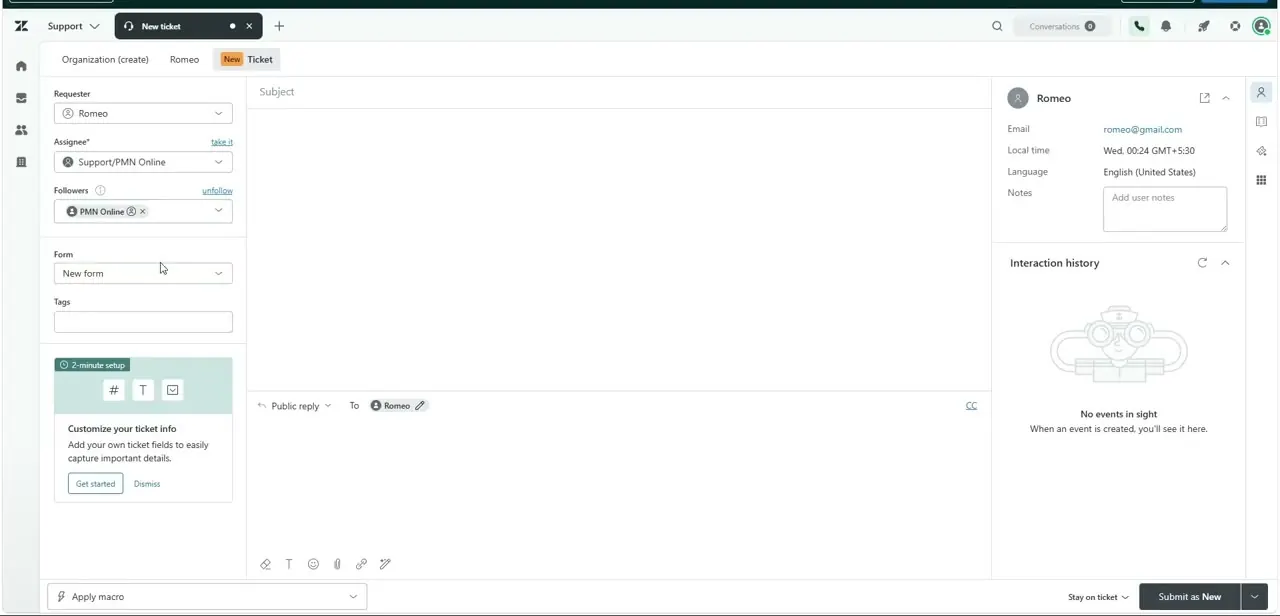
Once the new user is added, the left panel updates to show them as Requester, with their email, local time zone, and language now populated on the right-hand profile card. The Assignee field routes ownership to a specific group or agent, and Followers lets you loop in a teammate who should see updates without owning the reply. The Form dropdown, set to "New form" by default, controls which set of custom fields appears below it — worth checking if your account uses different forms for different ticket types.
04Write a clear subject line
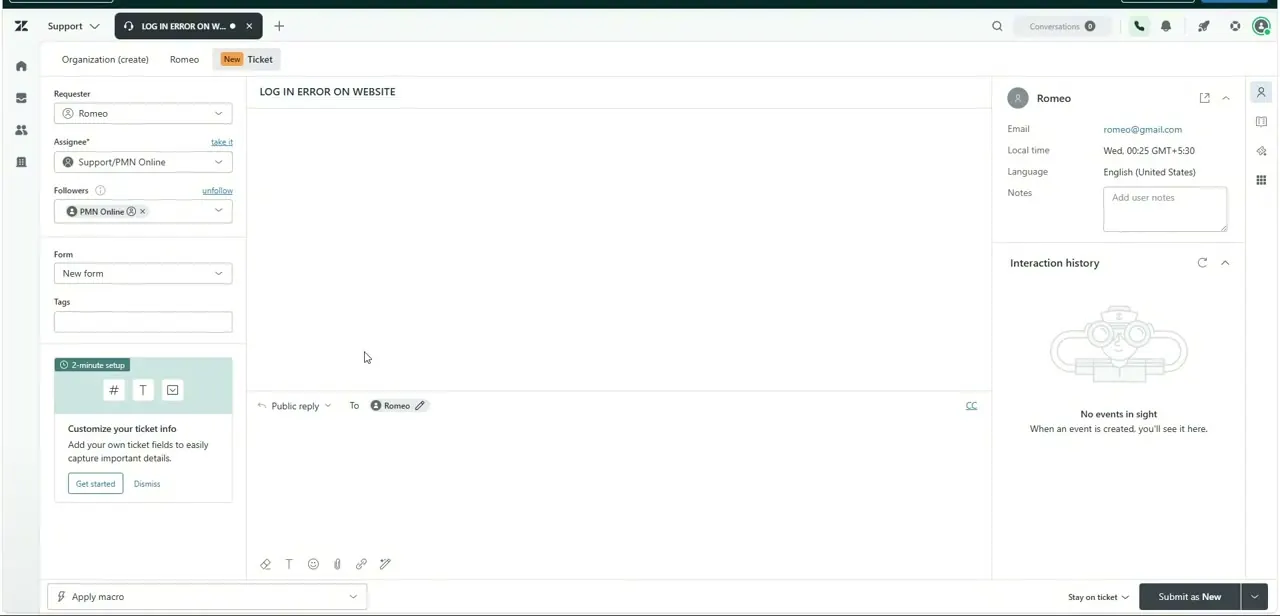
The Subject field sits at the top of the conversation panel and is the single most important piece of manual entry — it's what shows up in every queue view, notification, and report, so vague text like "issue" or "call" makes the ticket useless to anyone triaging later. A subject like "Log In Error On Website" tells the next person exactly what they're walking into before they open the ticket body. Since there's no original customer message to pull from on a manually created ticket, the subject is doing work an inbound email subject line would normally do for you.
05Fill in the description and adjust ticket parameters
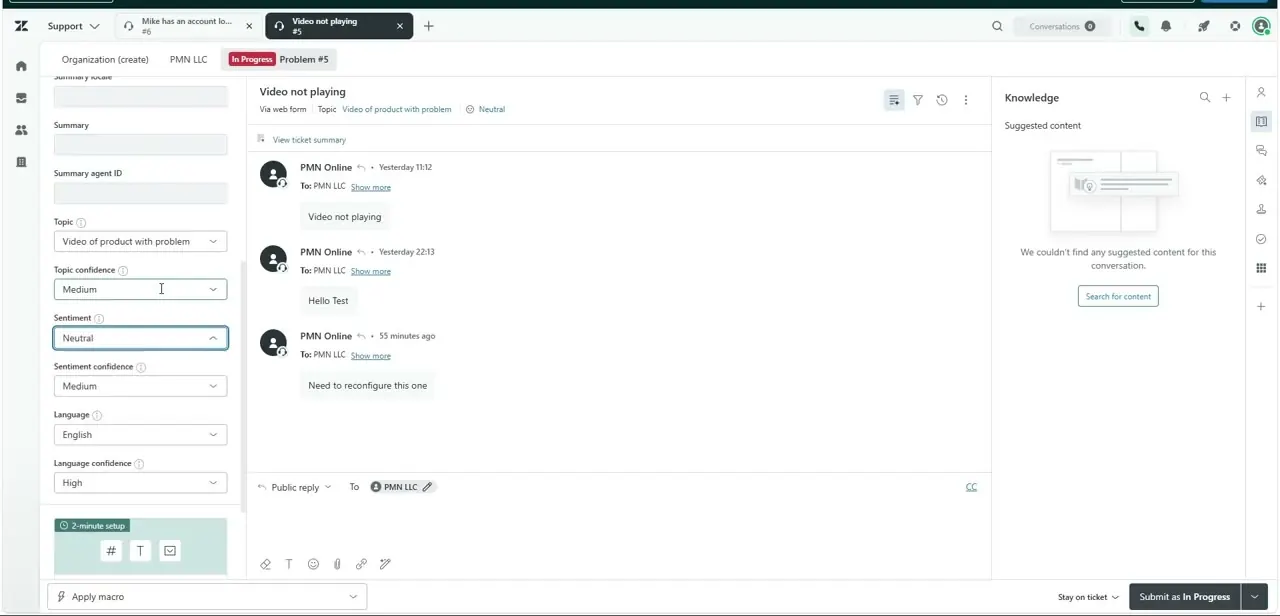
Below the subject, use the reply box to write out what actually happened — treat it like you're quoting the customer, even though you're typing on their behalf. Scrolling further down the left panel surfaces additional classification fields: Topic, Topic confidence, Sentiment, Sentiment confidence, and Language, several of which Zendesk can auto-populate or suggest once there's enough text in the ticket. Setting Type and Priority in the same area matters just as much, since those two fields are usually what filtered views and SLA timers key off.
06Submit with the correct status
The submit button in the bottom-right corner always names the status it's about to apply — New, Open, or Pending — and clicking the small arrow next to it opens the full list to change that choice before you submit. New is the right call for an issue you're just logging and haven't started working; Open or In Progress fits a ticket you're already handling as you create it. Once submitted, the ticket behaves exactly like an inbound one — it appears in the relevant views, counts toward reporting, and can be reassigned or reopened like any other case.
Frequently asked questions
Can I create a ticket for a customer who doesn't exist in the system yet?
Yes, typing a new name into the Requester field opens an Add new user modal where you enter their name, email, and user type to register them on the spot.
What status should I use for a manually created ticket?
It depends on your workflow, but New is common for a fresh unassigned issue, while Open or In Progress fits tickets you're already actively working.
Can I attach files to a manually created ticket?
Yes, the ticket composer supports file attachments through the paperclip icon in the reply toolbar, just like a standard reply.
Why does the ticket ask me to choose a Form?
Different ticket forms can expose different custom fields, so selecting the right one ensures the fields relevant to that type of issue actually show up on the ticket.
What's the difference between Topic and Type on a new ticket?
Topic is a more granular, often AI-suggested category describing what the ticket is about, while Type is a broader classification like Problem, Question, or Task used for routing and reporting.
Watch the full walkthrough
The same steps, demonstrated on screen from start to finish.