Easy Tech Tuts
How to Add a Signature in Zendesk Easily 2026
By Impran M N
A missing or inconsistent signature on ticket replies is a small thing that quietly undermines how professional your support team looks. Zendesk handles this at the account level: instead of asking every agent to type their name and title into every reply, an admin sets a signature template once in Admin Center, and it's applied across public comments automatically. This guide walks through getting from your everyday ticket view into that setting and configuring the template so every agent's replies carry consistent, correctly formatted sign-offs.
01Start from your everyday ticket workspace
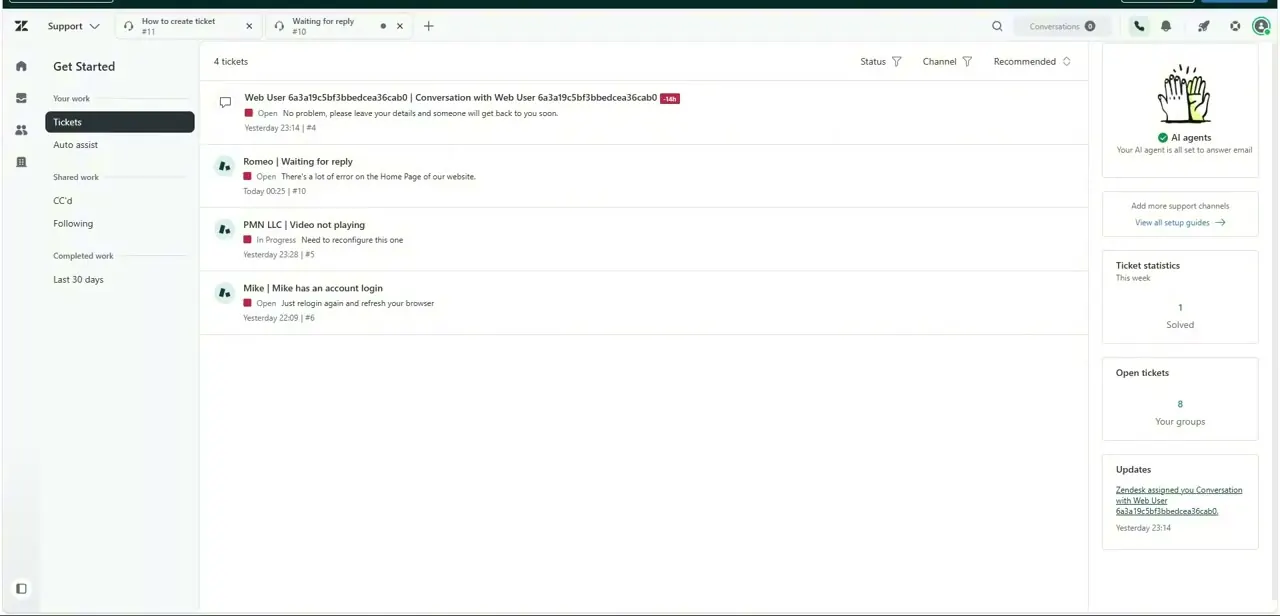
Signature setup lives outside the ticket view itself, but it's worth knowing where you're starting from: the standard Zendesk Support workspace, with your ticket list on the left showing status, requester, and last update, and a sidebar of AI agent status, ticket statistics, and open ticket counts on the right. Nothing here is signature-related directly, but this is the view your signature template will ultimately affect — every reply sent from a ticket like these picks up whatever template you configure.
02Open the Support menu and go to Admin Center
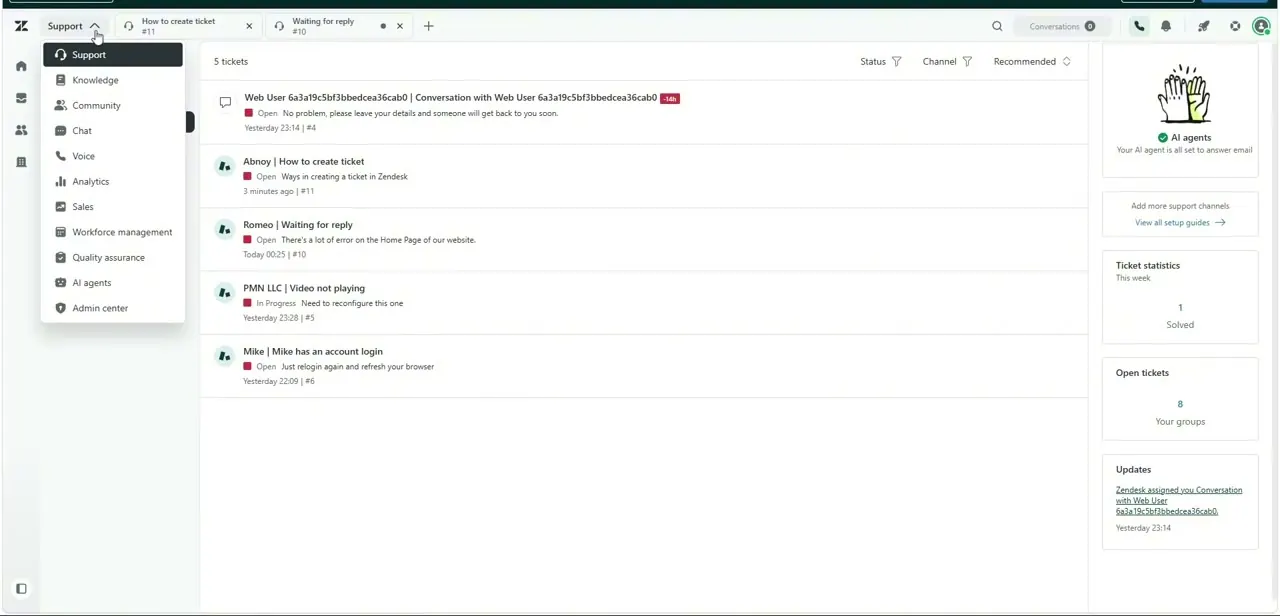
Click the Support dropdown in the top-left corner of the workspace. It expands into a full product switcher — Support, Knowledge, Community, Chat, Voice, Analytics, Sales, Workforce management, Quality assurance, AI agents — with Admin Center listed at the bottom. That's the entry point for any account-wide configuration, signatures included; agent-facing ticket views don't expose this setting directly.
03Navigate to Agent tools, then Agent interface
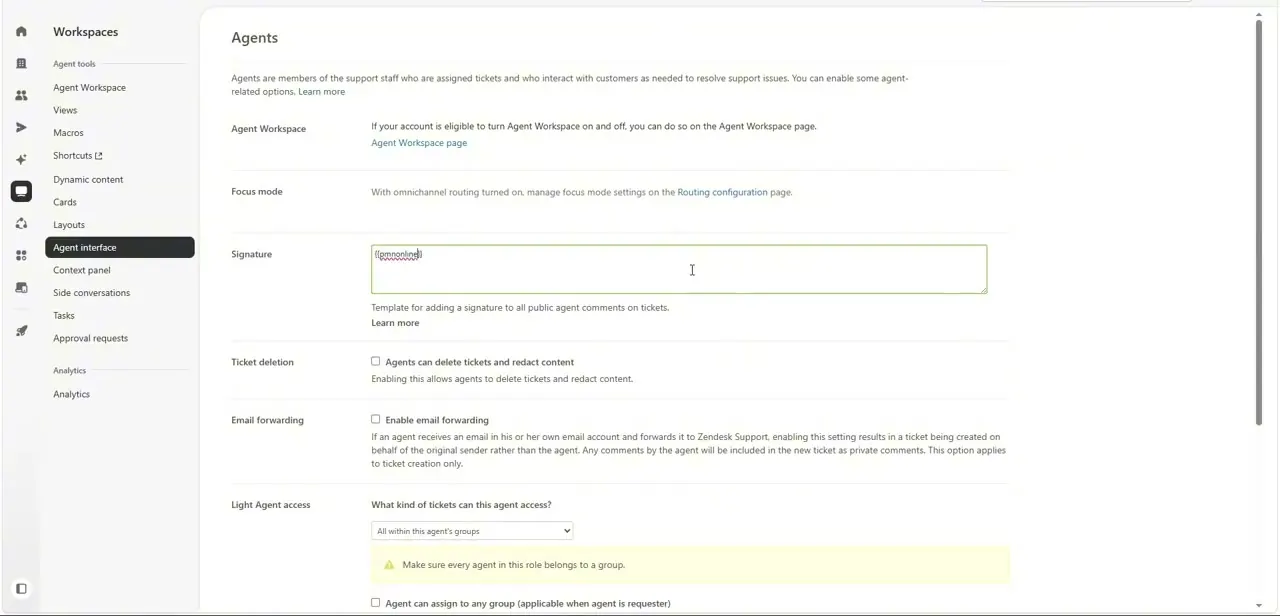
Inside Admin Center, the left sidebar groups settings under Agent tools: Agent Workspace, Views, Macros, Shortcuts, Dynamic content, Cards, Layouts, Agent interface, Context panel, and more. The signature template specifically lives under Agent interface, not Agent Workspace — the two names are close enough to cause a wrong turn if you're skimming, so look for "Agent interface" in that list before you start searching the page for a signature box.
04Find and edit the Signature field
On the Agent interface page, scroll to the Signature field — a text box labeled "Template for adding a signature to all public agent comments on tickets." By default it may contain a placeholder token like {{agent.signature}}, which pulls in each individual agent's own configured signature rather than hardcoding one name for the whole team. You can edit this template directly, add static company boilerplate around the token, or replace it with fixed text if you want every agent's replies to look identical regardless of who's answering.
05Decide between a shared template and per-agent personalization
If you keep the {{agent.signature}} placeholder in the template, each agent can still personalize their own name, title, or contact line from their individual profile, while the surrounding template — company name, support hours, a standard closing line — stays consistent across the whole team. If you'd rather every reply look identical with no personalization, replace the placeholder with static text instead. Either approach is a legitimate choice; it depends on whether your team benefits more from a personal touch or from strict brand consistency.
06Save and verify on a real ticket
Save your changes on the Agent interface page, then open or reply to a test ticket to confirm the signature appears exactly as intended — spacing, line breaks, and any placeholder text all render correctly before it goes out to real customers. It's easy to miss a stray line break or an unresolved placeholder token in the settings screen alone, so a live test reply is the only way to be sure the template looks right in an actual sent comment.
Frequently asked questions
Where do I set up a signature for all agents in Zendesk?
In Admin Center, under Agent tools > Agent interface, there's a Signature field that holds the template applied to public comments on tickets across your account.
What does the {{agent.signature}} placeholder do?
It pulls in each individual agent's own personal signature into the shared template, so you can keep company-wide formatting consistent while still letting each agent's name and details show through.
Can I make every agent's signature identical with no personalization?
Yes, replace the {{agent.signature}} placeholder with fixed text in the Agent interface Signature field, and every public reply will use that same static sign-off.
Do I need admin access to change the signature template?
Yes, the Signature field lives in Admin Center under Agent tools, which requires admin-level access — it isn't available from the regular agent ticket workspace.
How do I confirm my signature template looks right?
Save your changes, then open a real or test ticket and send a reply. Checking a live comment is the most reliable way to catch formatting issues that aren't obvious in the settings box.
Watch the full walkthrough
The same steps, demonstrated on screen from start to finish.