Easy Tech Tuts
How to Verify Your Shopify Account | Step by Step | Easily 2026
By Impran M N
Verifying your Shopify account is one of the first hurdles new store owners run into, and skipping it can quietly block access to features you'll need later, like accepting real payments or connecting outside tools. It isn't a single button labeled "Verify" so much as a handful of confirmations scattered across your admin and account settings, which is exactly why so many people think they're done when they're not.
This guide walks through where those confirmations live, what the dashboard looks like before and after you handle them, and which features actually depend on getting verification done. Along the way it also covers the small details, like which inbox Shopify actually emails, that quietly cause most of the "why isn't this working" confusion. It's written for anyone setting up a new Shopify store who wants to avoid discovering a blocked feature mid-launch.
01Log into your Shopify admin
Everything about verification starts from your store's admin, reached at your unique myshopify.com address or a connected custom domain. Once you're signed in, Shopify treats your login itself as the first layer of identity confirmation, tying every action back to the account and email you registered with.
If you manage more than one store, note which one you're working in before you start, since account-level settings like verification apply per account, not per store, and it's easy to end up checking the wrong store's status. Bookmark the correct admin URL once you find it, since jumping between stores through search results is a common way people lose track of which one they're actually configuring.
02Check your account status from the dashboard
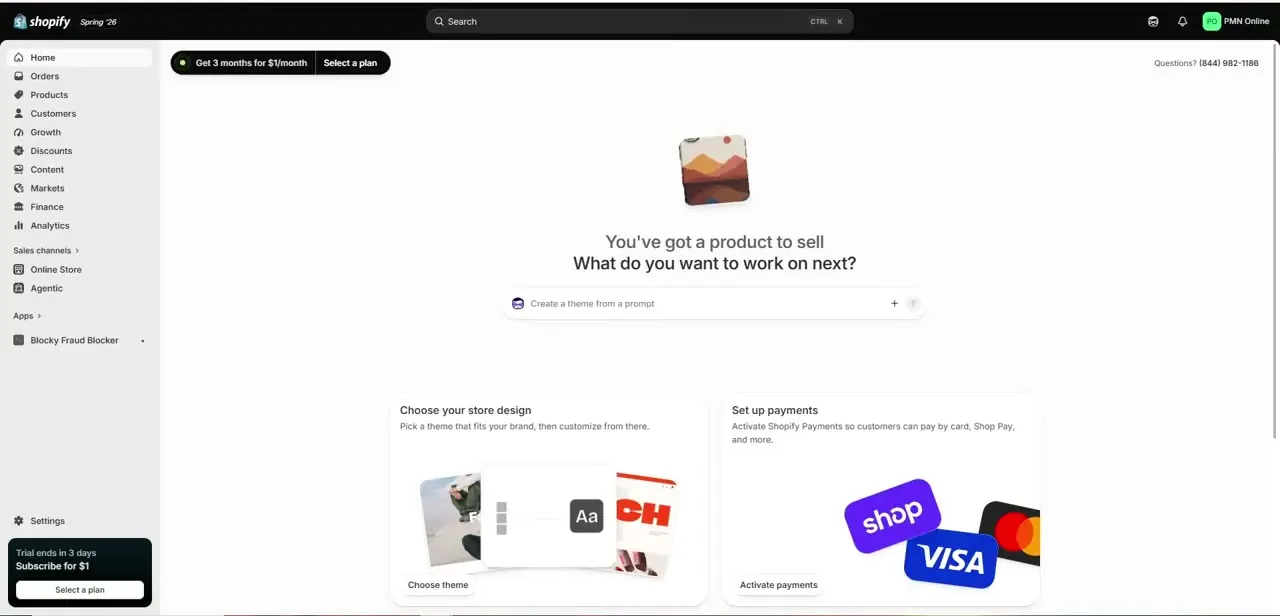
The home screen greets you with "You've got a product to sell" and two prompt cards side by side: one to choose a store design, the other to set up payments. That payments card is the clearest visual cue that verification-related setup is still outstanding, since Shopify won't let real transactions flow until Shopify Payments or another provider has been activated and your identity confirmed.
A banner in the lower-left corner also tracks your trial countdown, which is a separate clock from verification but worth noting so the two don't get confused — running out the trial clock without ever touching the payments card is a common way stores launch with no way to actually get paid. Treat that card as a to-do item rather than background decoration; it stays visible precisely because Shopify wants you to click it.
03Open the account switcher to confirm your details
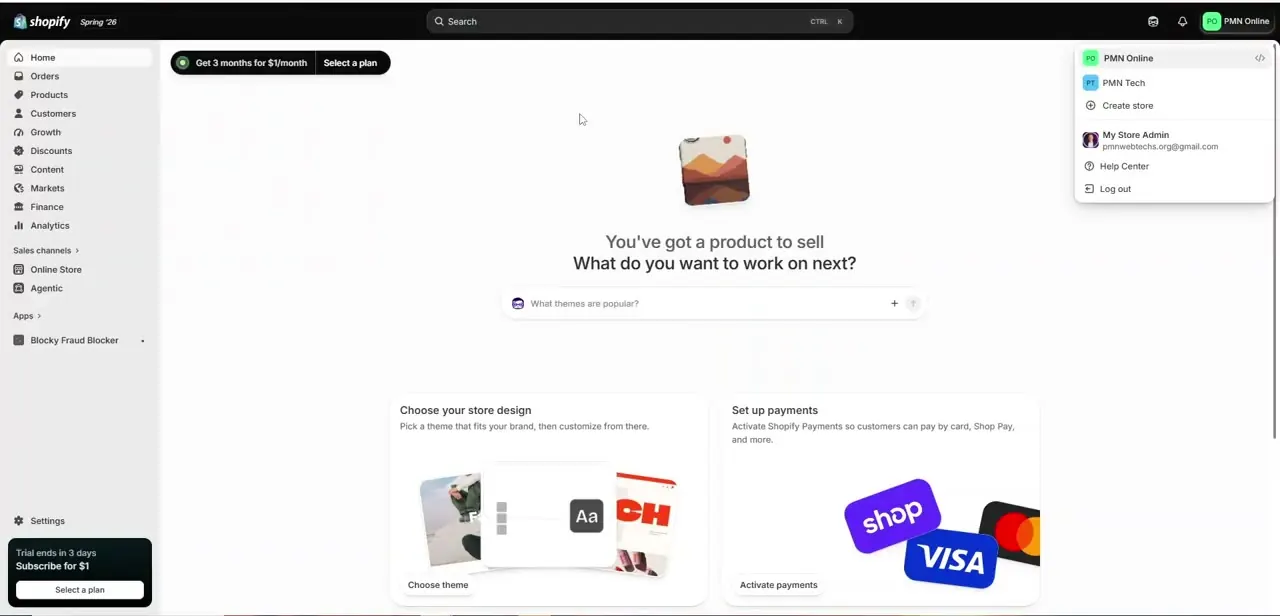
Click your store name or avatar in the top-right corner and a panel drops down listing every store tied to your login, plus a separate "My Store Admin" entry showing the email address your account is registered to. This is worth checking early, because Shopify sends verification-related confirmations to that exact address, and a typo or an old inbox here is one of the most common reasons people think verification is stuck when it's really just an email that never arrived.
The same panel is where you'd log out, switch between a personal and a business store, or jump to the Help Center if something looks wrong. If you run multiple stores under one login, this menu is also where mismatched verification status across stores becomes obvious — one store can be fully verified while a newer one still needs the same steps repeated.
04See what verification unlocks in the editor
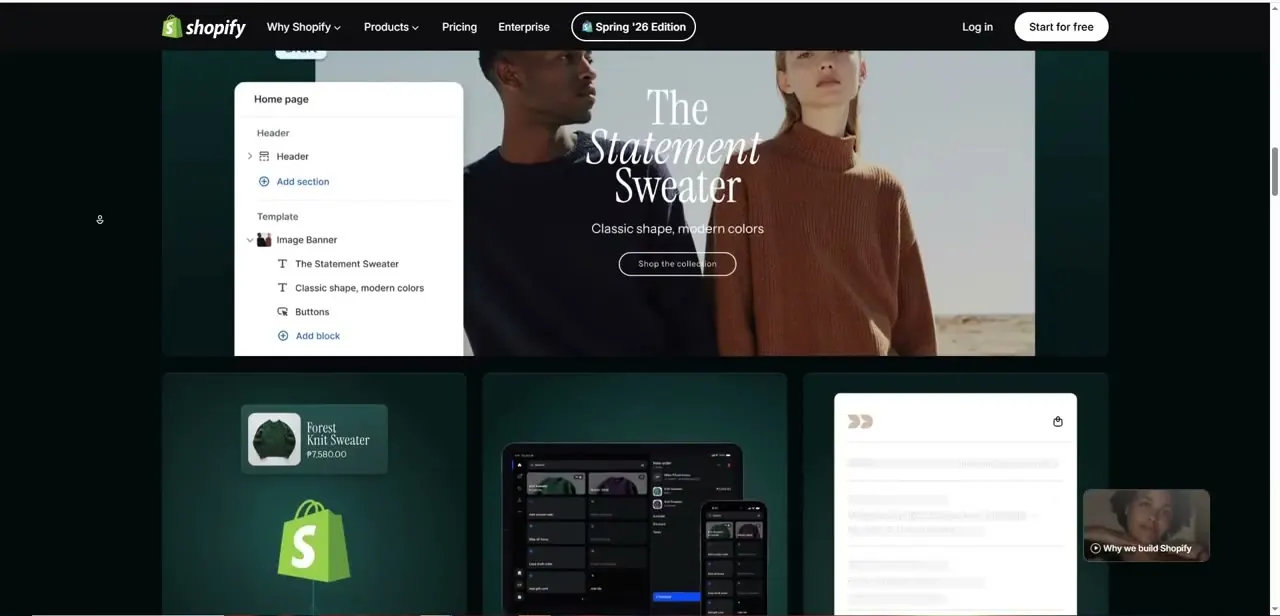
Once your details check out, head into your Online Store editor to see the practical payoff. Verified accounts get full access to the theme customizer, where you can edit sections like the homepage banner, adjust the header, and add blocks to any template without Shopify holding features back pending confirmation.
This is also where the difference between a browsing account and a working store becomes obvious: you can preview a live-looking storefront, build out product pages, and rearrange sections freely, but nothing customers see is actually sellable until the payments and business details behind it are confirmed. It's a useful gut check — if you can freely edit here but checkout still refuses real cards, that's a sign the payments side of verification, not the storefront side, is what's unfinished.
05Turn on payments to complete verification
Click through the "Set up payments" card from the dashboard and Shopify will ask for the business or personal details it needs to activate Shopify Payments: legal name, address, banking information, and sometimes a government ID depending on your country. This step is where most of the actual verification work happens, since it's Shopify's payment processor confirming you're a real, compliant seller before money can move through your store. Have your bank details and ID ready before you start so you're not hunting for paperwork mid-form, and double-check that the legal name and address you enter exactly matches your bank or government records — small mismatches are the most common reason this step gets kicked back for review instead of approved immediately.
06Watch for the confirmation email or in-app notice
After submitting your payment and business details, Shopify typically reviews them within a short window and either confirms instantly or emails you if it needs more information. Check the bell icon in the admin as well as the inbox tied to the email address you confirmed earlier, since some notices only appear in one place. If a request for additional documentation shows up, respond promptly — an incomplete verification can pause payouts even after your store is otherwise live and taking orders, which is a frustrating way to discover the process wasn't actually finished.
07Revisit your account settings periodically
Verification isn't always a one-time event. Adding a new payment method, changing your business address, or expanding into a new country can trigger Shopify to ask for reconfirmation. Get in the habit of glancing at your account settings and the dashboard prompts whenever you make a major change to your store, so you catch any new verification request before it holds up an order rather than after a customer is already asking where their payment went.
Frequently asked questions
Why does Shopify require account verification?
Verification helps confirm you're a legitimate business owner, which builds trust with customers and lets Shopify safely enable features like Shopify Payments and other financial integrations.
What happens if I skip verification?
You can still browse and customize your storefront, but you won't be able to accept real payments until the identity and business details behind Shopify Payments are confirmed.
Is verification required for every Shopify store?
Nearly every store hits a verification step at some point, particularly when activating a payment processor, since that's where Shopify confirms who's actually behind the business.
How long does Shopify account verification take?
It's often near-instant if your submitted details match, but it can take longer if Shopify requests additional documentation — keep an eye on both your email and the admin notification bell.
Where do I check if my account is verified?
The dashboard's "Set up payments" prompt disappearing is the clearest sign; you can also check Settings > Payments in your admin for the current status.
Watch the full walkthrough
The same steps, demonstrated on screen from start to finish.