 Easy Tech Tuts
How to Create a New Outlook Account Easily 2026
By Impran M N
Setting up a free professional email account shouldn't require wrestling with a confusing sign-up flow, and Microsoft's outlook.com registration is actually one of the more straightforward ones once you know which screens to expect. This guide walks through starting from the Outlook landing page, choosing a username under the @outlook.com domain, and getting through password and verification steps without getting stuck. It's aimed at anyone setting up a fresh personal inbox from scratch, not migrating an existing Microsoft 365 account.
01Start from the Outlook landing page
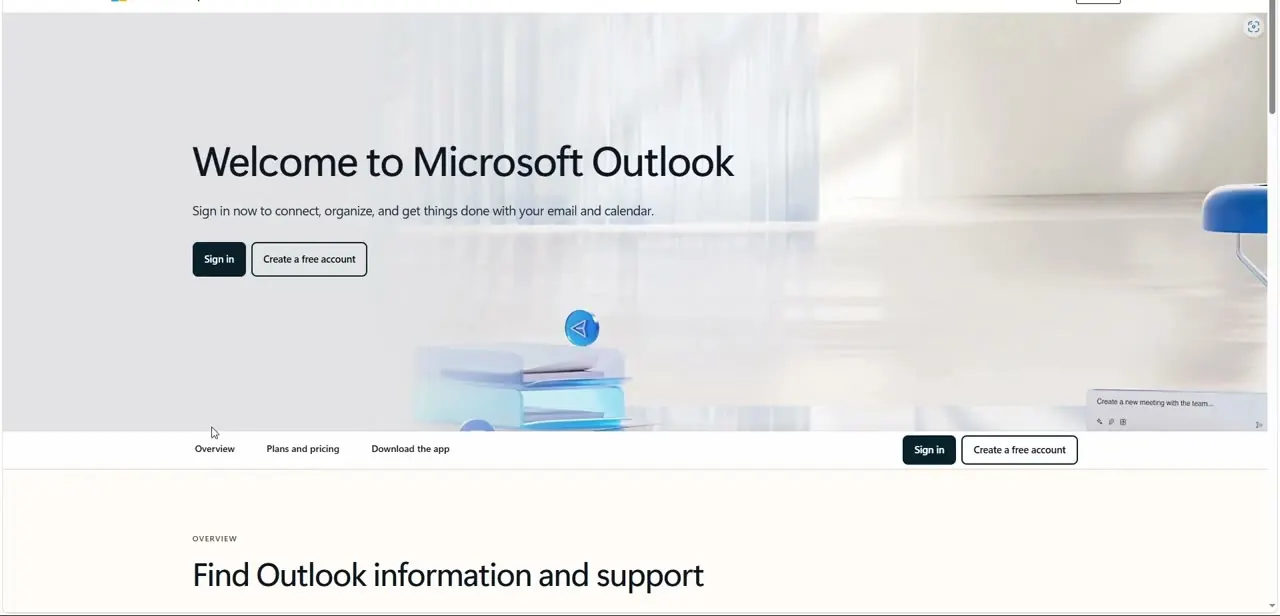
Navigating to outlook.com in your browser lands you on a welcome screen with two clear options: Sign in for an existing account, or Create a free account for a new one. The page repeats the Create a free account button in both the hero section and the footer navigation, so it's hard to miss regardless of how far you've scrolled. This is also where you'd end up if a coworker or friend sent you a plain outlook.com link, so it's worth recognizing as the correct starting point rather than searching for a separate sign-up page.
02Use the sign-in screen's account link if you land there instead
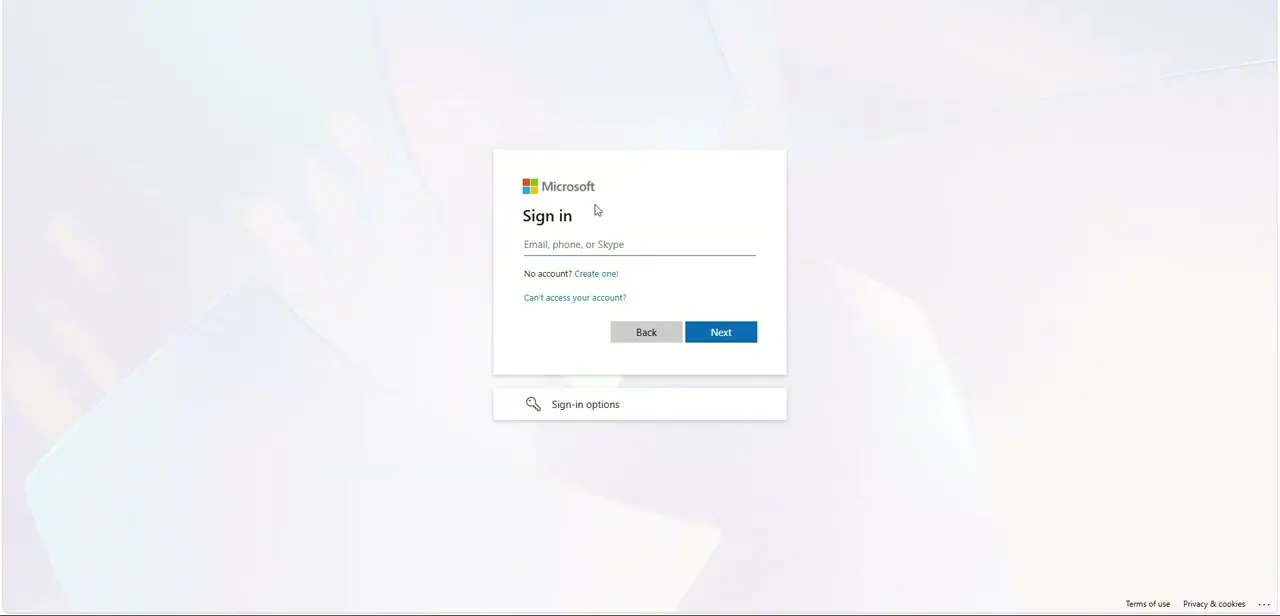
Depending on how you arrive, you might first hit a plain Microsoft Sign in box asking for an email, phone, or Skype name rather than the marketing landing page. That's not a dead end — right below the input field is a "No account?
Create one!" link that routes to the same registration flow. It's worth knowing this shortcut exists, since plenty of app and product links point straight to the sign-in screen rather than the outlook.com homepage.
03Choose your username and domain
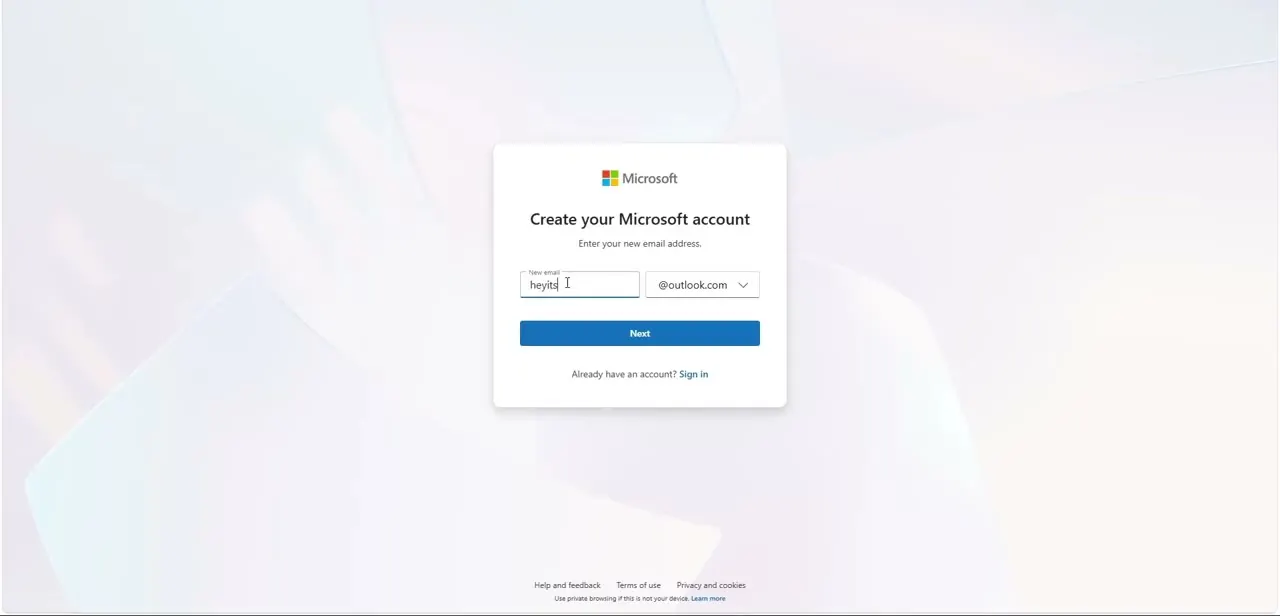
Whichever path gets you there, registration starts with a "Create your Microsoft account" screen asking for your new email address. Type your desired handle into the text field on the left, and use the dropdown on the right to confirm the suffix — @outlook.com is the default, though Microsoft sometimes offers alternates like @hotmail.com in the same menu. If the handle you want is already taken, you'll find out after clicking Next rather than while typing, so have a couple of backup variations ready.
04Create a secure password
The next screen asks for a password to pair with your new address. Mix uppercase and lowercase letters, numbers, and at least one special character to satisfy Microsoft's strength requirements, and avoid reusing a password from another account you already use for anything sensitive. A visibility toggle on the password field lets you double-check what you typed before continuing, which matters here since a typo means locking yourself out before the account even exists.
05Provide your profile details
After the password, Microsoft asks for your first name, last name, region or country, and date of birth. This isn't optional filler — your date of birth determines certain account protections and content settings, and your region affects things like default language and applicable privacy rules. Enter these accurately rather than placeholder values, since correcting them later can be more involved than getting them right the first time.
06Complete verification and set up backup security
Before the account activates, you'll typically need to solve an anti-bot puzzle prompt confirming a human is completing the signup, not an automated script. Once past that, Microsoft offers to add a modern Passkey using your device's fingerprint or PIN scanner, or you can provide a backup phone number or alternate email for account recovery instead.
Either option is worth setting up in the same session — skipping both means you have no fallback if you're ever locked out later. After this step, Microsoft's background process finishes building your mailbox and storage, and your new inbox loads automatically.
Frequently asked questions
Is creating an Outlook account free?
Yes, signing up gives you a free Outlook Web App inbox along with 5 GB of OneDrive storage and Microsoft 365 free web apps.
What if my desired username is already taken?
You'll find out after clicking Next on the email address screen and will need to try a variation of your desired handle, since usernames must be unique across the @outlook.com domain.
Do I need to add a backup phone number?
It's optional but strongly recommended for account recovery if you ever get locked out, and it's offered right alongside the passkey option during setup.
What can I do with my new account besides email?
Your account integrates with OneDrive storage and Microsoft 365 free web apps for documents and spreadsheets, all tied to the same sign-in.
Can I skip straight to account creation without visiting the sign-in screen first?
Yes, the outlook.com landing page has a direct Create a free account button, so you don't need to go through the sign-in screen's "Create one!" link unless that's where a link happened to take you.
Watch the full walkthrough
The same steps, demonstrated on screen from start to finish.


