Easy Tech Tuts
Monday.com Tutorial For Beginners, How to Use Monday.com Sidekick AI for Task, Project Management
By Impran M N
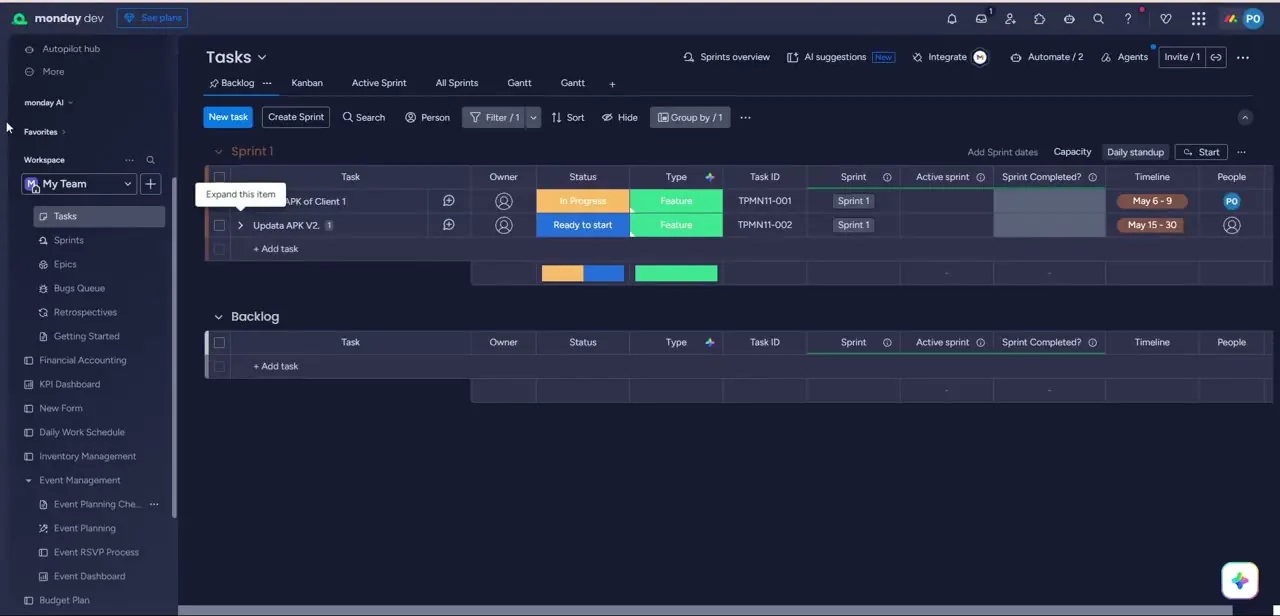
Monday.com organizes work as boards — colorful, spreadsheet-like tables where every row is a task and every column is a piece of information about it, like who owns it or when it's due. For a beginner the learning curve is really just learning to read one board well, since templates, task detail panels, and status columns all work the same way across every board you'll ever create. This guide covers setting up and navigating a board, updating task status, and where Monday.com's built-in AI tools — surfaced in the toolbar as AI suggestions, monday AI, and Agents — sit alongside the manual workflow.
01Read a board's structure
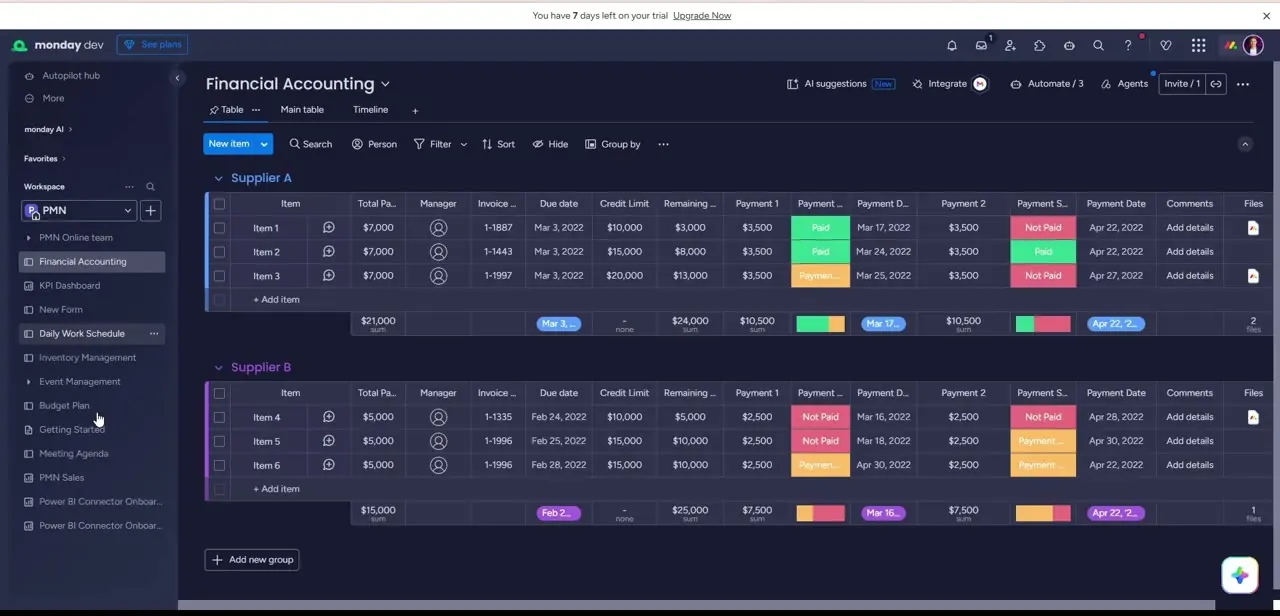
A Monday.com board is a table split into named groups — colored bands like "Supplier A" or "Supplier B" — with each row inside a group being one item, and each column holding a specific data type: text, a person, a date, a status label, or a number. The toolbar above the table carries the tools that act on the whole board: New item to add a row, Filter and Sort to narrow what's shown, Group by to reorganize, and on the right, AI suggestions, Integrate, Automate, and Agents for the more advanced features. Every group and column total rolls up automatically at the bottom of the table — sums, counts, and date ranges — so you get a running summary without building a separate report.
02Start a new board from a template
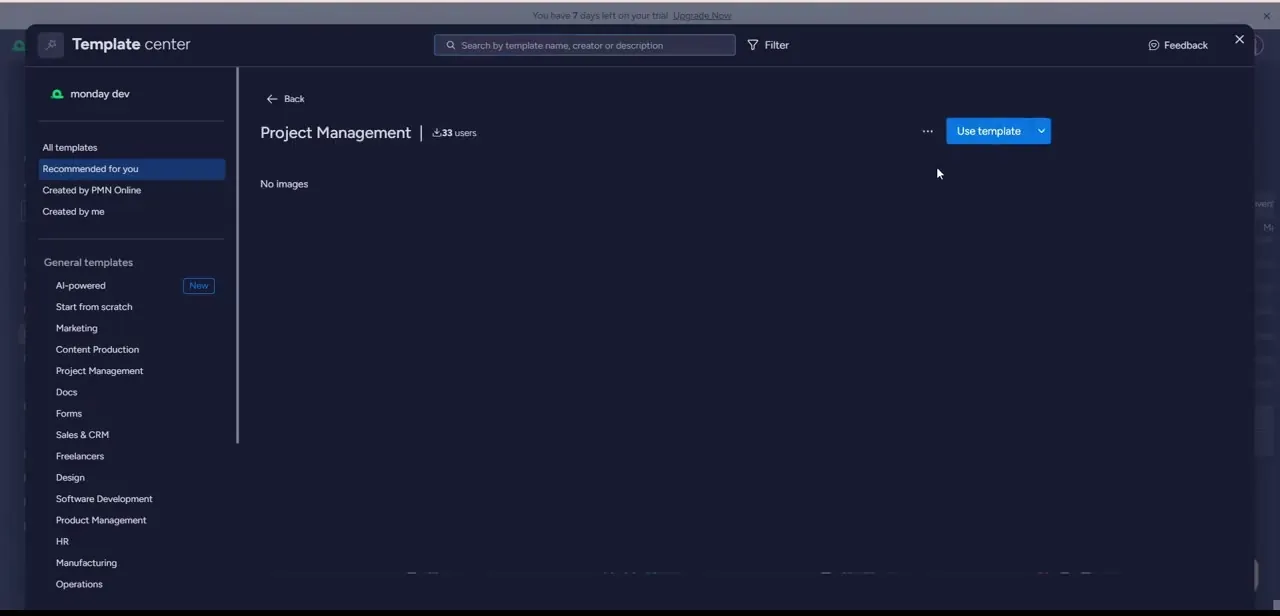
Rather than building a board from a blank grid, the Template center (reachable from the + next to your workspace) lets you browse by category — Marketing, Sales & CRM, Software Development, HR, and more — and preview a template before committing. Selecting one, like Project Management, shows how many users have adopted it and offers Use template to drop a ready-made structure of groups, columns, and sample items straight into your workspace, which you then rename and refill with your own data instead of starting from zero.
03Update status directly in the table
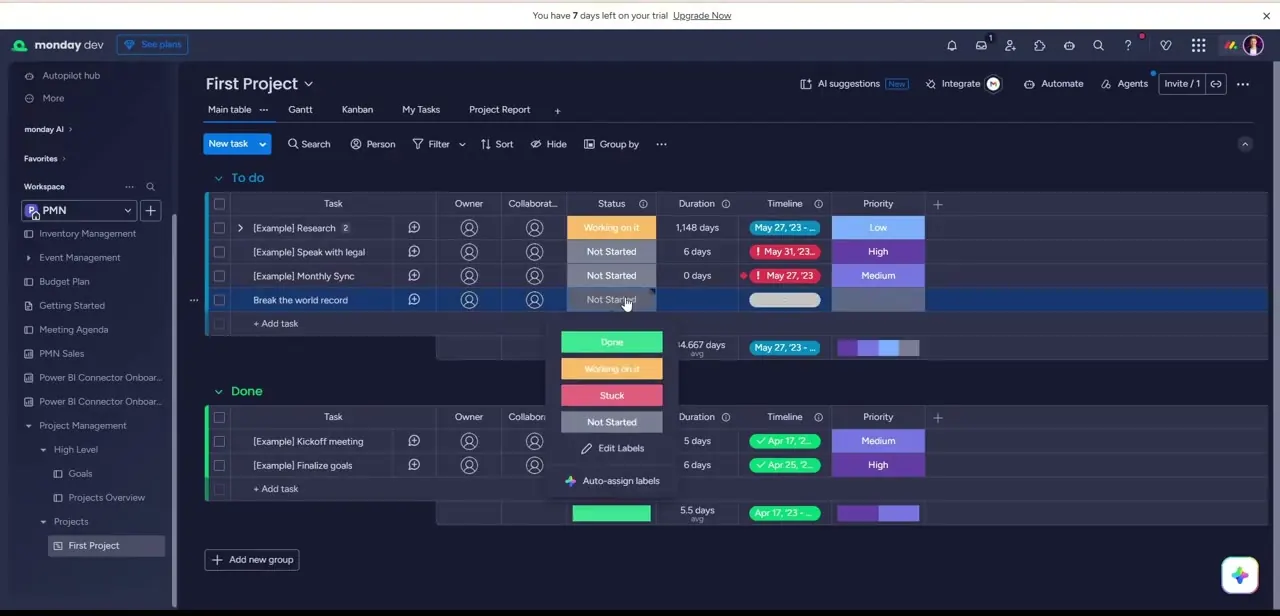
The Status column is the fastest way to see where work stands, and it's editable inline — click a cell and a dropdown of colored labels appears: Done, Working on it, Stuck, Not Started, plus an Edit Labels option if the defaults don't match your workflow. Changing a task's status here updates every view and rollup that depends on it immediately, which is what makes Monday.com's dashboards and progress bars stay accurate without any manual recalculation. Auto-assign labels is also available from the same dropdown for cycling defaults automatically as items move through stages.
04Open a task for detail and updates
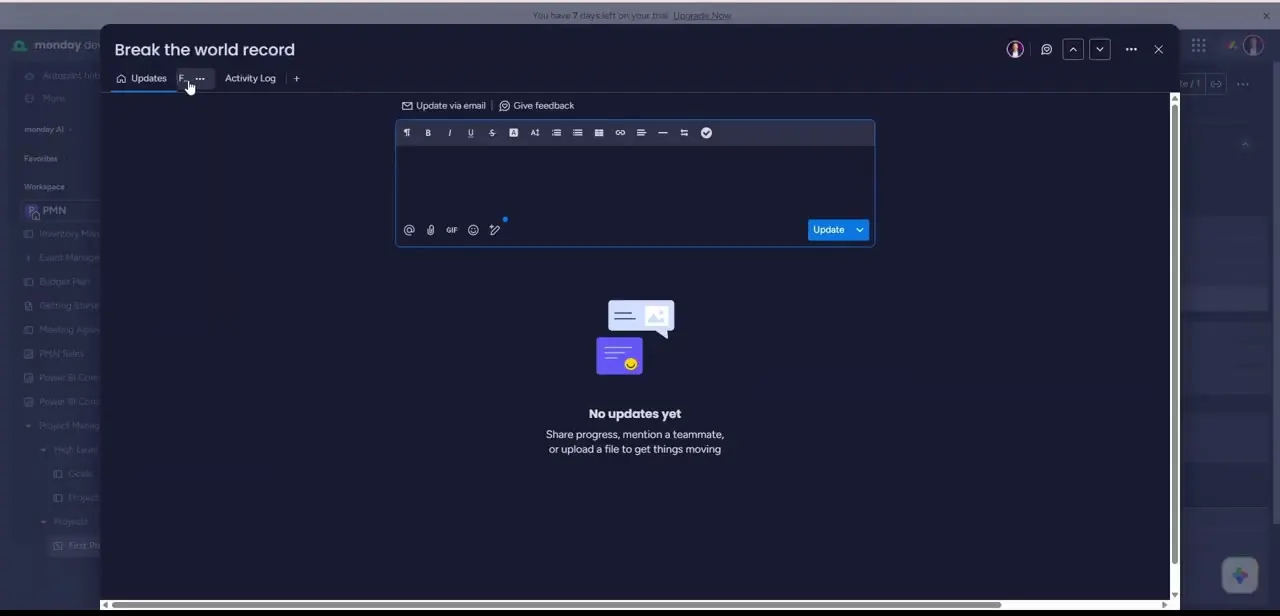
Clicking a task's name (rather than one of its column cells) opens its full item card, with tabs for Updates, Files, and Activity Log. Updates is a running comment thread scoped to that one task — post progress notes, @mention a teammate, attach a file or GIF, and everyone with access sees the same thread instead of it getting buried in chat. It starts empty on a new task ("No updates yet"), and this is generally where the real day-to-day conversation about a piece of work happens, separate from the structured columns on the board.
05Know where the AI tools live
Monday.com surfaces AI in a few places rather than one single panel: monday AI in the left sidebar under Favorites, an AI suggestions button in the board toolbar (flagged "New"), and an Agents entry alongside Automate. These are built to help with the repetitive parts of board management — drafting content for an item, suggesting automations, or summarizing updates — and they sit next to, not instead of, the manual tools covered above. As a beginner, it's worth treating the AI features as an accelerator you turn to once you already understand how a board's groups, columns, and statuses work, rather than a replacement for learning the basics first.
06Move between multiple boards without losing context
A real workspace, like the sample PMN workspace shown throughout this walkthrough, holds many boards at once — Financial Accounting, Daily Work Schedule, KPI Dashboard, Inventory Management, Budget Plan — all listed in the left sidebar and switchable with a single click. Related boards can also be nested under a parent folder (as seen with Project Management containing High Level and Projects sub-items), which is worth setting up early if you expect the workspace to grow past a handful of boards, since flat lists get hard to navigate quickly.
Frequently asked questions
Are Monday.com's AI features available on every plan?
AI capabilities like AI suggestions and Agents are generally rolled out more broadly on paid tiers; a free trial (as shown here, with a 7-day countdown) typically gives access to try them before deciding on a plan.
Do I need technical skills to use Monday.com as a beginner?
No. Monday.com is a visual, drag-and-drop tool — building a board, adding items, and changing statuses all happen by clicking cells in a table, with no code required.
What's the difference between a board's columns and its Updates tab?
Columns hold structured data (status, owner, due date) that rolls up into totals and views. The Updates tab, opened from an individual task, is an unstructured comment thread for discussing that specific item.
Can I start from a template instead of building a board from scratch?
Yes. The Template center offers ready-made boards by category — Project Management, Marketing, Sales & CRM, and more — that you can preview and drop into your workspace with Use template.
How is Monday.com different from a basic to-do list app?
Monday.com supports multiple boards, color-coded statuses, automatic rollups, task-level comment threads, and built-in AI and automation tools, going well beyond a flat list of to-dos.
Watch the full walkthrough
The same steps, demonstrated on screen from start to finish.