Easy Tech Tuts
How to Share Documents in a Microsoft Teams Meeting Easily 2026
By Impran M N
Getting everyone on the same page during a live call works best when you can share and even co-edit a document without pausing to send a clunky email. This guide covers opening the chat panel attached to a meeting, attaching a file, checking who's allowed to view or edit it before you hit send, and what the file looks like once it's landed in the conversation. It's built for anyone running client calls or team reviews inside Teams who's tired of switching windows to send an attachment.
01Open the chat tied to your meeting
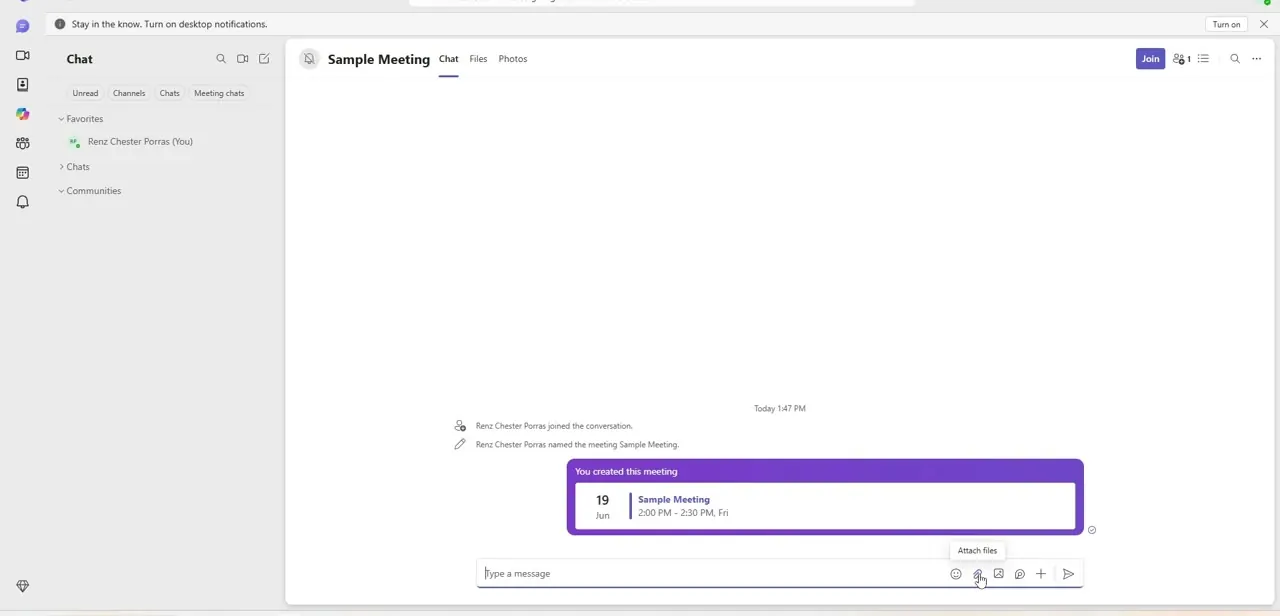
Every Teams meeting has its own chat thread, reachable from the Chat tab next to Files and Photos at the top of the meeting window. This is where file sharing actually happens — not through a separate transfer tool, but through the same message box you'd use to type a note to attendees. Anything you attach here becomes part of the permanent meeting record, visible to anyone in the conversation whether they joined the call or not.
02Find the attach files control
Along the bottom of the message box sits a small row of icons — emoji, attach, GIF, sticker, and more — and hovering over the paperclip-style icon pops up an "Attach files" tooltip confirming you've got the right one. Clicking it opens your options for where the file comes from, whether that's a document already sitting in OneDrive or something local on your machine you haven't uploaded anywhere yet.
03Check the permission line before sending
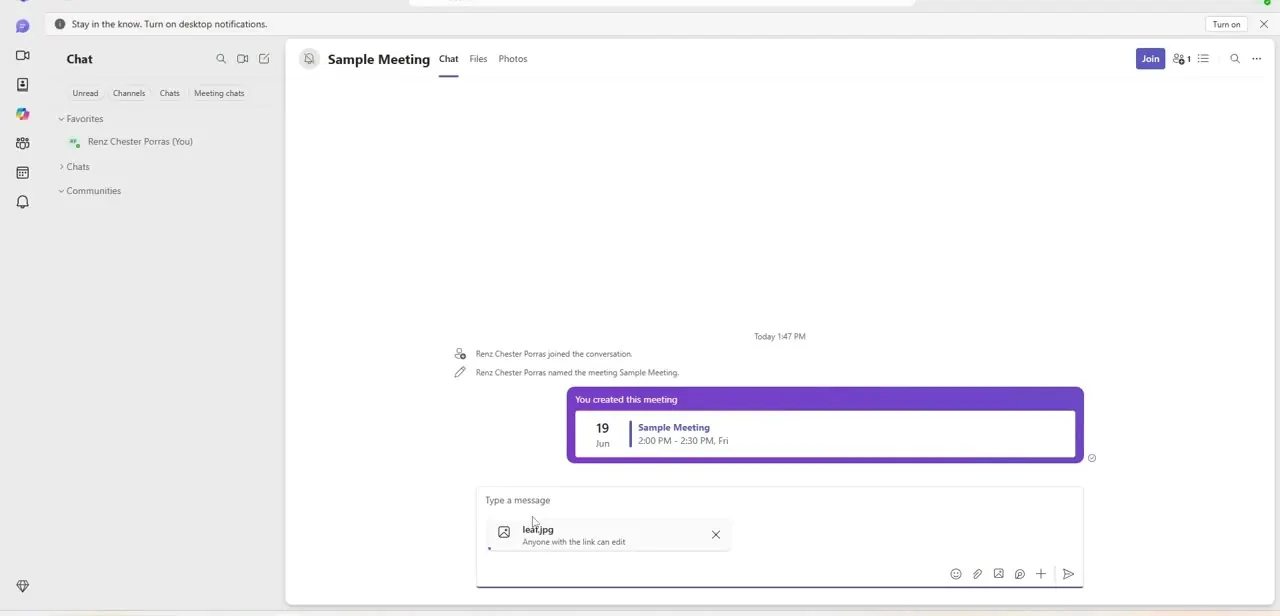
Once a file is picked, it shows up as a preview card sitting above the message box before you send anything — complete with a filename, a thumbnail, and a small line of text underneath stating exactly who can do what with it, such as "Anyone with the link can edit." This is the moment to actually look at that line rather than skim past it, because it's telling you the real access level the file will have the second it lands in chat, not a placeholder you configure later.
04Tighten permissions for sensitive files
If the default permission is broader than you want — say the file should only be viewed, not edited, or only certain people should have access at all — this is the point to change it, before the message goes out. Click into the permission line on the preview card to switch between view, comment, and edit access, or restrict it to specific people if you're sharing with external guests who shouldn't have a wide-open link.
05Send it and watch it land in the thread
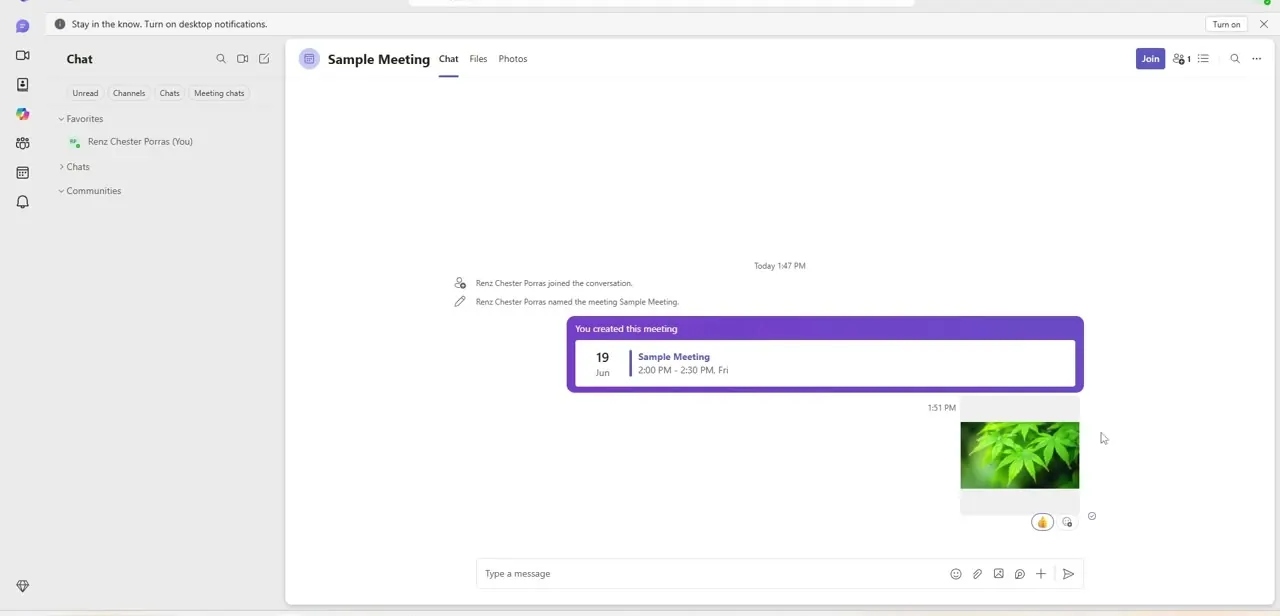
Hit send and the file appears in the chat as a compact card with a thumbnail and timestamp, sitting in the message flow just like any other message would. Anyone in the meeting or chat can click straight into it from there — no separate download step, no hunting through email for an attachment that got buried.
06Open the file for real-time co-authoring
For Word, Excel, or PowerPoint files specifically, clicking the shared file opens it inside Teams itself rather than kicking you out to a separate app, and multiple attendees can type into it at the same time with each person's cursor visible. That's the real advantage over emailing a copy around — there's one live document everyone's looking at and editing together instead of five versions that need merging afterward.
07Find it again after the call ends
Once the meeting's over, you don't have to scroll back through the chat to relocate a file — the meeting window keeps a Files tab that lists everything that was shared during that call, in one place. That persistent record is what makes it worth attaching files through the meeting chat in the first place rather than a side channel that's harder to search later.
Frequently asked questions
Can multiple people edit a shared document at the same time in a Teams meeting?
Yes — once you open a Word, Excel, or PowerPoint file inside Teams rather than downloading it, it supports real-time co-authoring with multiple attendees typing at once.
How do I let an external guest access a file I share?
Check the permission line on the file's preview card before sending — switch it to Specific people to authorize named guests instead of leaving it open to anyone with the link.
Where do shared files go after the meeting ends?
The meeting window keeps a Files tab that lists every document shared during that call, so you don't need to scroll back through chat history to find one.
Can I share a file from OneDrive without downloading it first?
Yes — the attach files option lets you pick a file already stored in OneDrive directly, without needing a local copy on your device.
What does the permission text under a file preview actually mean?
It states the real access level the file will have the instant you send it, such as anyone with the link being able to edit it — worth checking before sending, not after.
Watch the full walkthrough
The same steps, demonstrated on screen from start to finish.