Easy Tech Tuts
How to Set Up Automated Messages in Microsoft Teams With Power Automate Easily 2026
By Impran M N
Typing the same status update into a Teams channel every morning is the kind of task that seems small until you add up the interruptions across a week. Power Automate can take it off your plate entirely, posting a message into a Teams channel or chat on a schedule you set once and never touch again.
The flow itself is short — a trigger, one Teams action, and a message body — but a few choices along the way, like who the message appears to come from and where exactly it lands, are easy to get wrong on a first attempt. This guide walks through building and testing the flow so the first automated message that goes out is the right one.
01Start from a template or build your own trigger
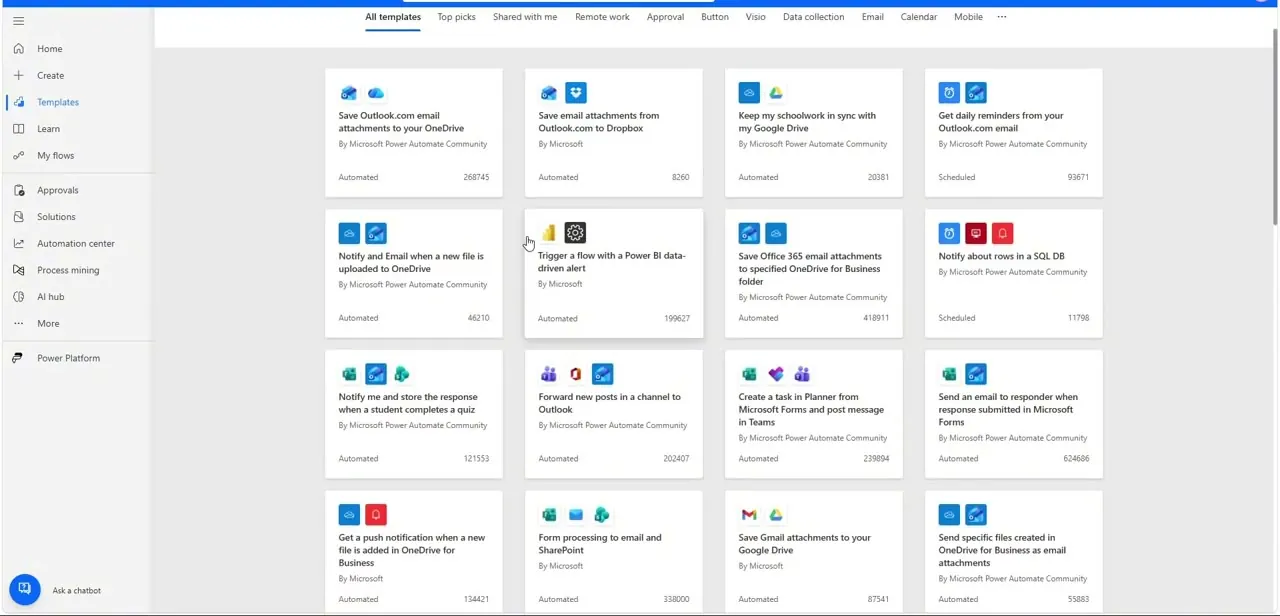
Power Automate's template gallery is worth a scan before building from scratch — templates like "Automate weekly reminders and updates in a chat" and "Forward new posts in a channel to Outlook" show the Teams connector already wired up, which is useful as a reference even if you end up customizing everything. For a fully custom flow, choose Automated cloud flow and set a Recurrence trigger for how often the message should send, whether that's every weekday morning or once a week. If you'd rather fire the message from a button press instead of a clock, a manually triggered flow works the same way and is the faster option for testing before you commit to a real schedule.
02Search the trigger list for your starting point
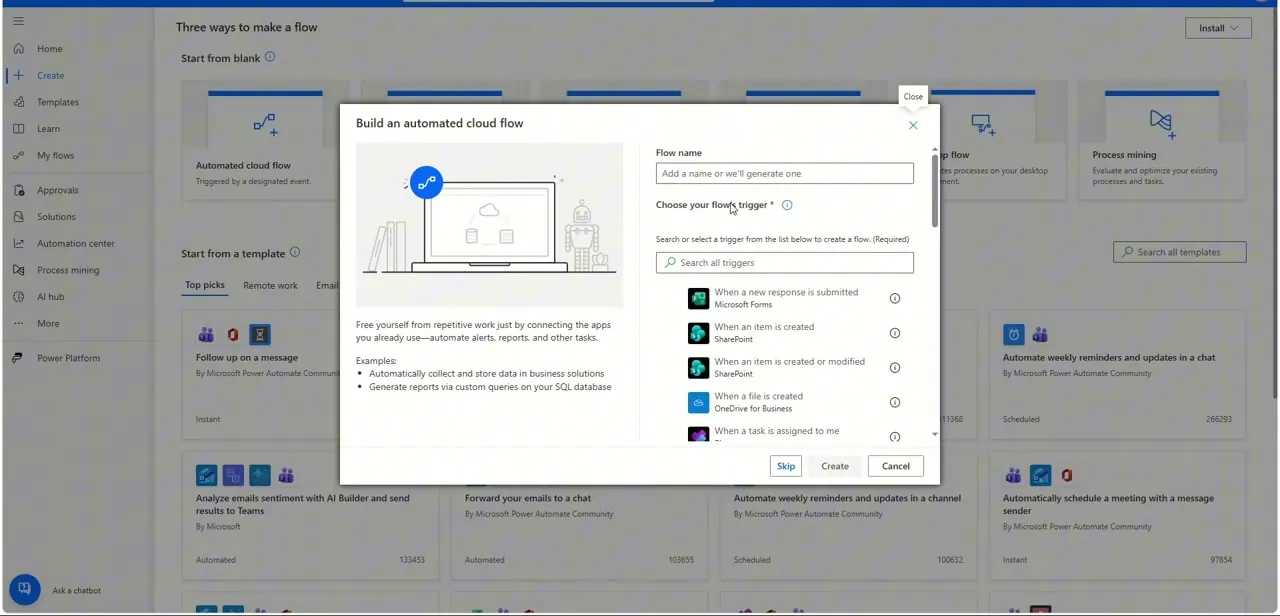
When building an automated cloud flow, the trigger picker lists both event-based and Forms-based starters — "When a new response is submitted," "When an item is created," and similar — searchable from the same dialog. For a message that should run on its own schedule rather than in response to another app, search specifically for Recurrence and set the interval and start time there. Naming the flow clearly at this stage, before you add a single action, saves confusion later when it sits next to a dozen other flows in My flows.
03Add Post message in a chat or channel
Underneath your trigger, search for and add the Microsoft Teams action "Post message in a chat or channel." This single action does the actual work of the flow, and its parameters are where every meaningful decision gets made: who the message appears to come from, where it lands, and what it says. Everything else in the flow exists to feed information into this one step.
04Set the posting identity, team, and channel
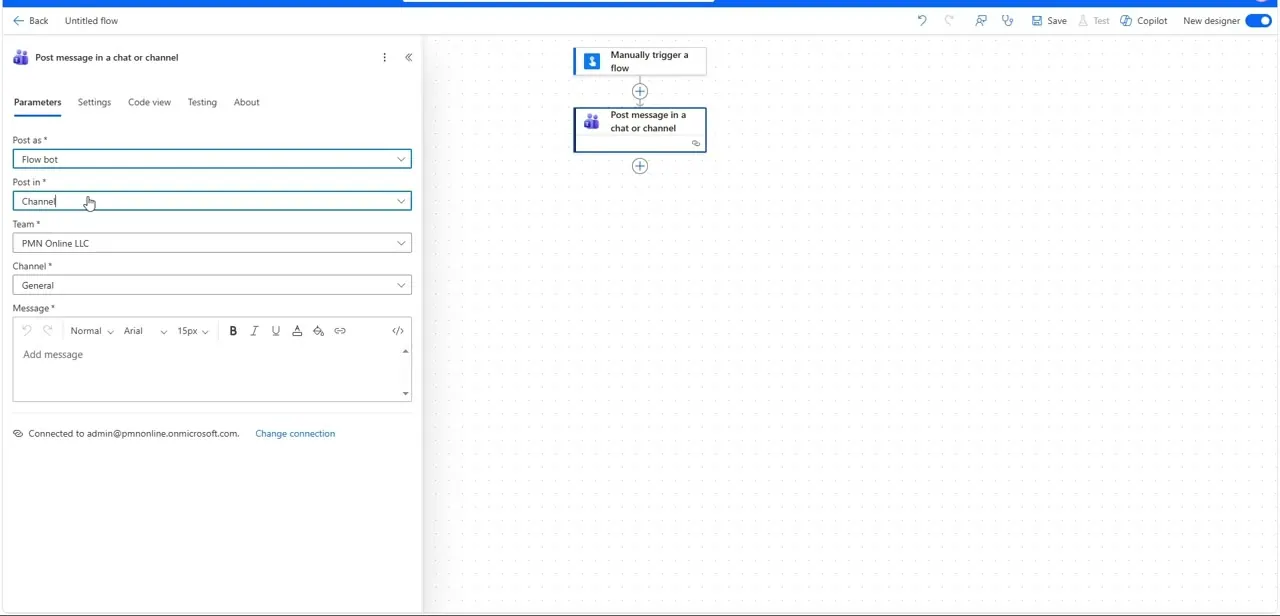
The action's Parameters panel starts with "Post as," where you choose between Flow bot — a neutral automated sender clearly separate from a real person — or your own user account, which makes the message look like it came from you directly. Below that, "Post in" lets you pick Channel or Chat, and choosing Channel reveals Team and Channel dropdowns, letting you target something as specific as a single team's General channel. Getting this combination right matters for tone: a Flow bot post reads as a system notification, while posting as yourself reads as a personal update, and picking the wrong one for a sensitive announcement can land oddly with the team.
05Write the message and add dynamic content
The Message field includes a real formatting toolbar — bold, italic, underline, and a link tool — so status updates can carry actual structure instead of a wall of plain text. Beyond static text, insert dynamic content tokens from earlier steps to pull in things like the current date, a count, or a value from a connected data source, so the same flow produces a fresh, accurate message every time it runs rather than a static line that goes stale. Keep the message short and scannable; a Teams post that reads like an email attachment gets skimmed past, not read.
06Save, run a manual test, and confirm delivery
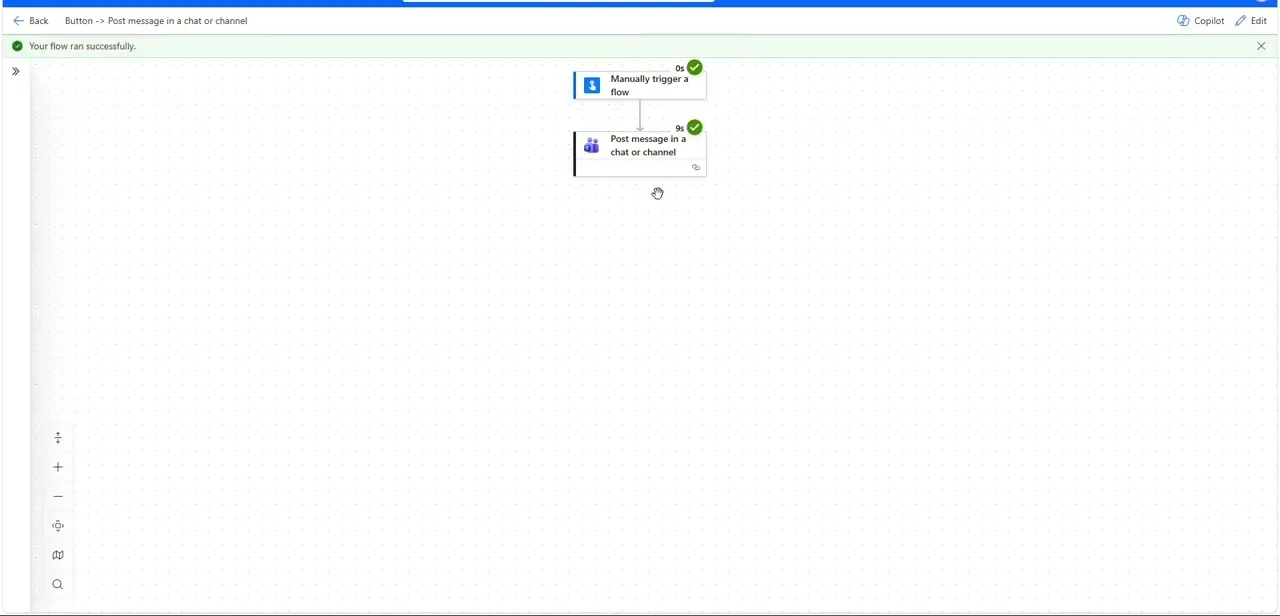
Save the flow and trigger it manually the first time, even if the real trigger will eventually be a recurrence schedule — this lets you confirm the message posts correctly without waiting for the clock. Power Automate's run view shows each step with a green checkmark and its execution time, so you can see at a glance that the trigger fired and the Post message action completed in a matter of seconds. Open Teams and check the actual channel to confirm the message landed where intended and reads the way you wrote it before you let the schedule take over.
Frequently asked questions
Can the message post as me instead of a bot?
Yes, Power Automate lets you choose between posting as the Flow bot or under your own user identity when configuring the Post message action.
Can I send the same automated message to multiple channels?
You can add multiple Post message actions in the same flow, each targeting a different channel or chat.
Do I need admin permission to post automated Teams messages?
You generally just need permission to post in the target channel or chat yourself, though some organizations restrict bot posting through admin policies.
Why didn't my scheduled message send?
Check that the recurrence trigger is set correctly and that the flow is turned on, since a paused or misconfigured trigger is the most common cause of missed sends.
What's the difference between posting to a channel and posting to a chat?
A channel post is visible to every member of that team and shows up in the channel's shared feed, while a chat post goes into a specific group chat or one-on-one conversation — pick channel for broad visibility and chat for a targeted audience.
Watch the full walkthrough
The same steps, demonstrated on screen from start to finish.