Easy Tech Tuts
Jotforms Beginner Tutorials, How to use Jotforms in AI Era
By Impran M N
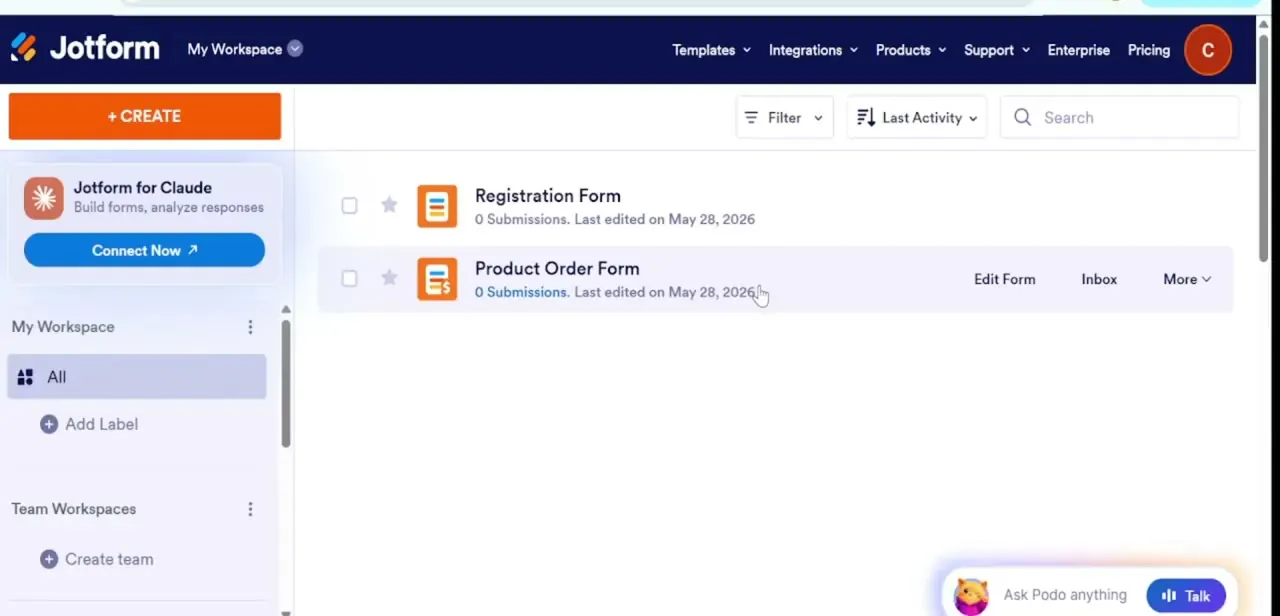
Jotform has grown well beyond simple contact forms — it now opens with an AI assistant that can draft a working form from a plain-English description before you touch a single field. For a beginner, that changes the fastest path from zero to a published form: instead of dragging in every field by hand, you describe what you need, let the AI generator lay out a starting point, then edit from there. This guide walks through that flow end to end, from an empty dashboard to a form with real address and contact fields in it.
01Start from an empty workspace
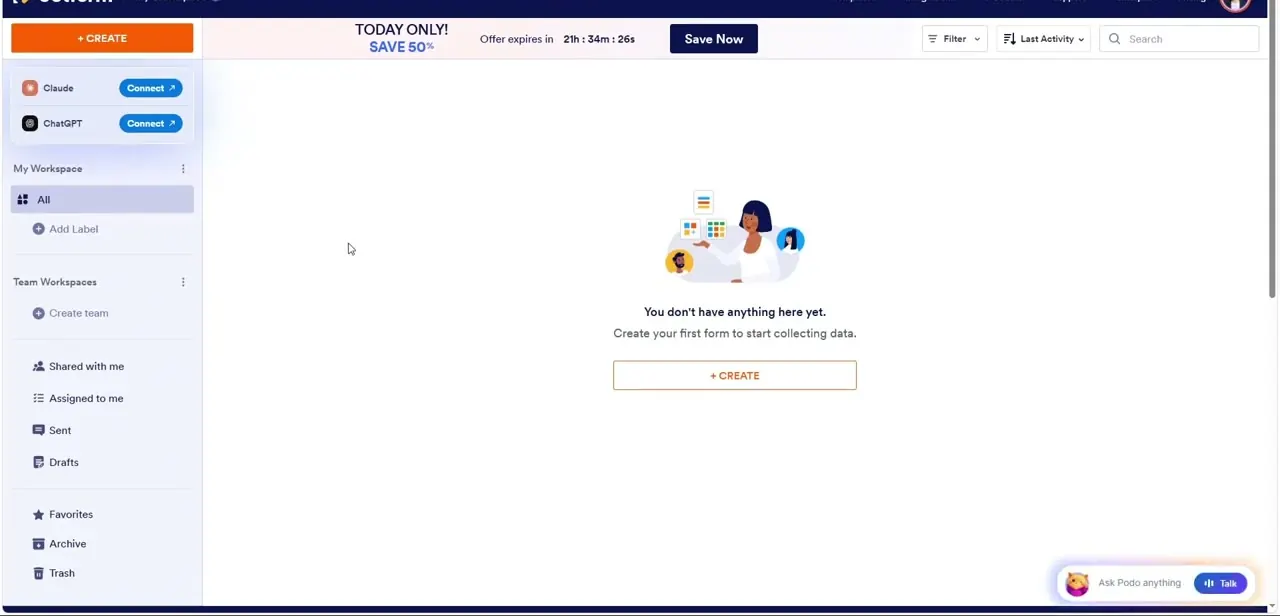
A new Jotform account opens on My Workspace, and until you build something it shows a plain empty state: an illustration, the line "You don't have anything here yet," and a Create button. The left sidebar is where the rest of the account lives — Shared with me, Assigned to me, Sent, Drafts, Favorites, and Archive — but none of that matters until there's at least one form, so the fastest move for a beginner is the orange + Create button in the top-left corner.
02Describe your form to the AI generator
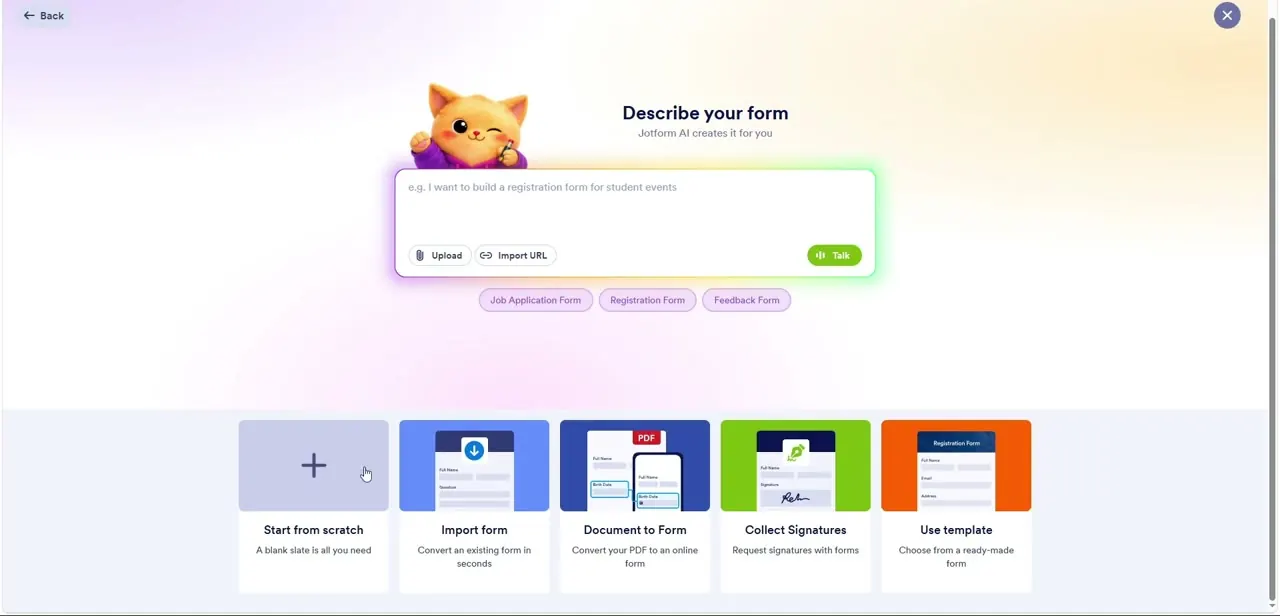
Clicking Create opens "Describe your form," where Jotform's AI assistant asks what you're building in plain language — the placeholder example is something like a student event registration form. You can type a description, upload an existing document to convert, paste a URL to import from, or use the Talk button to describe it out loud, and a row of quick-start chips (Job Application Form, Registration Form, Feedback Form) covers the most common starting points. Below that, the same screen still offers the traditional routes — Start from scratch, Import form, Document to Form, Collect Signatures, or a template library — so the AI path is an addition to the old workflow, not a replacement for it.
03Pick a layout before you land in the builder
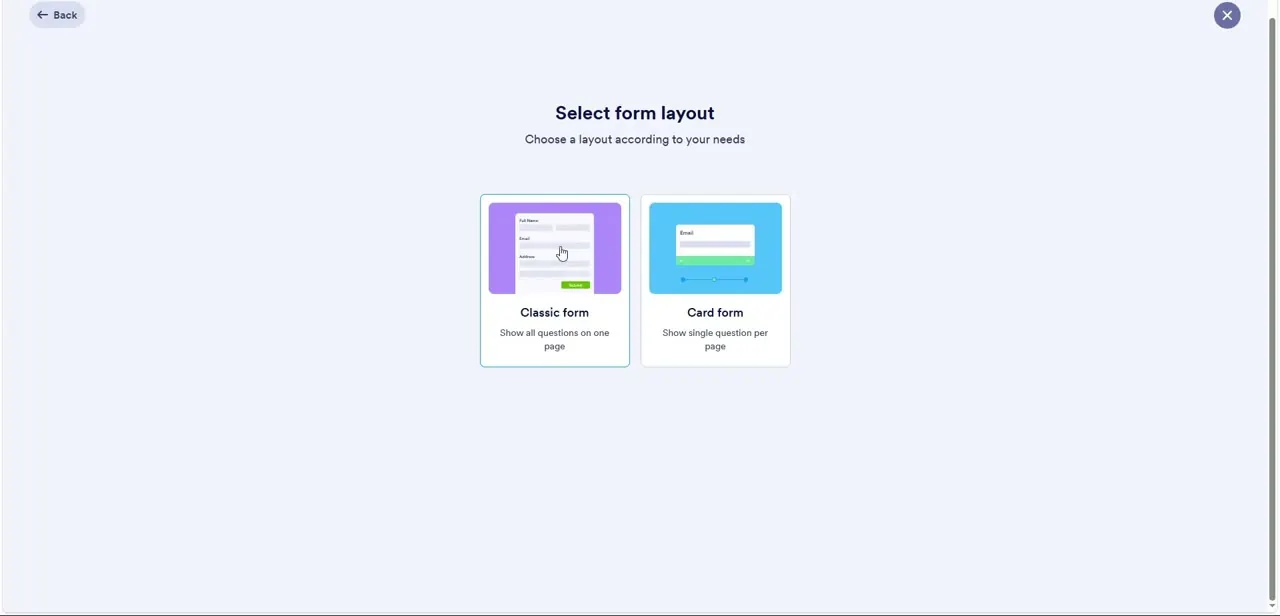
Whether you start from AI or from scratch, Jotform asks you to choose between a Classic form, which shows every question on one scrollable page, and a Card form, which shows a single question per page like a conversational survey. Classic is the safer default for anything longer than a handful of fields since respondents can see the whole form and skip around; Card form tends to perform better for short forms where you want to keep attention on one question at a time. This choice is changeable later, but picking correctly up front saves a redesign.
04Work the drag-and-drop builder
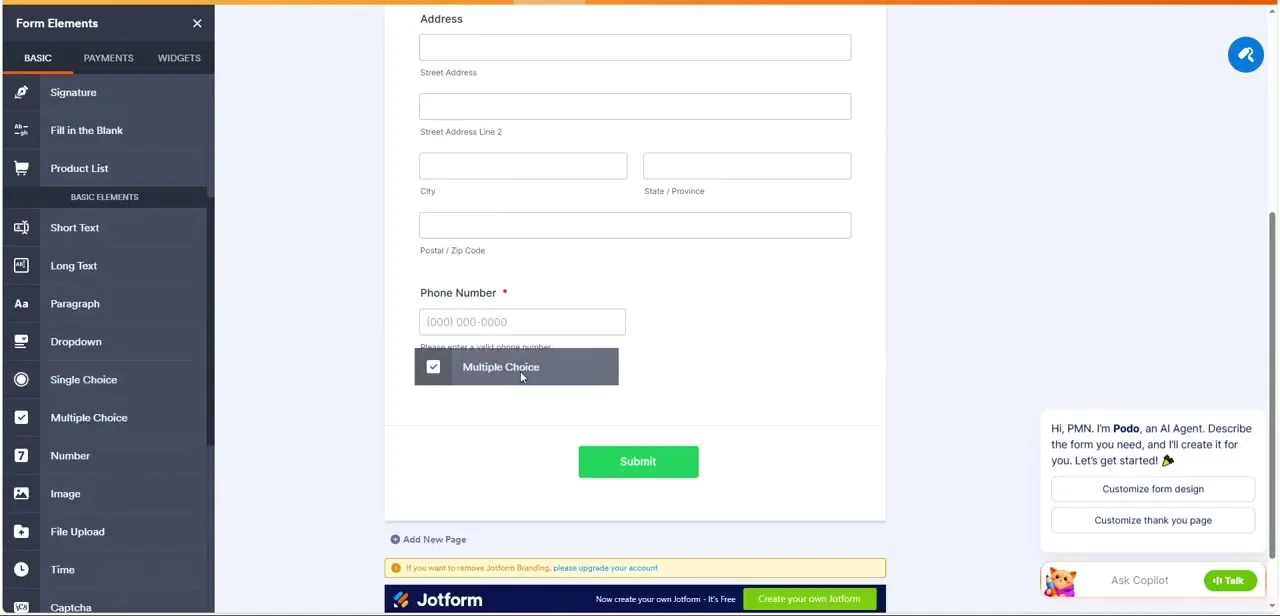
The builder itself is split into three tabs along the top — Build, Settings, and Publish — with the Form Elements panel pinned to the left, organized into Basic, Payments, and Widgets. Basic elements cover the fields nearly every form needs: Full Name, Email, Address, Phone, Date Picker, Signature, Dropdown, and choice-style questions like Single Choice and Multiple Choice. You drag an element from the panel onto the canvas, drop it where you want it in the field order, and click into any label or subheader to edit the text directly on the page rather than through a separate settings dialog.
05Refine and reorder the fields the AI generated
Once a starting form exists, the real work is refining it: an address block auto-expands into Street Address, City, State/Province, and Postal Code sub-fields, and a phone number field ships with format validation and an error message ready to go. Dragging in additional fields — like adding a Multiple Choice question after a Phone Number field — works the same whether the form came from the AI generator or was built from scratch, which is the point: the AI just gets you to a reasonable first draft faster, and every field remains fully editable, reorderable, and deletable afterward.
06Publish and watch for the branding notice
When the form is ready, the Publish tab produces a shareable link, an embed snippet for your own website, or a QR code for print and in-person use. Free accounts will notice a small yellow banner in the builder reminding you that Jotform branding stays on the form unless you upgrade — worth knowing before you promise a client or teammate a fully white-labeled form. Once published, submissions land back in My Workspace, where the same list view you started from now shows response counts and last-activity timestamps for each form.
Frequently asked questions
Is Jotform free to use for beginners?
Yes, Jotform has a free plan with limited monthly submissions and forms, which is enough to build and test the basics — including the AI form generator — before deciding whether to upgrade.
What does Jotform's AI form generator actually do?
You describe the form you want in plain language (or upload a document, or import a URL), and it drafts a working form with relevant fields already in place, which you then edit like any manually built form.
Do I need coding skills to build a form?
No. Jotform is a drag-and-drop builder for both the AI-generated and from-scratch paths — you add, reorder, and edit fields directly on the canvas without writing code.
What's the difference between a Classic form and a Card form?
Classic shows every question on a single scrollable page; Card form shows one question per page, similar to a conversational survey. You choose one when creating the form, and it affects how respondents experience it.
Can I embed a Jotform form on my own website?
Yes. The Publish tab generates an embed snippet alongside a shareable link and QR code, so the form can live directly on an existing site.
Watch the full walkthrough
The same steps, demonstrated on screen from start to finish.