 Easy Tech Tuts
How to Use GoHighLevel Media Library Easily 2026
By Impran M N
The GoHighLevel Media Library — labeled Media Storage inside the app — is where every image, logo, and asset you upload lives once, ready to be reused across funnels, emails, and websites without re-uploading it each time. This guide walks through getting to the right sub-account, uploading a file, grabbing a shareable link for it, and keeping the library tidy as it grows. It's aimed at small business owners and digital marketers who want their media assets working for them instead of getting lost across a dozen different campaigns.
01Make sure you're in the right sub-account
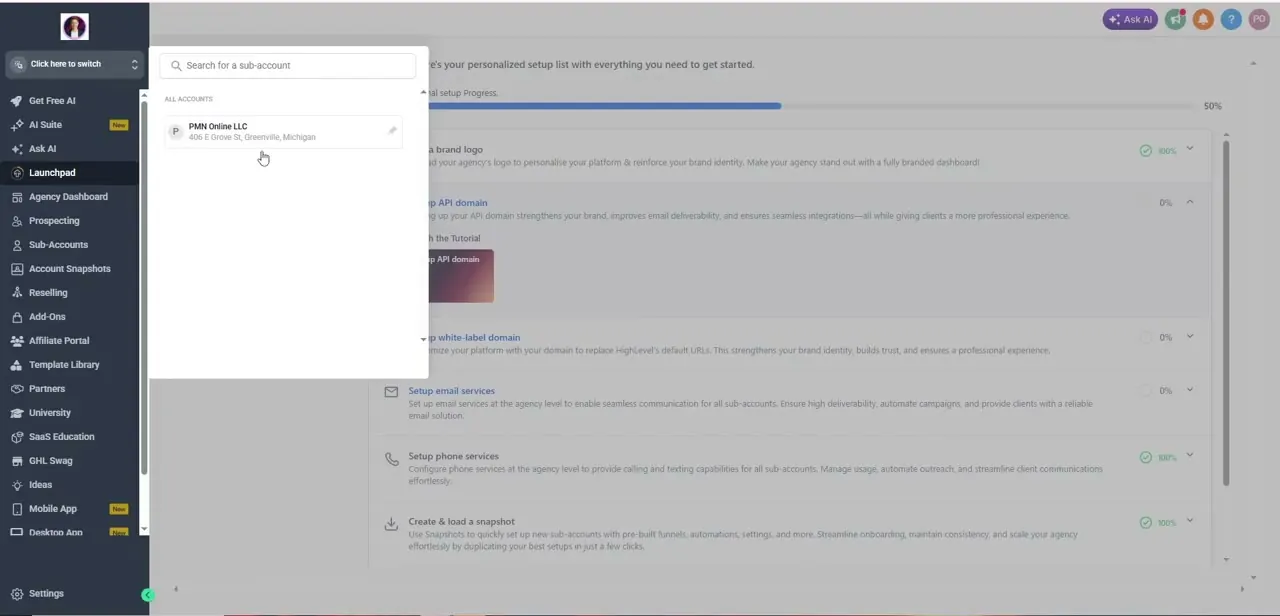
GoHighLevel is agency software at heart, so before touching media, confirm which account you're working in. The account switcher in the top left lets you search across every sub-account you manage and jump between them — in the video it shows a single agency, PMN Online LLC, but larger agencies will see a full list here. This matters because Media Storage is scoped per sub-account, so a logo uploaded in the wrong one won't show up where you actually need it.
02Open Media Storage and upload a file
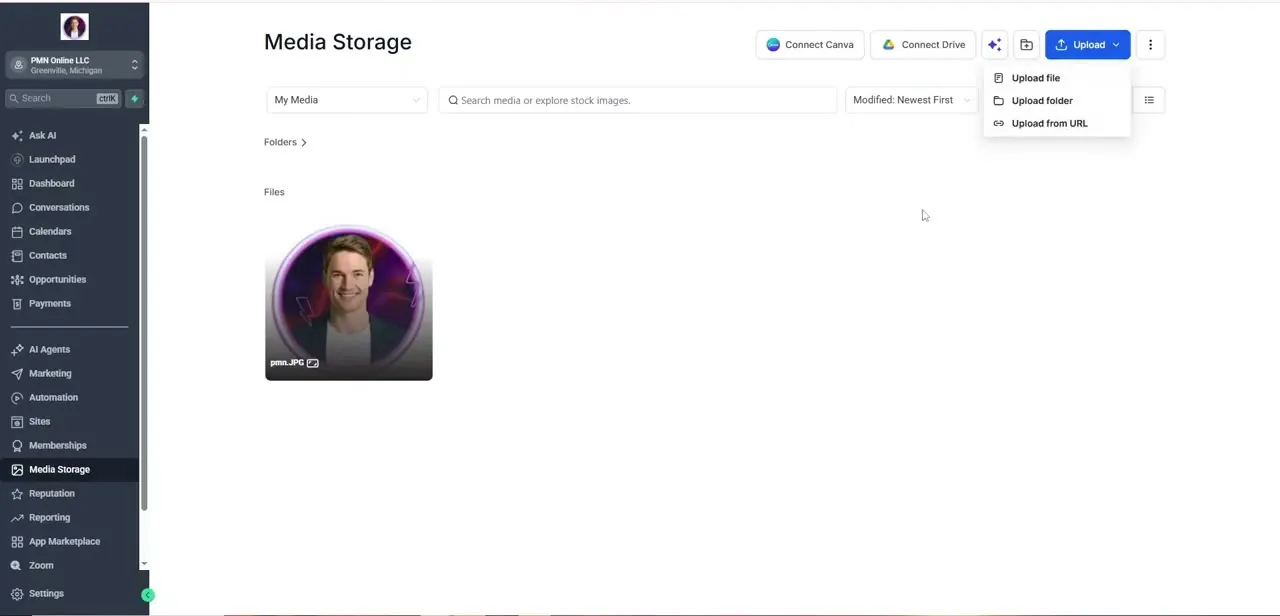
Media Storage sits in the left sidebar, roughly two-thirds of the way down near Sites and Memberships. The page opens with two view options — My Media or stock images via search — and a blue Upload button in the top right with a dropdown for Upload file, Upload folder, or Upload from URL. There are also one-click Connect Canva and Connect Drive buttons above it, which pull assets in directly from those services instead of exporting and re-uploading manually.
03Grab a shareable link once a file finishes uploading
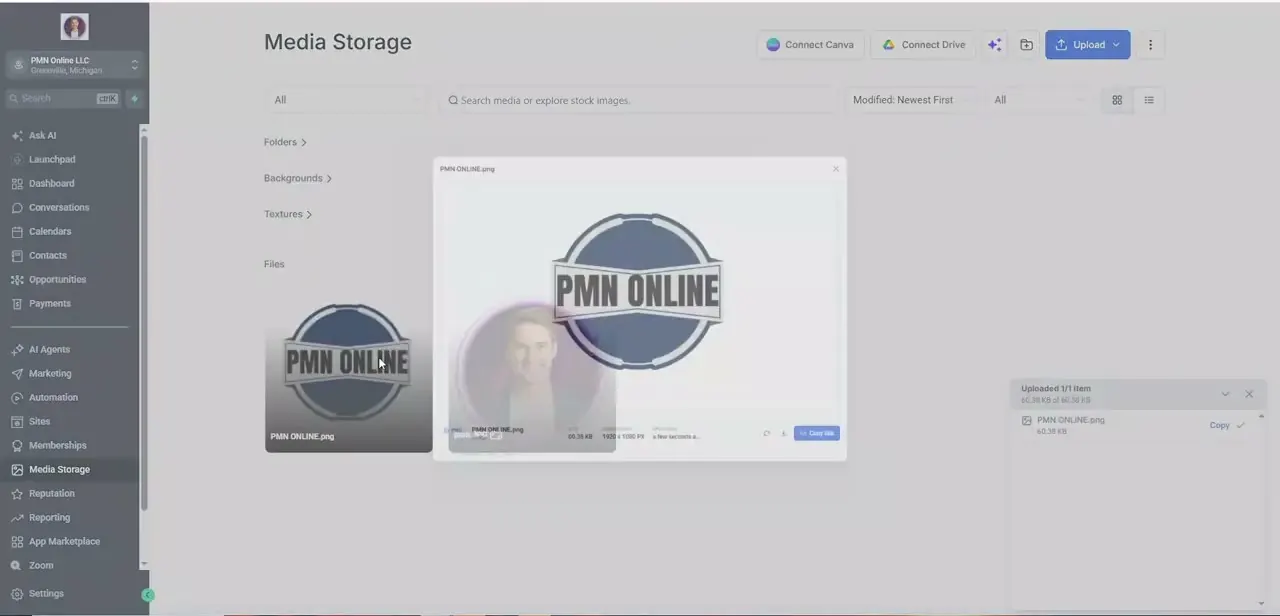
After a file uploads, clicking its thumbnail opens a preview showing the filename, file size, dimensions, and a Copy URL button — in the video this generated a direct link to the newly uploaded PMN ONLINE.png. A confirmation toast also appears in the bottom right showing upload progress and a quick Copy link for the file. This is the fastest way to drop an image into an email, a funnel page, or a chat message without leaving Media Storage to hunt for the file again.
04Check the Files view to confirm everything landed
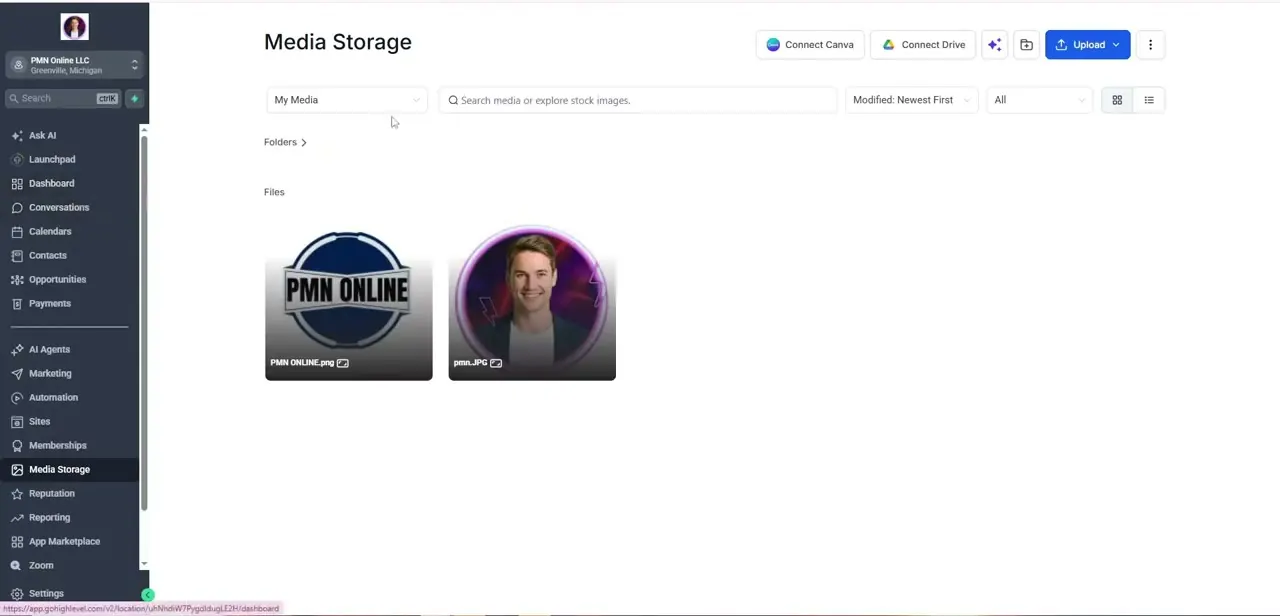
Back on the main Media Storage screen, uploaded files show up as thumbnails under the Files section, each labeled with its filename and a small icon indicating file type. With just two files — a logo and a headshot — it's easy to scan, but the same grid view is what you'll rely on once dozens of assets accumulate, so get comfortable with it early rather than only searching by name later.
05Use folders and search to stay organized
The Folders row above Files is where organization actually happens — group assets by campaign, client, or asset type (logos, backgrounds, textures) instead of leaving everything in one flat list. The search bar at the top doubles as a stock image search when you need something you haven't uploaded yet, and the sort dropdown (Modified: Newest First by default) helps you find recently added files fast during a busy build.
06Reuse assets across campaigns instead of re-uploading
Once a file lives in Media Storage, it's available everywhere inside that sub-account — email builders, funnel pages, and social posts can all pull the same URL rather than needing a fresh copy each time. This is the real time-saver the library provides: upload your logo, headshots, and brand assets once at the start of a client's setup, and every campaign built afterward references the same source instead of duplicating storage and creating version mismatches.
Frequently asked questions
What file types can I upload to the GoHighLevel Media Library?
The Upload menu supports individual files, entire folders, and files pulled in directly from a URL, covering the common image and video types used across marketing campaigns, websites, and emails.
Can I reuse the same media file across multiple campaigns?
Yes. Once a file is uploaded to Media Storage, you can copy its direct URL from the preview modal and drop that same link into any email, funnel, or page without uploading it again.
Can I connect Canva or Google Drive instead of uploading manually?
Yes, Media Storage has one-click Connect Canva and Connect Drive buttons above the upload area, which pull assets in directly from those services rather than requiring an export-then-upload step.
How do I keep my Media Library from becoming cluttered?
Use the Folders feature to group assets by campaign, client, or type as you upload rather than leaving everything in one flat Files list, since sorting hundreds of unsorted thumbnails later is far slower.
Is Media Storage shared across sub-accounts?
No, it's scoped to whichever sub-account you're currently in. Check the account switcher in the top left before uploading to make sure the asset lands where your team actually needs it.
Watch the full walkthrough
The same steps, demonstrated on screen from start to finish.


