 Easy Tech Tuts
Zapier Tutorial for Beginners, How to use Zapiers in AI era
By Impran M N
Zapier connects your favorite apps so an action in one automatically triggers a task in another, without you clicking between tabs to make it happen. This walkthrough follows a real, complete example — an automation that watches for a new Google Forms response and automatically sends a thank-you email through Gmail — from the moment you land on Zapier's homepage through publishing a live Zap. Rather than describing automation in the abstract, every step here matches an actual screen you'll click through, so a first-timer knows exactly what to expect before they open the app themselves.
01Sign in and see what Zapier promises
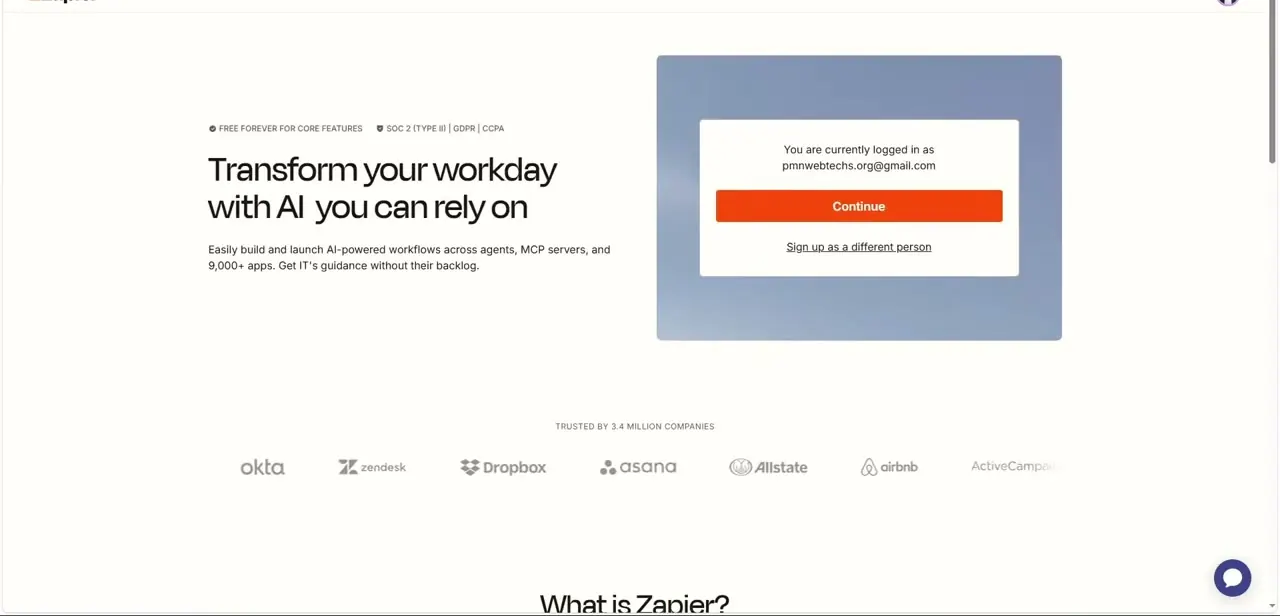
Zapier's homepage leads with "Transform your workday with AI you can rely on," backed by a line about building AI-powered workflows across agents, MCP servers, and over 9,000 apps, plus trust signals like "Free forever for core features" and SOC 2 compliance. If you're already signed into a Google account in your browser, Zapier surfaces a quick confirmation screen asking you to continue with that account or sign up as someone else, which is the fastest path in if you don't already have a dedicated Zapier login. The page also lists recognizable companies it's trusted by — Okta, Zendesk, Dropbox, Asana, Allstate, and Airbnb among them — which is more a credibility signal than something you need to act on, but it's worth knowing Zapier is built for exactly this kind of business-critical automation, not just hobby projects.
02Understand triggers and actions before you build
Every Zap — Zapier's term for one automation — is built from two core pieces: a trigger, which is the event that starts everything (a new form response, a new email, a new row in a spreadsheet), and one or more actions, which are what happens next (sending an email, creating a record, posting a message). Getting comfortable with this trigger-then-action structure before you start clicking is the single most useful thing a beginner can do, because every Zap you'll ever build, no matter how complex, is just more of this same pattern chained together.
03Pick your apps from the connector panel
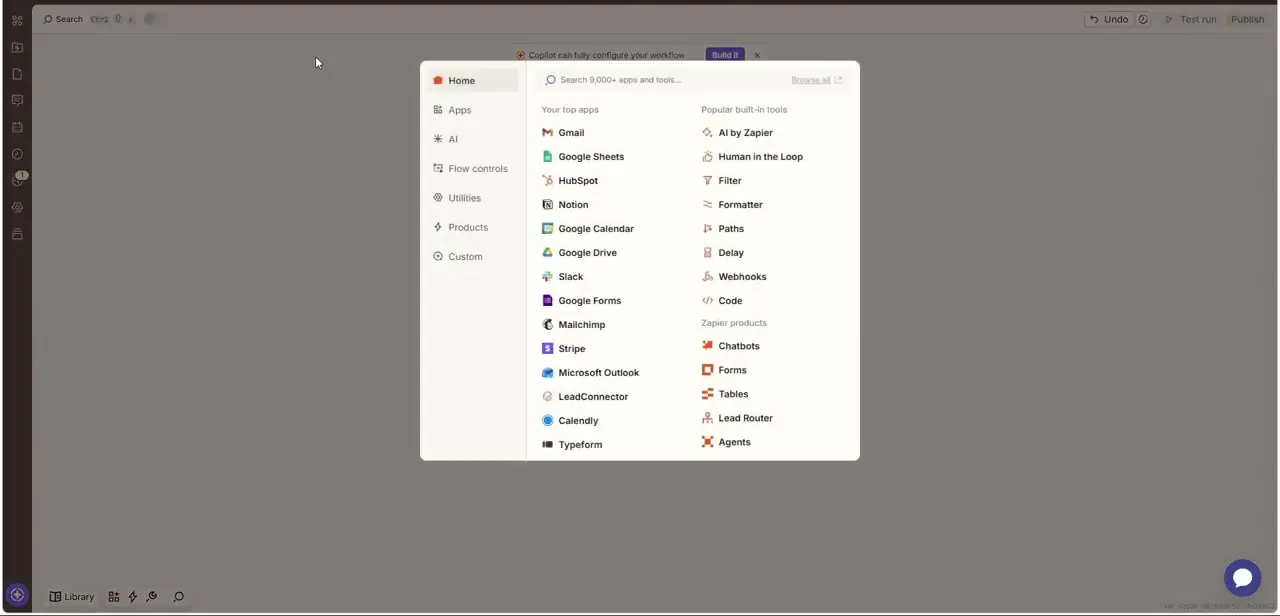
Inside the Zap editor, clicking to add a step opens a panel split into Your top apps and Popular built-in tools. The app list includes Gmail, Google Sheets, HubSpot, Notion, Google Calendar, Google Drive, Slack, Google Forms, Mailchimp, Stripe, Microsoft Outlook, LeadConnector, Calendly, and Typeform — a mix of the most commonly connected services.
The built-in tools column is just as important for beginners to notice: AI by Zapier, Human in the Loop, Filter, Formatter, Paths, Delay, Webhooks, and Code sit alongside Zapier's own products like Chatbots, Forms, Tables, Lead Router, and Agents. These built-in tools aren't external apps — they're logic you can insert directly into a Zap, like a Filter step that stops the automation unless a condition is met.
04Build the trigger-to-action flow
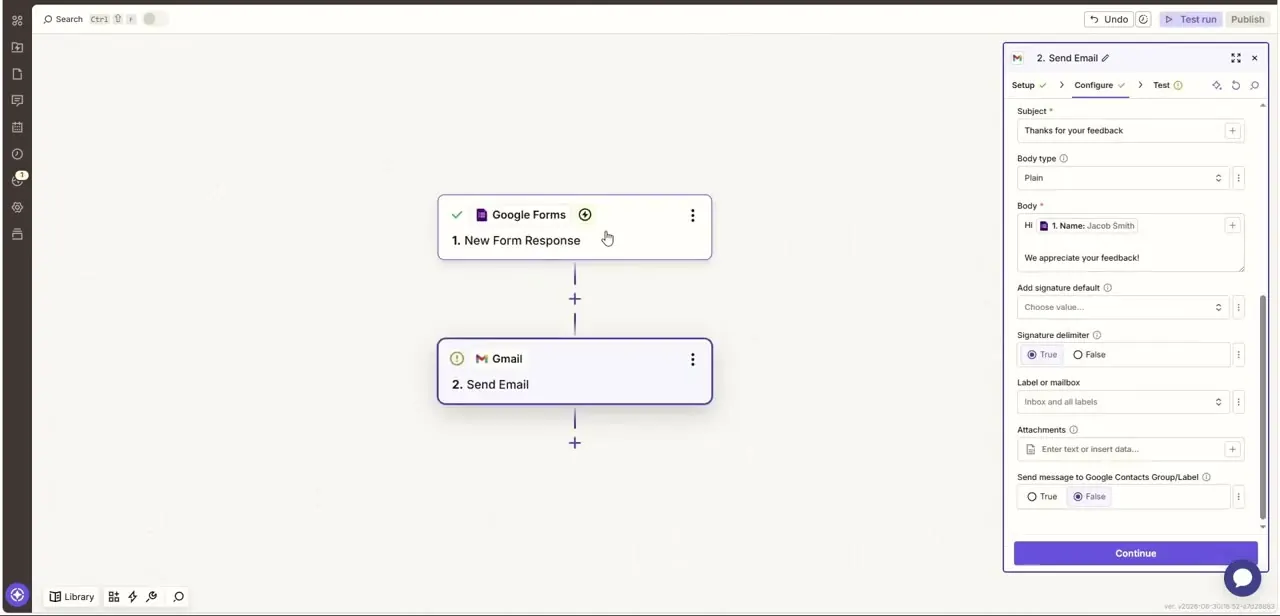
A simple two-step Zap shows the pattern clearly: step 1 is Google Forms, set to trigger on "New Form Response," marked complete with a green checkmark once configured. Step 2 is Gmail, set to "Send Email," with its Configure panel open on the right showing a Subject field ("Thanks for your feedback"), a Body type set to Plain, and a Body field that pulls the responder's name in dynamically — written as "Hi {{1.
Name}}, We appreciate your feedback!" — so every email personalizes itself using data from the form submission that triggered it. Further down, the same panel exposes Attachments and a toggle for whether to also add the sender to a Google Contacts group, which is the kind of secondary option beginners often skip on a first Zap and add back in later once the core flow works.
05Test before you trust it
Every Configure panel in Zapier leads to a Test tab next to Setup and Configure at the top, and running that test sends a real trial version of the action so you can confirm the email actually reads the way you intended before it goes out to real form submitters. Skipping this step is the most common beginner mistake — a typo in the dynamic field reference, or a Body type set to the wrong format, only becomes obvious once you see the test result rendered.
06Publish and confirm your Zap is live
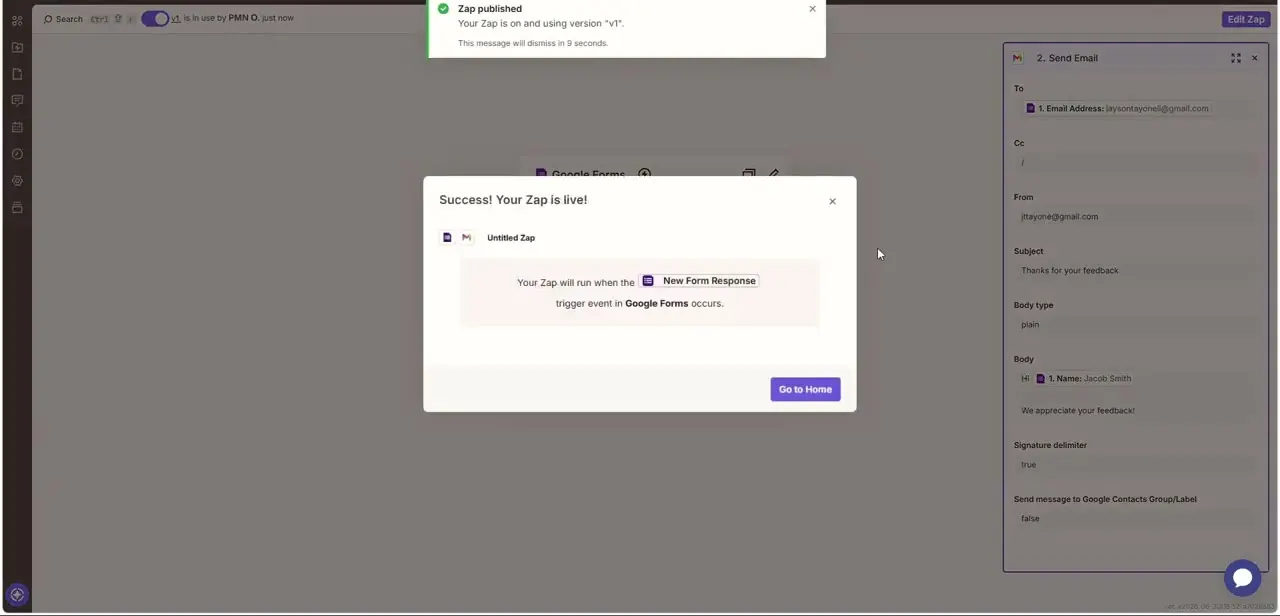
Once the test passes, Publish in the top right takes the Zap from draft to live, and Zapier confirms with a "Success! Your Zap is live!" dialog summarizing the automation in plain language: "Your Zap will run when the New Form Response trigger event in Google Forms occurs." A toggle at the top left of the editor shows the Zap is on and notes who last touched it, along with a small "Zap published" confirmation banner that self-dismisses after a few seconds. From this point forward, the automation runs on its own in the background — no one needs to open Zapier again for it to keep working.
07Build confidence before going multi-step
Once one trigger-to-action Zap is working reliably, the natural next move is adding a built-in tool like Filter (to only send the email for certain form responses) or Paths (to branch into different actions depending on what was submitted) rather than jumping straight into a five-step automation. Each of Zapier's built-in tools shown in the connector panel — Delay, Formatter, Code, Webhooks — solves one specific problem, so the fastest way to get good at Zapier is adding them one at a time to a Zap you already understand, instead of trying to design a complex flow from scratch on day one.
Frequently asked questions
Is Zapier hard to learn for beginners?
No — the core concept is just trigger plus action, and Zapier's editor walks you through configuring each step with a Setup, Configure, and Test tab before anything goes live.
What's the difference between an app and a built-in tool in Zapier?
Apps like Gmail, Google Forms, and Slack connect to external services; built-in tools like Filter, Paths, Delay, and AI by Zapier are logic you add directly inside a Zap, without connecting to anything outside Zapier.
Do I need technical skills to use Zapier?
No coding is required for a standard Zap — connecting a trigger like Google Forms to an action like Gmail is done entirely through the visual editor's Configure panels.
What kinds of tasks can Zapier automate?
Anything expressible as a trigger and an action across its 9,000+ supported apps — the example in this guide sends a personalized thank-you email automatically whenever someone submits a Google Form.
Should I test a Zap before publishing it?
Yes — every step's Configure panel leads to a Test tab, and running it before you Publish is the easiest way to catch a formatting mistake before it reaches real users.
Watch the full walkthrough
The same steps, demonstrated on screen from start to finish.


