 Easy Tech Tuts
How to Use Zapier with Airtable, Connect & Integrate Easily 2026
By Impran M N
Zapier extends what Airtable can do by connecting it to hundreds of other apps, so a new record in a base can automatically send a Slack message, add a Google Sheets row, or trigger a Gmail draft without you touching either app manually. This guide covers building that connection from the Zapier side: starting a Zap, picking Airtable as your trigger app, and understanding what Zapier needs from Airtable to authenticate before you get into mapping fields.
01Start a new, untitled Zap
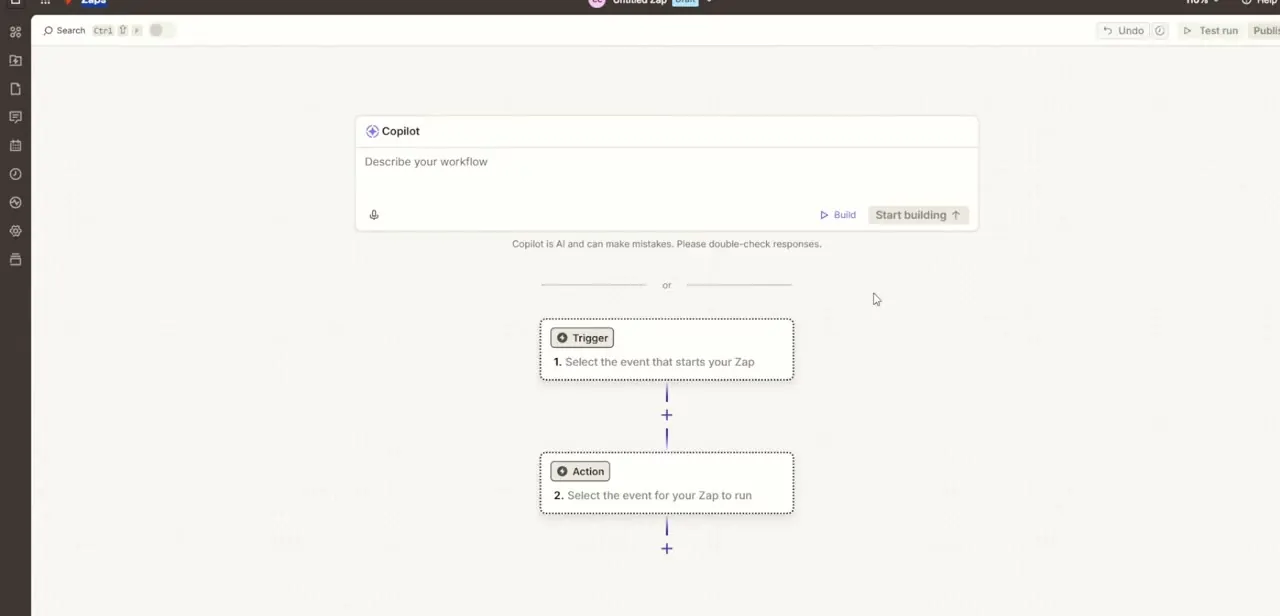
From your Zapier dashboard, create a new Zap and you'll land on a blank canvas with two placeholder blocks stacked vertically: a Trigger block labeled "Select the event that starts your Zap" and an Action block below it labeled "Select the event for your Zap to run." Zapier also offers a Copilot text box at the top where you can describe the workflow in plain language and have it draft the structure for you, but building it manually block by block gives you more control over exactly which Airtable event fires the automation.
02Search for Airtable as your trigger app
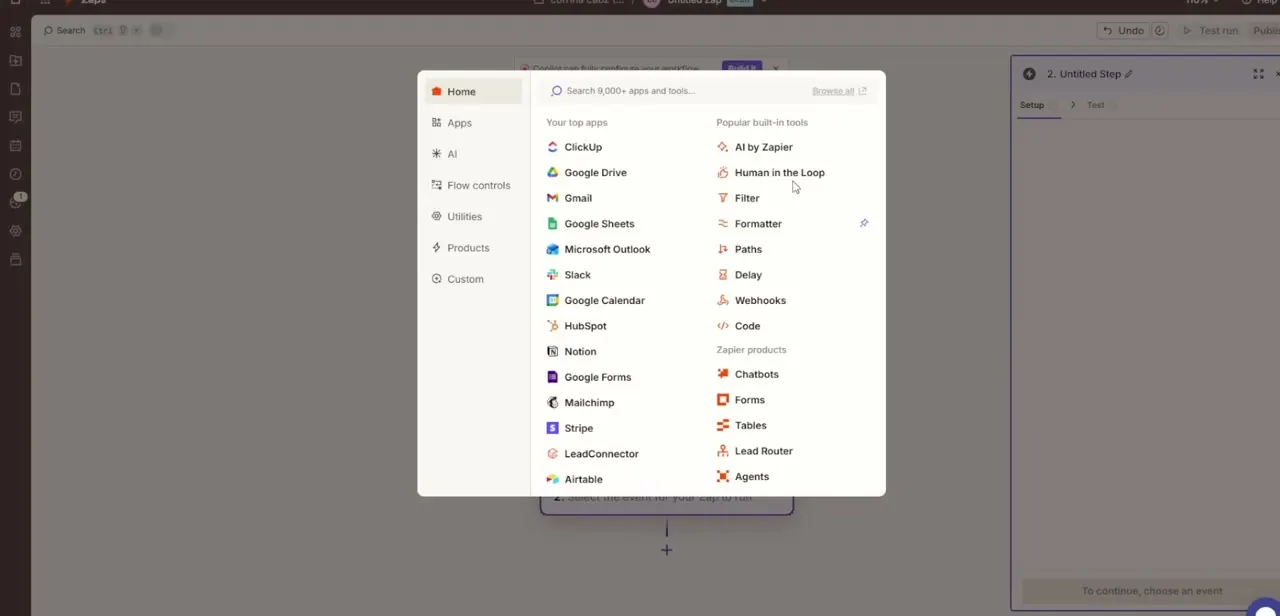
Click the Trigger block and a searchable app picker opens, split into "Your top apps" (apps you've used before, if any) and "Popular built-in tools" like Filter, Formatter, and Paths. Type Airtable into the search box, or scroll the list if it's already showing among your top apps, and select it to move into choosing a specific trigger event.
03Choose your trigger event
Once Airtable is selected, Zapier asks which event should start the Zap — the most common choices are New Record and New or Updated Record, scoped to a specific base and table you'll select in the next step. Pick New Record if you only want the automation to fire on freshly created rows, or the updated variant if edits to existing records should also count.
04Generate a Personal Access Token in Airtable
Before Zapier can pull data from your base, it needs to authenticate as you. Open a new tab, go to your Airtable account's Developer Hub, and generate a Personal Access Token scoped to the specific base (or bases) you want Zapier to access — avoid granting it access to every base in your account if you only need one. Copy the token immediately, since Airtable only displays the full value once.
05Connect the account and select your base
Back in Zapier, paste the Personal Access Token when prompted to connect your Airtable account, then choose the specific base and table your trigger should watch. Run Zapier's test-data pull at this stage — it fetches a sample record so you can confirm the connection is reading real data before you build anything further downstream.
06Add an action, map fields, and publish
Click the Action block and pick the destination app — Gmail, Slack, and Google Sheets are common choices for turning an Airtable record into a notification or a synced row elsewhere. Map each Airtable field to the corresponding input in that action (a record's Name field to an email subject line, for instance), run a live test to confirm the data lands correctly, and only then click Publish to switch the Zap from draft to active.
Frequently asked questions
What do I need from Airtable to connect it to Zapier?
You need a Personal Access Token generated from Airtable's Developer Hub, scoped to the base you want Zapier to access, which Zapier uses to authenticate the connection.
What triggers can I use from Airtable in Zapier?
Common triggers include new record creation or updates to existing records within a specified base and table.
Does Zapier have usage limits for Airtable automations?
Yes, Zapier's free and paid plans have task limits, so it's worth monitoring your Zap history to track usage over time.
Can I connect Airtable to multiple apps in one Zap?
Yes, a single Zap can include multiple action steps, sending Airtable data to more than one destination app in sequence.
What's the difference between using Zapier's Copilot and building a Zap manually?
Copilot lets you describe the workflow in plain language and drafts a Zap structure automatically, while building manually means picking the trigger and action blocks yourself — manual building gives you more precise control over which Airtable event fires the automation.
Watch the full walkthrough
The same steps, demonstrated on screen from start to finish.


