Easy Tech Tuts
How to Add WhatsApp Button to Wix Sites Easily 2026
By Impran M N
Rather than hand-building a click-to-chat link and pinning an icon to the page yourself, Wix's app market has dedicated WhatsApp chat widget apps that give you a full floating chat interface — welcome message, agent profile, and all — with a proper settings panel instead of a single link field. This guide walks through finding that kind of app, choosing how it behaves, and customizing the header and footer text visitors actually see when they open it.
01Browse Wix's professional solutions for chat apps
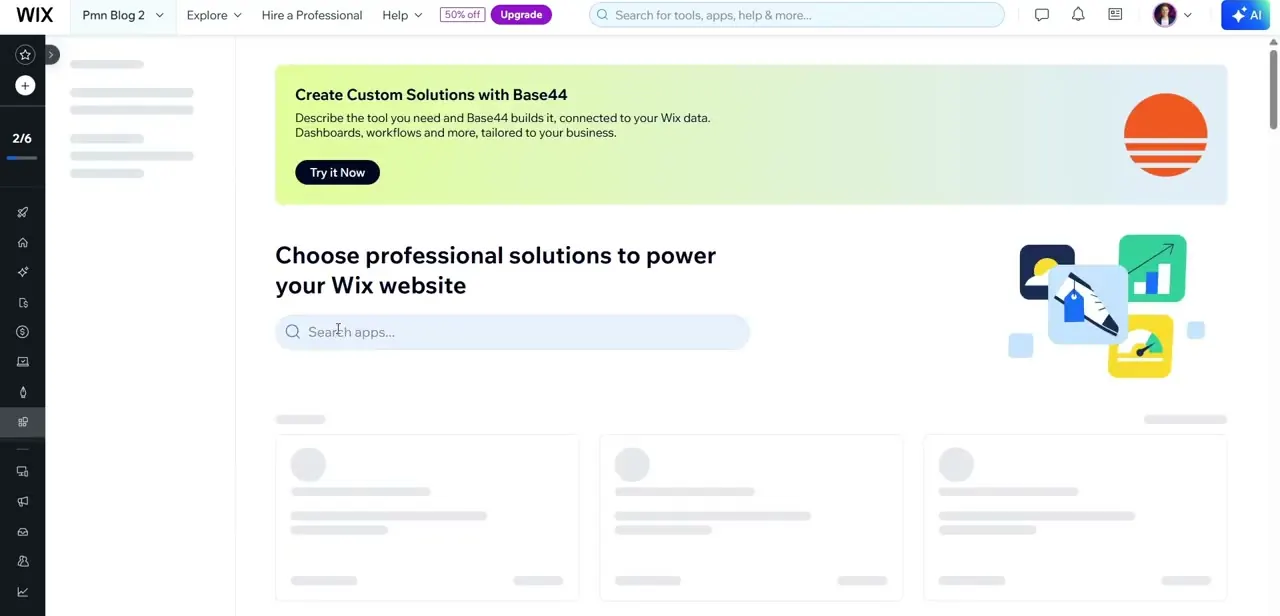
From your site's dashboard, open the apps section where Wix surfaces "professional solutions to power your Wix website," complete with a search bar for finding specific tools. This is where WhatsApp chat widgets live alongside other communication apps — searching directly is faster than browsing categories if you already know you want a WhatsApp-branded chat experience rather than a generic contact form.
02Choose how the widget behaves
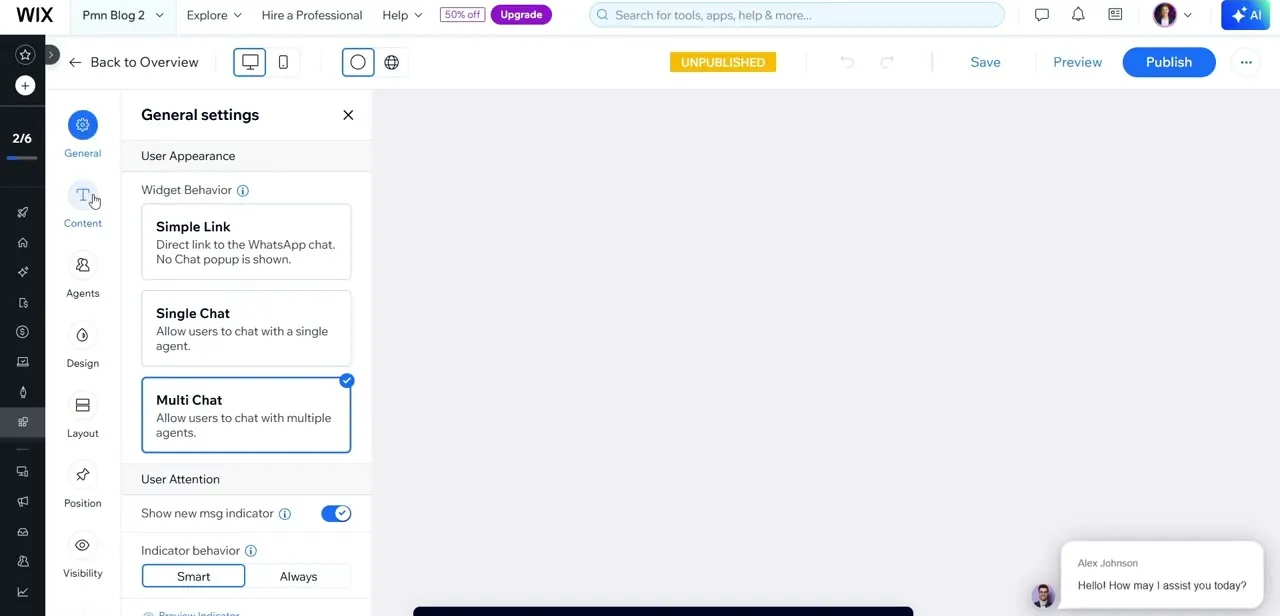
Once installed, open the widget's General settings and look at Widget Behavior. You get three real options here: Simple Link, which sends visitors straight into a WhatsApp chat with no popup shown at all; Single Chat, which lets users chat with one specific agent; and Multi Chat, which allows visitors to choose between multiple agents. Multi Chat is the richer option and shows a live preview of the floating chat bubble as you configure it, complete with a sample greeting and an agent card.
03Write your header and footer content
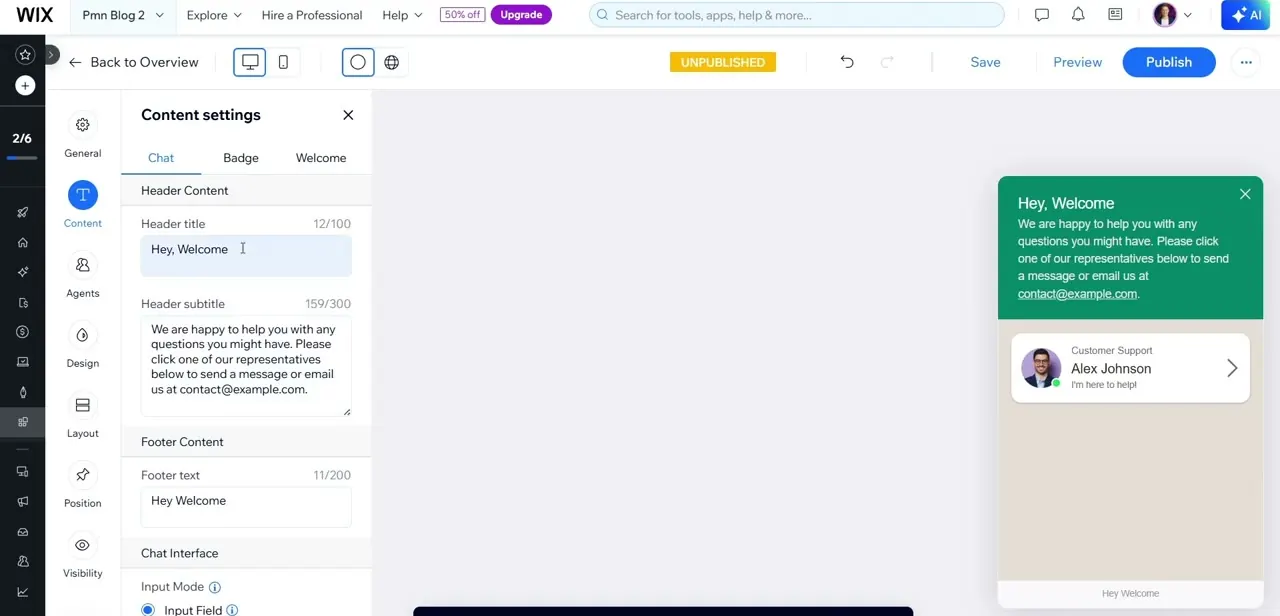
Move to Content settings, under the Chat tab. Here you set the Header title and Header subtitle that appear at the top of the chat window when a visitor opens it — something like "Hey, Welcome" paired with a subtitle explaining who will respond and how, including a fallback email address for visitors who'd rather not chat. There's a separate Footer text field beneath it, and each field shows a live character count so you know how much room you have before it gets cut off.
04Personalize the greeting for your actual business
Replace the generic placeholder text with your own — swap "Hey, Welcome" for something naming your business, like "Hey, Welcome to [Your Site]" so the first thing a visitor sees confirms they're in the right place. Tabs for Badge and Welcome sit next to Chat within the same Content settings panel, letting you customize the small badge that appears before the chat opens and a separate welcome message shown on first contact.
05Configure who responds and how attention is drawn
Under Agents, add the person or people who'll actually be answering — this is what powers the agent card shown in the preview, with a name, role, and photo rather than an anonymous chat box. Back in General settings, User Attention controls include a Show new message indicator toggle and an Indicator behavior setting choosing between Smart and Always, which governs how aggressively the widget nudges visitors to notice it.
06Set its position and visibility, then check on mobile
The Position and Visibility tabs in the left rail control where the widget sits on the page and whether it shows on every page or only specific ones. Toggle between desktop and mobile preview using the device icons at the top of the editor, since a floating chat widget is exactly the kind of element that can crowd other fixed elements — like a cookie banner or back-to-top button — on a small screen.
07Preview, publish, and send a real test message
Before publishing, the editor's status still shows Unpublished at the top — use Preview to interact with the widget as a visitor would, opening the chat and confirming your header and footer text render the way you configured them. Once it's live, send an actual test message through it so you know replies land wherever your agents are actually watching, whether that's WhatsApp directly or a connected inbox.
Frequently asked questions
Do I need the WhatsApp Business app for this to work?
It depends on the widget's behavior mode — Simple Link sends visitors straight into a normal WhatsApp chat, while Single Chat and Multi Chat modes are built around the widget's own agent and routing setup.
Can I customize the welcome message visitors see?
Yes. Content settings has separate Chat, Badge, and Welcome tabs, and the Chat tab lets you set a Header title, Header subtitle, and Footer text with a live character count.
Can more than one person respond to chats?
Yes, if you choose Multi Chat under Widget Behavior in General settings, visitors can choose between multiple agents you've added.
Will the widget show on every page of my site?
That's controlled from the Visibility tab in the widget's settings, where you choose whether it appears sitewide or only on specific pages.
How do I know if visitors are actually noticing the widget?
The Show new message indicator toggle and Indicator behavior setting, found in General settings under User Attention, control how the widget visually draws attention — set to Always for maximum visibility or Smart to show it more selectively.
Watch the full walkthrough
The same steps, demonstrated on screen from start to finish.