Easy Tech Tuts
How to Add Link to an Image in Webflow Easily 2026
By Impran M N
A plain image on a Webflow page is just decoration until you wrap it in something clickable, and the platform's answer to that is the Link Block — a container built specifically to hold an image (or anything else) and turn the whole thing into an anchor. It matters because bolting a link onto an image the wrong way tends to produce messy markup, broken hover states, or a click target that doesn't line up with what the user actually sees. This guide walks through finding the Link Block in the Designer, nesting an image inside it, and wiring up the destination and hover behavior so the result is clean, responsive, and accessible.
01Open the Add panel and search for Link Block
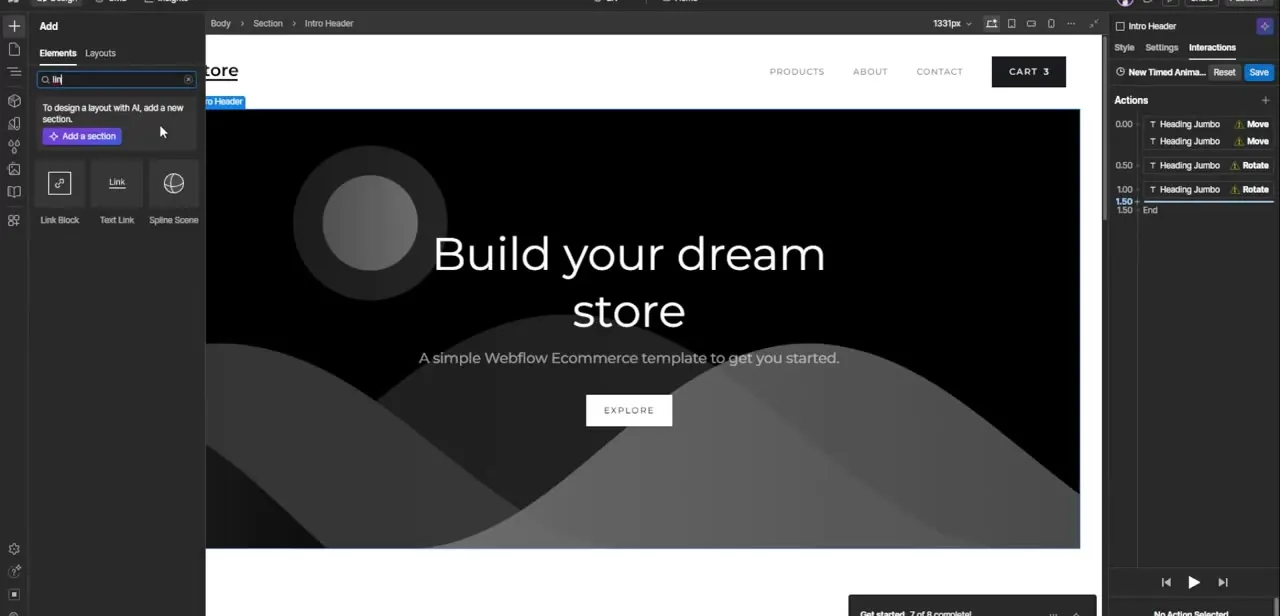
Click the Add icon in the left-hand toolbar to open the Elements panel, then type into the search field at the top. Typing a partial match like "lin" surfaces the elements you need fast: Link Block, Text Link, and Spline Scene all show up as options.
Link Block is the one you want for an image, since it's a generic container designed to wrap other elements — unlike Text Link, which is built for inline text and won't hold an image cleanly. Webflow also shows an "Add a section" AI prompt at the top of this panel, but that's unrelated to what you're doing here.
02Drag the Link Block onto your canvas
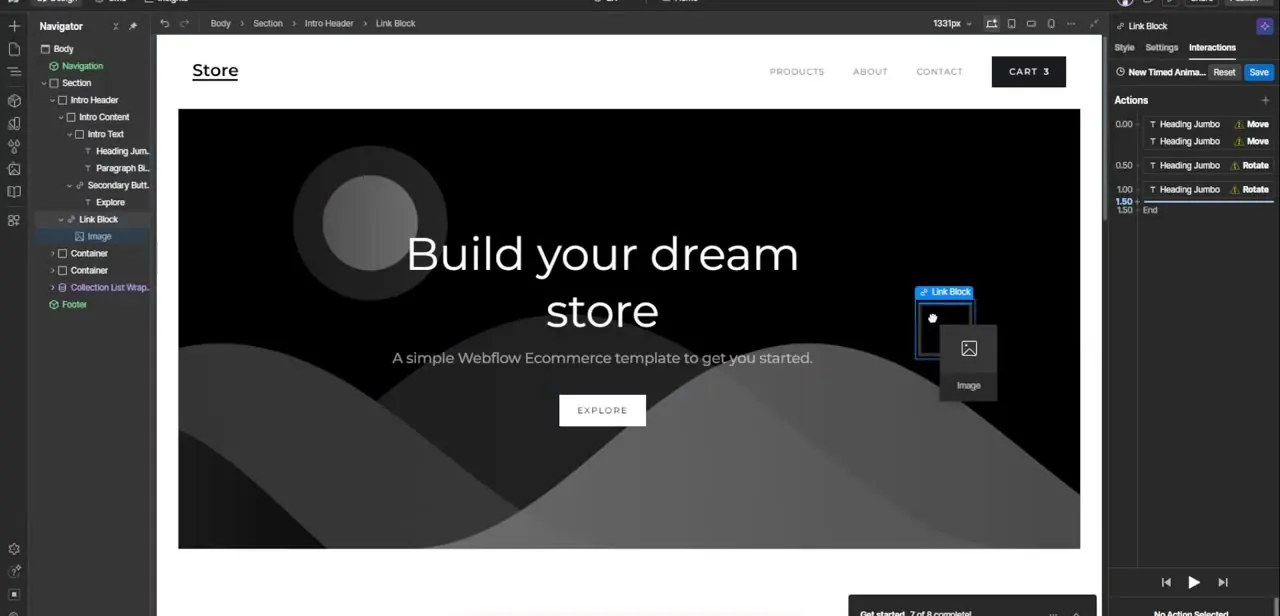
Drag the Link Block element from the panel onto the page, dropping it wherever the clickable image should live — inside a header, a card, or a standalone section. As soon as it lands, the Navigator on the left updates to show a new Link Block node nested under whatever container you dropped it into, confirming it's now part of the page structure rather than floating on top. At this point the Link Block is an empty rectangle with no content, which is exactly what you want before adding the image.
03Nest an image element inside the Link Block
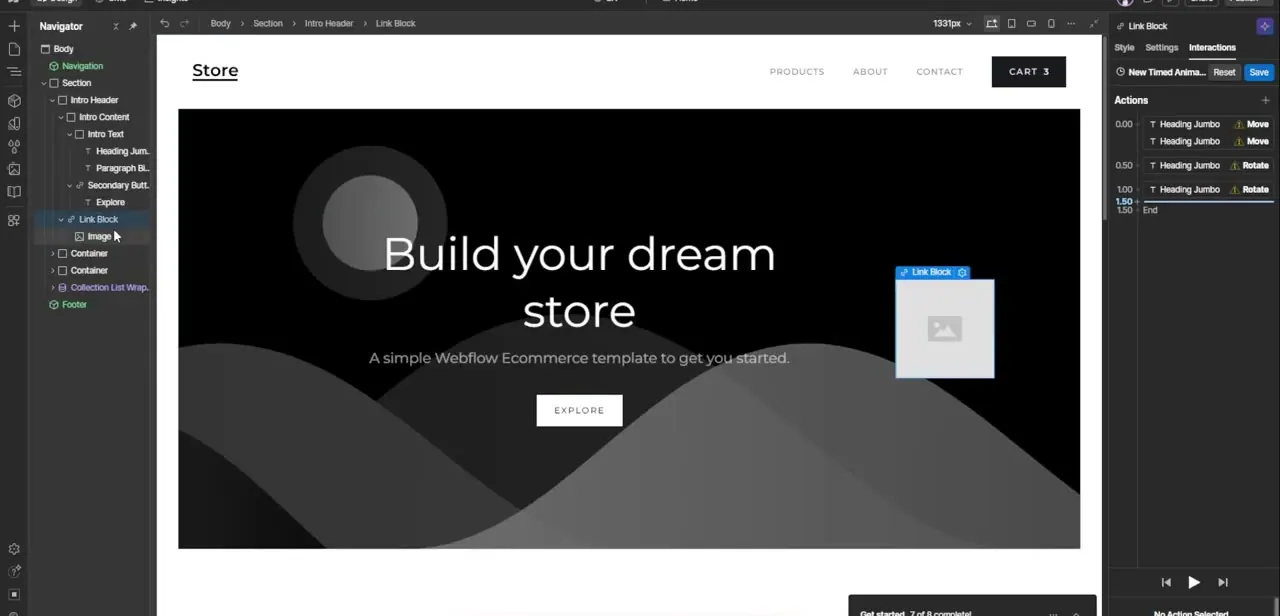
With the Link Block selected, open the Add panel again and drag an Image element directly inside it — the Navigator is the easiest way to confirm this worked, since you should see Image indented one level under Link Block, not sitting next to it. Once nested, the image inherits the Link Block's click behavior automatically; you don't have to add any interaction manually. Webflow shows a placeholder icon where the image will go until you upload or select a real asset from your asset manager.
04Set the link destination
Select the Link Block itself (not the image inside it) and open its Settings panel on the right. Here you choose what the click should do: paste an external URL, pick a page from your own site, jump to a section anchor, trigger an email or phone link, or point at a file download. Because the destination is set on the Link Block rather than the image, you can swap the image later without touching the link — useful if you're running the same banner with different creative over time.
05Choose a target and add a hover state
Still in the Link Block's settings, decide whether the destination opens in the same tab or a new one — external links usually make sense as a new tab, internal navigation usually doesn't. Then switch to the Style panel and add a hover state, even something subtle like a slight opacity dip or a scale-up, so users get visual confirmation the image is actually clickable before they click it. Skipping this step is the most common reason a linked image feels dead on a live site — nothing about a static image screams "click me" without some kind of feedback.
06Add alt text for accessibility and SEO
Click the nested image and open its settings to add descriptive alt text — something that explains what the image shows and, ideally, hints at where the link goes. This isn't optional polish: screen readers rely on it, and search engines use it to understand image content since they can't interpret pixels directly. A blank alt field is a missed opportunity on any image that's also functioning as a navigation element.
07Publish and click through to confirm
Hit Publish in the top-right corner and open the live site once it finishes deploying. Click the image directly rather than trusting the Designer preview, since actual click behavior — new tab versus same tab, correct destination, hover animation — only shows up reliably on the published version. If anything's off, the fix is almost always back in the Link Block's own settings rather than the image nested inside it.
Frequently asked questions
Can I link an image without using a Link Block?
Webflow's cleanest approach is nesting the image inside a Link Block, since it keeps the markup semantic and avoids custom code. You could technically wrap other elements in custom HTML embeds, but Link Block is the native, supported way to do it.
Will linking an image affect my page's SEO?
Not negatively, as long as you keep meaningful alt text on the nested image and use a real anchor element, which Link Blocks generate by default under the hood.
Can I link to a different page within my own site?
Yes — the Link Block's settings panel lets you pick an internal page or a section anchor instead of typing a full external URL.
Does the linked image work the same on mobile?
Yes, since the Link Block is a standard responsive element, but it's worth testing tap targets on smaller breakpoints to make sure the image stays easy to tap and the hover effect doesn't get stuck on touch devices.
Why isn't my hover effect showing up on the published site?
Double-check the hover state is applied to the Link Block itself, not the nested image — styling the wrong element is the most common reason a hover animation silently fails to appear.
Watch the full walkthrough
The same steps, demonstrated on screen from start to finish.