Easy Tech Tuts
How To Generate CSR & Activate SSL On Namecheap Domain Easily 2026
By Impran M N
Activating SSL on a Namecheap domain starts with a Certificate Signing Request (CSR) — a small block of encoded text that proves you control the domain and key pair the certificate will be issued for. Namecheap's flow moves you from a purchased-but-unactivated certificate, through generating and submitting that CSR, to choosing how you'll prove domain ownership. This guide follows that path end to end, including the private key that gets generated alongside the CSR and why losing it is a bigger problem than losing almost anything else in the process.
01Find your unactivated certificate
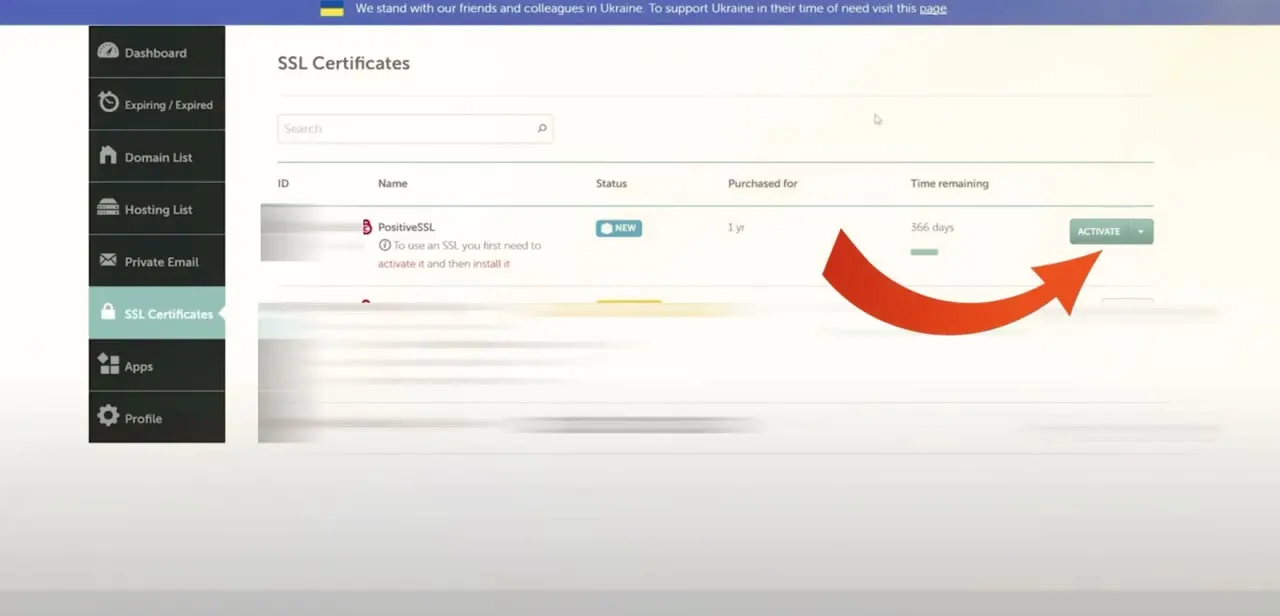
After purchasing an SSL certificate, it doesn't do anything until you activate it. In your Namecheap account, open SSL Certificates from the left menu, and any certificate you've bought — PositiveSSL in this case — shows up in a list with its status, purchase date, and time remaining.
A freshly purchased certificate is flagged New, with an explicit note that you need to activate it and then install it before it protects anything. Click Activate to start the process.
02Generate a CSR and keep the private key safe
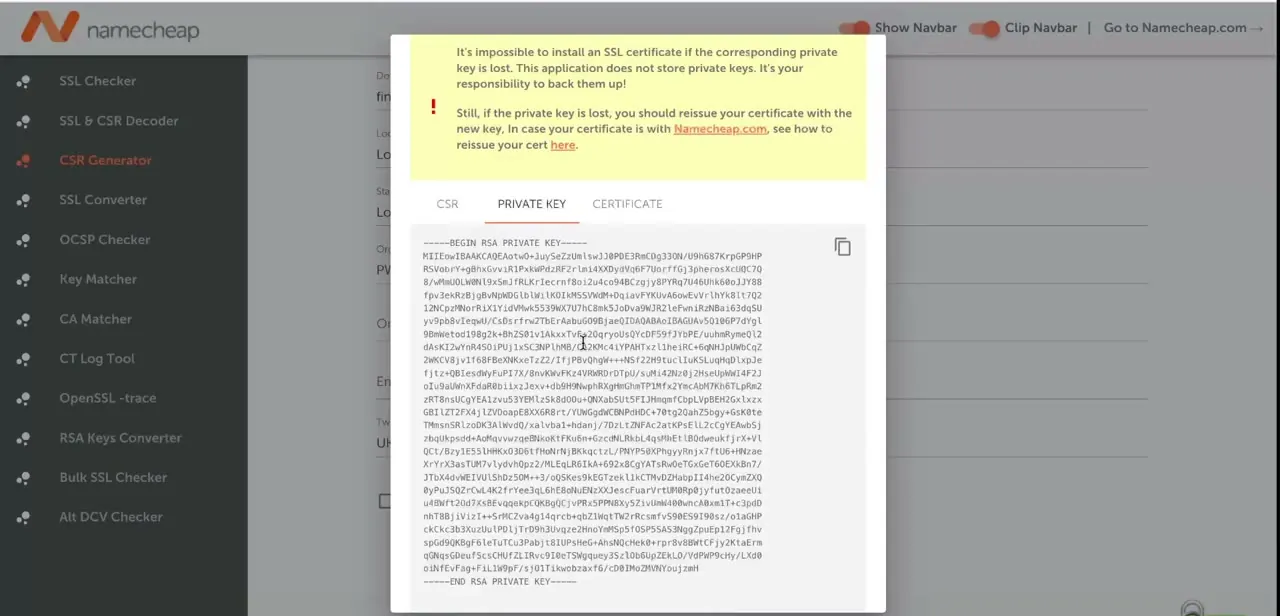
A CSR is generated together with a private key, and the two are a matched pair — the certificate only works with the exact key it was issued alongside. Using a CSR generator tool, you'll get three outputs in separate tabs: the CSR itself (what you submit to the certificate authority), the private key (what your server or hosting panel needs to actually use the certificate), and eventually the signed certificate. The tool is explicit that it does not store private keys and that losing yours means reissuing the certificate entirely, so copy it somewhere secure the moment it's generated rather than planning to come back for it later.
03Submit the CSR and confirm your domain
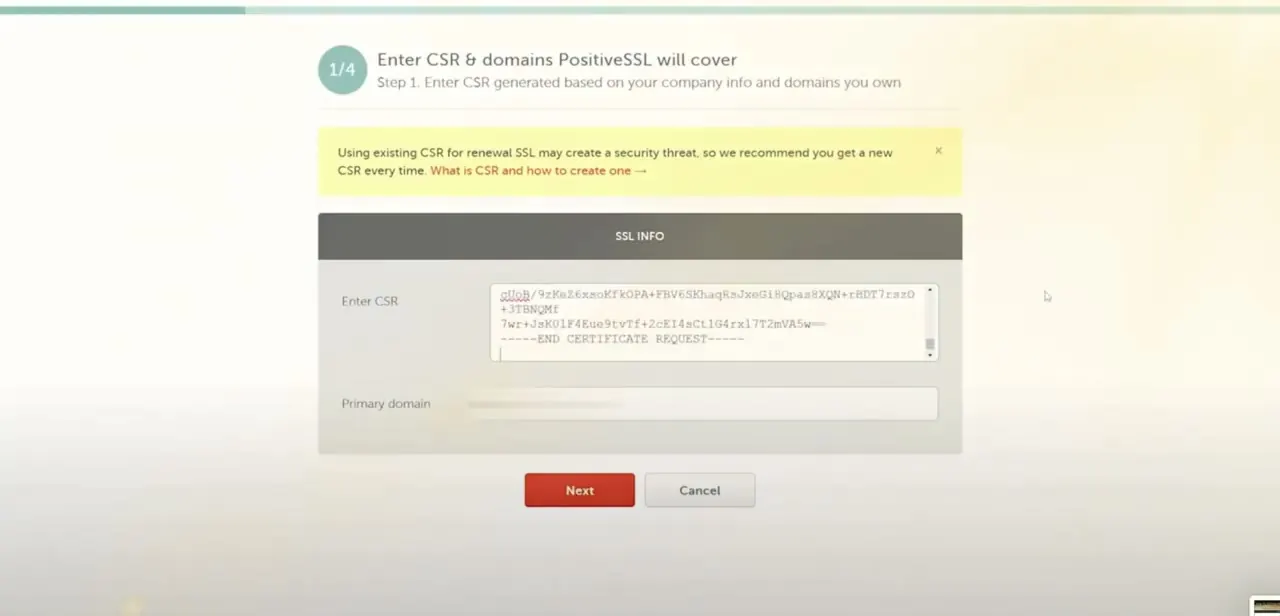
Back in Namecheap's activation wizard, step 1 of 4 asks you to paste the CSR you just generated into the Enter CSR field, then confirms the primary domain it covers underneath. Namecheap flags that reusing an old CSR for a renewal is a security risk and recommends generating a fresh one each time, which is worth following even though it's tempting to reuse a saved CSR to save a step. Once the CSR is pasted and the domain confirmed, click Next to move into choosing how you'll prove you own the domain.
04Choose a domain control validation method
The next steps in the wizard ask how you want to prove domain ownership — commonly email validation, sent to an address like admin@ or webmaster@ your domain, or DNS validation, where you add a specific TXT or CNAME record to your domain's DNS. Email is usually faster if you already have a working inbox on the domain; DNS validation is more reliable when that mailbox doesn't exist yet, since it works entirely inside the DNS panel you already have open.
05Add the validation record in Advanced DNS
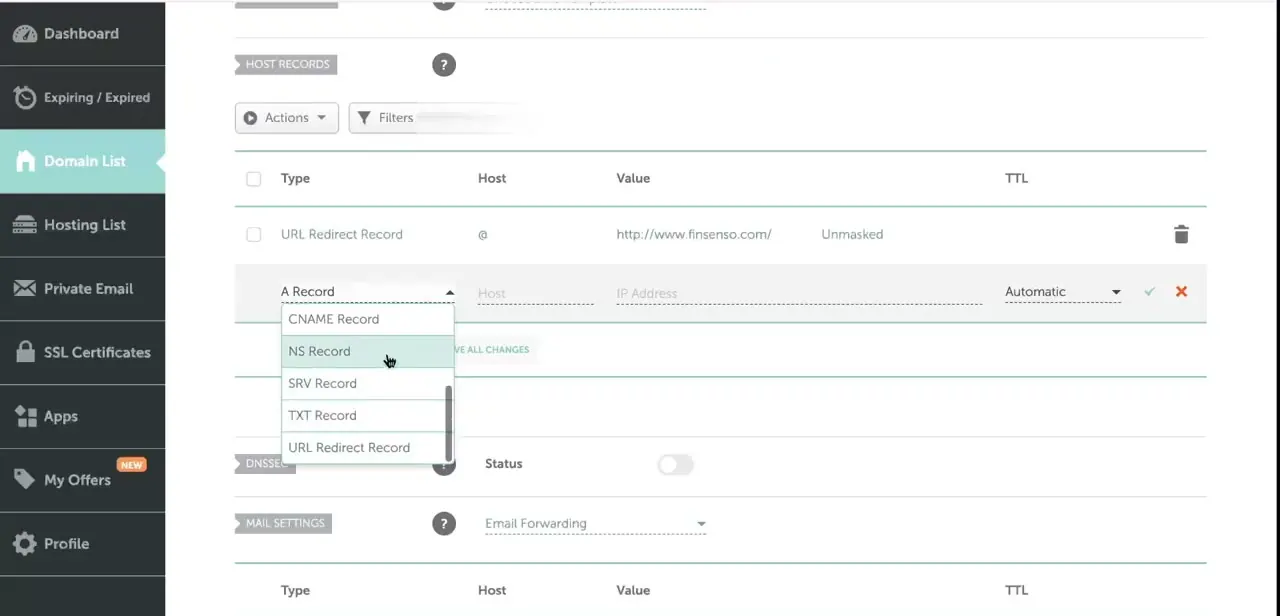
If you choose DNS validation, go to Domain List → Manage → Advanced DNS for the domain and open Host Records. This is the same panel where any existing records — like an existing URL redirect or A record — already live, and adding a new one means picking the correct record type from the dropdown (CNAME, TXT, and so on) before entering the exact host and value Namecheap's wizard gave you. Save the change, then return to the SSL wizard to trigger verification; it will check the DNS record rather than an inbox.
06Install the certificate once it's issued
After validation succeeds, Namecheap issues the certificate, and you'll download or copy it from the Certificate tab of the same tool you used for the CSR. Installation happens on your hosting side, not in Namecheap itself — in cPanel or EasyWP, there's typically an SSL/TLS section where you paste the certificate and the matching private key together. This is exactly why the private key from step two matters: without it, the certificate you just received can't actually be installed anywhere.
07Troubleshoot common activation failures
If activation stalls or fails, the usual culprits are a CSR that doesn't match the domain entered in the wizard, a DNS or email validation step left incomplete, or a validation record that was added with the wrong type or a typo in the value. Double-check the domain in the CSR against the one you're activating for, and confirm the DNS record shows up correctly using a DNS lookup tool before assuming Namecheap's system is at fault — propagation delays on a freshly added record are a common false alarm.
Frequently asked questions
What is a CSR used for?
A CSR is a block of encoded text, generated together with a private key, that a certificate authority like Namecheap's PositiveSSL uses to create and issue your SSL certificate for that specific domain.
Does this work with EasyWP hosting?
Yes, the CSR generation and Namecheap-side activation process applies regardless of hosting provider; only the final certificate installation step differs between Shared Hosting, EasyWP, and other cPanel-based providers.
What happens if I lose my private key?
You'll need to reissue the certificate with a new CSR and key pair — the certificate authority and most tools don't store private keys, so there's no way to recover a lost one.
Should email or DNS validation for domain control?
Email validation is usually faster if you already have a working inbox on the domain, while DNS validation is more reliable when you don't, since it only requires adding a record in Advanced DNS.
What if my SSL activation keeps failing?
Common causes include a CSR that doesn't match the domain entered in the wizard, or an incomplete or incorrectly entered DNS validation record — recheck both before assuming something else is wrong.
Watch the full walkthrough
The same steps, demonstrated on screen from start to finish.