Easy Tech Tuts
How To Connect Namecheap Domain To Squarespace Easily 2026
By Impran M N
If your domain lives at Namecheap but your website is built on Squarespace, you don't need to transfer the domain to connect the two. Squarespace's own domain-connection wizard walks you through pointing your existing domain at your site using its nameservers, which is the path it defaults to and the simplest to follow if you don't have other services depending on Namecheap's DNS. This guide follows that wizard screen by screen alongside the Namecheap side you'll need open in a second tab.
01Confirm your domain is active in Namecheap
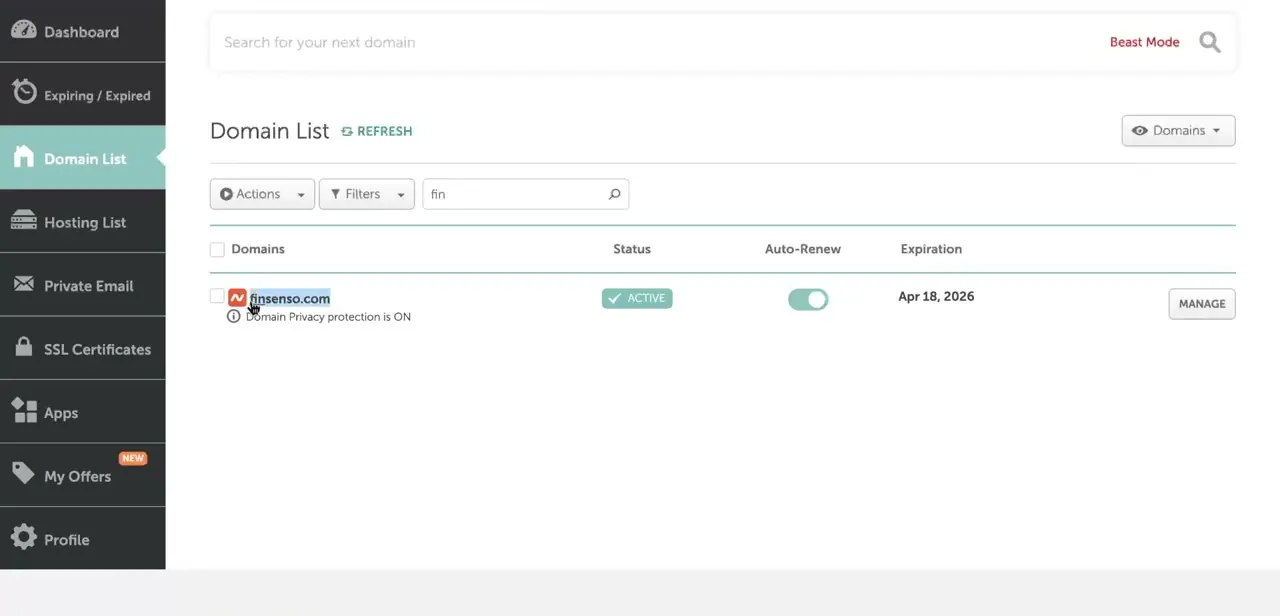
Before starting on the Squarespace side, log in to Namecheap and open Domain List to confirm the domain you want to connect is Active and not sitting in an expired or pending state. The list shows each domain's status, whether Auto-Renew is on, and its expiration date, plus a note if Domain Privacy protection is enabled. Keep this tab open — you'll come back to it once Squarespace hands you the nameserver values to enter.
02Start the connection from Squarespace's domain settings
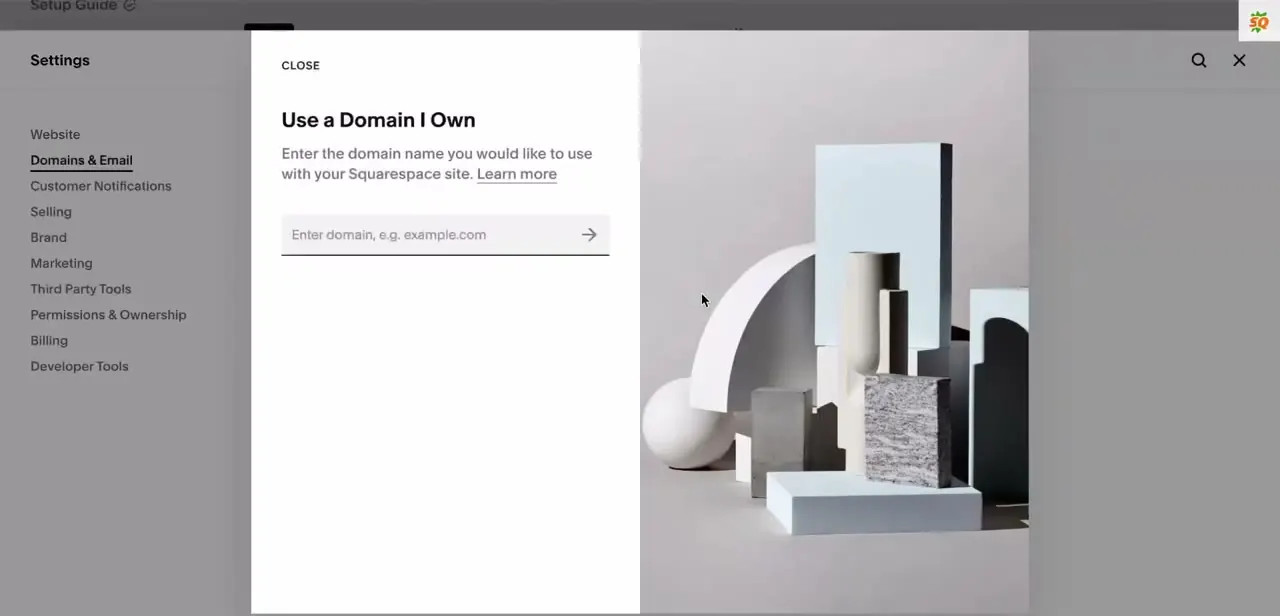
In your Squarespace site, go to Settings → Domains & Email and choose Use a Domain I Own. A panel opens asking you to type in the domain name exactly as registered — the same domain you just confirmed is active in Namecheap. Enter it and continue; Squarespace will look it up and move you into its guided setup for that specific domain.
03Choose the nameserver setup path
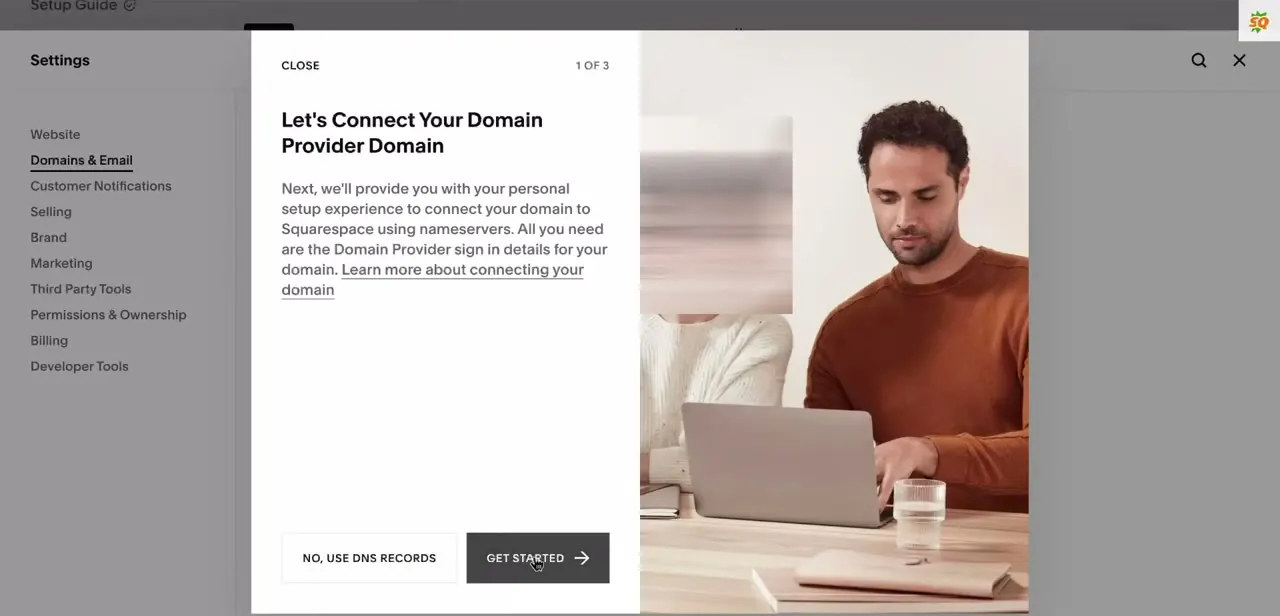
Squarespace then presents "Let's Connect Your Domain Provider Domain," a short explainer that it can set up the connection using nameservers if you provide your domain provider's sign-in details, or you can decline and use DNS records instead via the "No, use DNS records" button. The nameserver route is the simpler of the two for most people, since Squarespace manages the records for you afterward rather than you adding individual entries — but if you already rely on Namecheap's DNS for email or other services, DNS records may be the safer choice since switching nameservers hands that control to Squarespace entirely.
04Update your nameservers in Namecheap
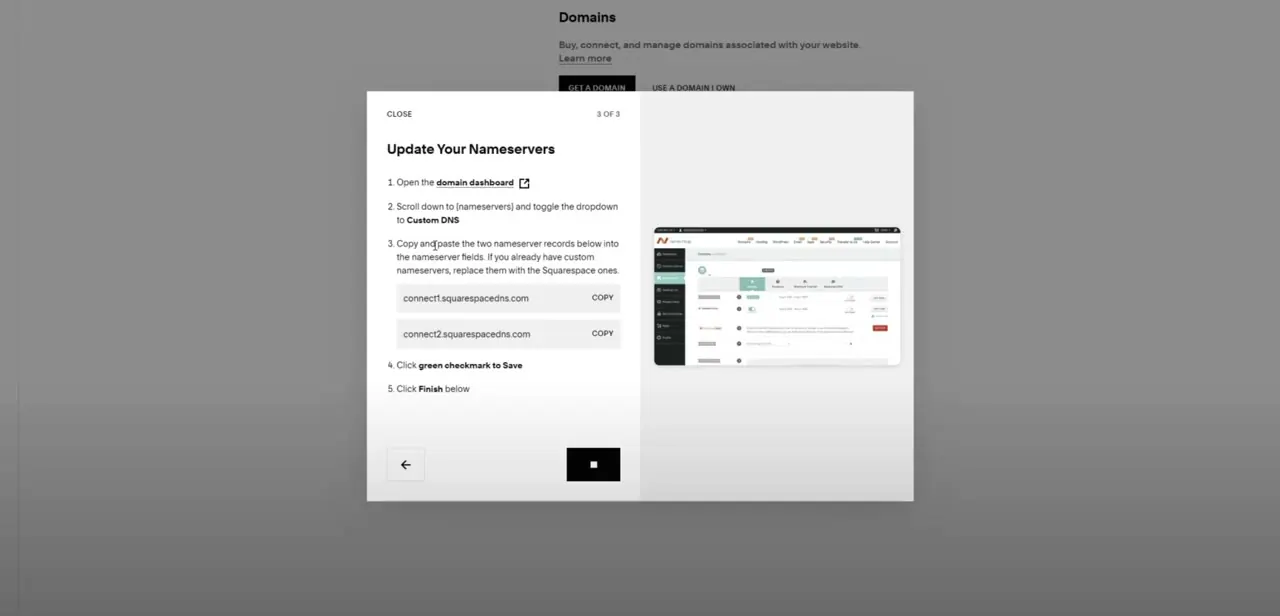
Following the nameserver path, step 3 of 3 gives you explicit instructions: open your domain dashboard, scroll to Nameservers, toggle it to Custom DNS, and paste in the two values Squarespace provides — connect1.squarespacedns.com and connect2.squarespacedns.com. In Namecheap specifically, that Nameservers section is on the domain's management page; replace whatever is currently listed (including Namecheap's own BasicDNS nameservers) with these two, click the green checkmark to save, then return to Squarespace and click Finish to complete the wizard.
05Allow propagation before troubleshooting
Nameserver changes take longer to propagate than a single DNS record update, commonly a few hours and sometimes up to 24-48 hours depending on your domain's TTL history. Squarespace won't fully activate the connection — including issuing SSL — until it can see the new nameservers resolving, so a domain that shows as not-yet-connected shortly after saving is expected, not necessarily broken.
06Verify SSL and site loading once connected
Once the nameservers propagate, Squarespace automatically provisions an SSL certificate for the domain, so there's no separate certificate step to complete on the Namecheap side. Visit your domain directly to confirm the Squarespace site loads over HTTPS without a browser warning. If it doesn't resolve after a day or so, double check the two nameserver values in Namecheap match exactly what Squarespace gave you, since a typo here is the most common reason the connection stalls.
Frequently asked questions
Do I need to transfer my domain to use it with Squarespace?
No, you can keep your domain registered with Namecheap and simply point its nameservers (or DNS records) to Squarespace.
Should I use nameservers or DNS records to connect?
Nameservers are simpler since Squarespace manages the records for you, but if you rely on Namecheap's DNS for email or other services, DNS records let you keep that control instead of handing it all to Squarespace.
How long does DNS propagation take for this setup?
Nameserver changes commonly take a few hours and can take up to 24-48 hours, so it's worth allowing time rather than assuming an issue right away.
Will SSL be set up automatically?
Yes, Squarespace automatically provisions an SSL certificate once it can see the domain's nameservers pointed to its own, with no separate step required in Namecheap.
What if my domain doesn't connect right away?
Double-check that the two nameserver values in Namecheap match exactly what Squarespace provided (connect1.squarespacedns.com and connect2.squarespacedns.com), as a small typo here is the most common cause of delays.
Watch the full walkthrough
The same steps, demonstrated on screen from start to finish.