Easy Tech Tuts
How to Make Instagram Reels With Canva Easily 2026
By Impran M N
A Reel in Canva is really a short timeline made of clips, text overlays, and template scenes stitched together, and once you've built one the pattern is reusable for every Reel after it. This guide follows that build from a single vertical video clip through adding a text overlay, layering in a second scene from a template, and assembling the finished multi-clip timeline — the actual mechanics of putting a Reel together rather than just a list of settings to tweak. It's aimed at creators and small business owners who want a repeatable process, not a one-off trick.
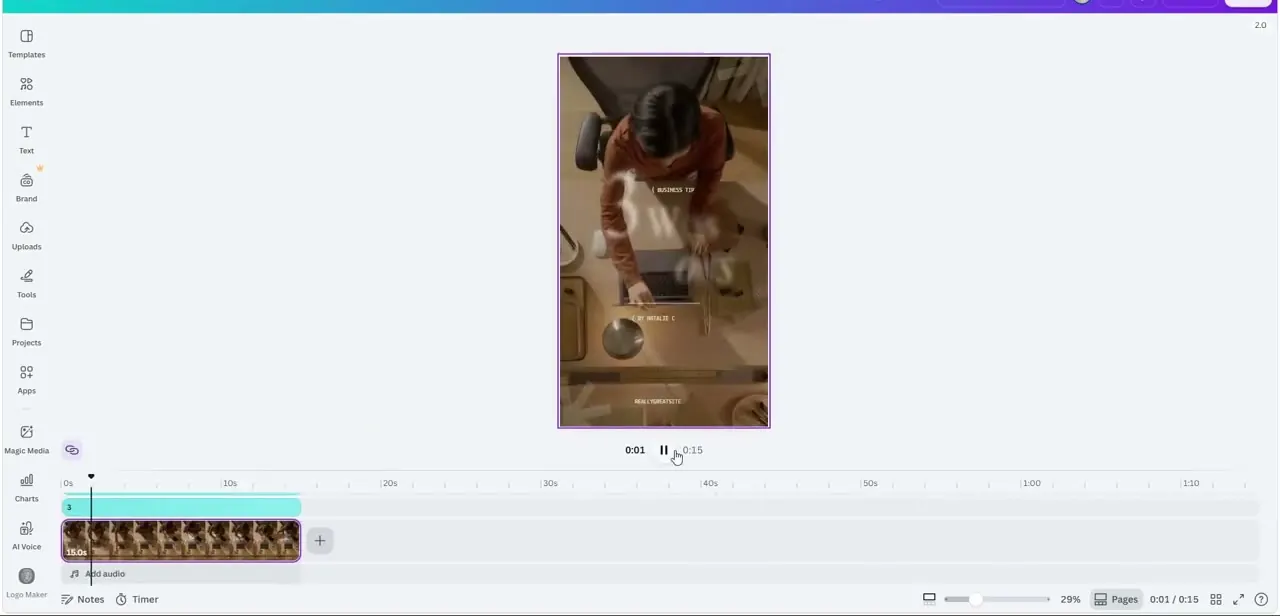
01Start with your base video clip
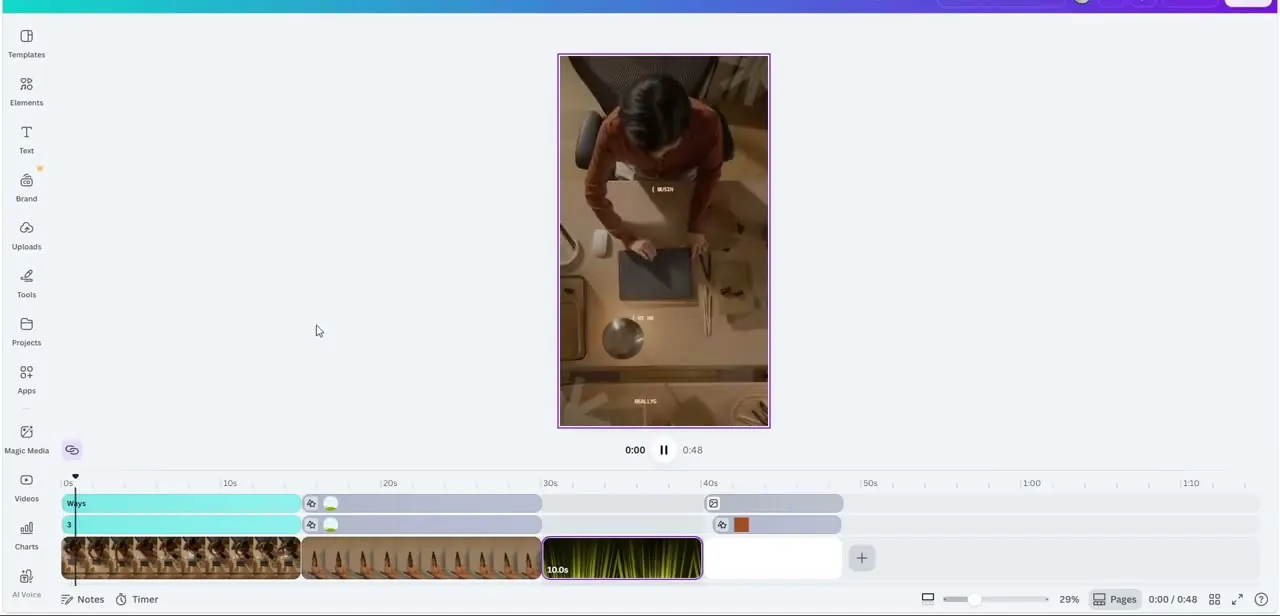
Drop a vertical video clip onto the canvas and Canva's editor lays out a timeline underneath the preview, with the clip's thumbnail frames stretched across a track you can trim from either end. The preview plays at the aspect ratio Reels actually use — tall and narrow — so what you see in the editor is close to what followers will see in their feed, not a cropped approximation you have to guess about.
02Add on-screen text
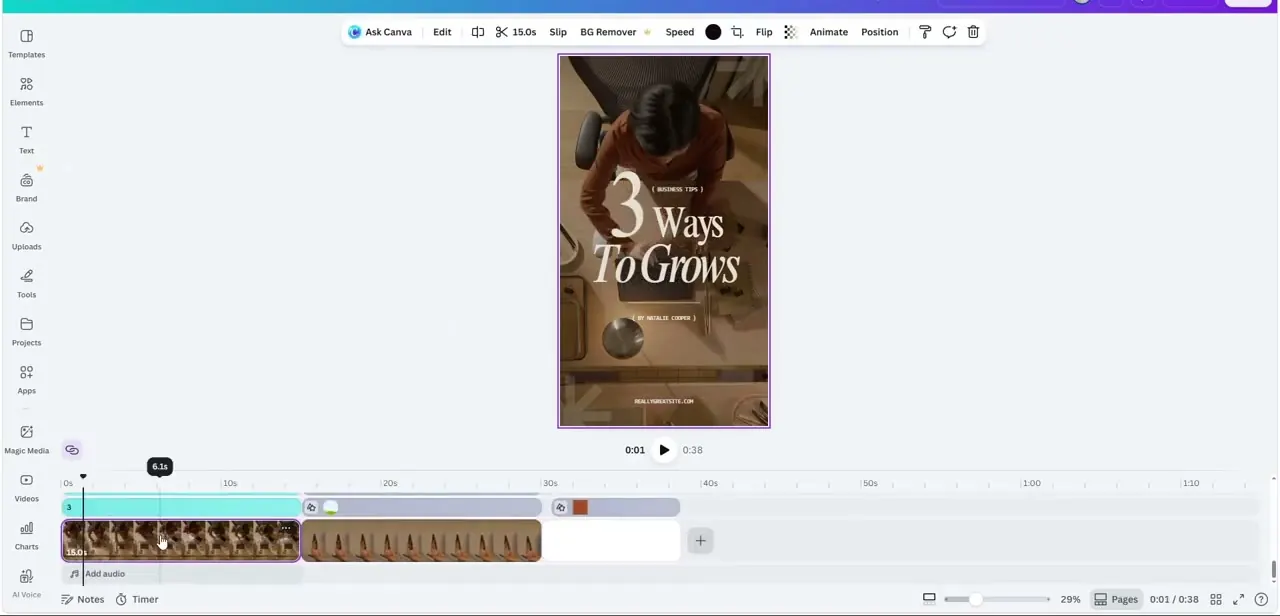
Text layered directly over the footage — a number, a hook, a short headline — is what turns a plain clip into something that reads as a Reel rather than a raw video. In this build, a bold serif treatment reading "3 Ways To Grows" sits centered over the footage with a smaller "Business Tip" label above it and a byline below, all pulled from a template's existing text styles rather than built from scratch. Keep hook text short enough to read in the first second or two, since that's the window before a scrolling viewer decides whether to stay.
03Layer in a second scene from a template
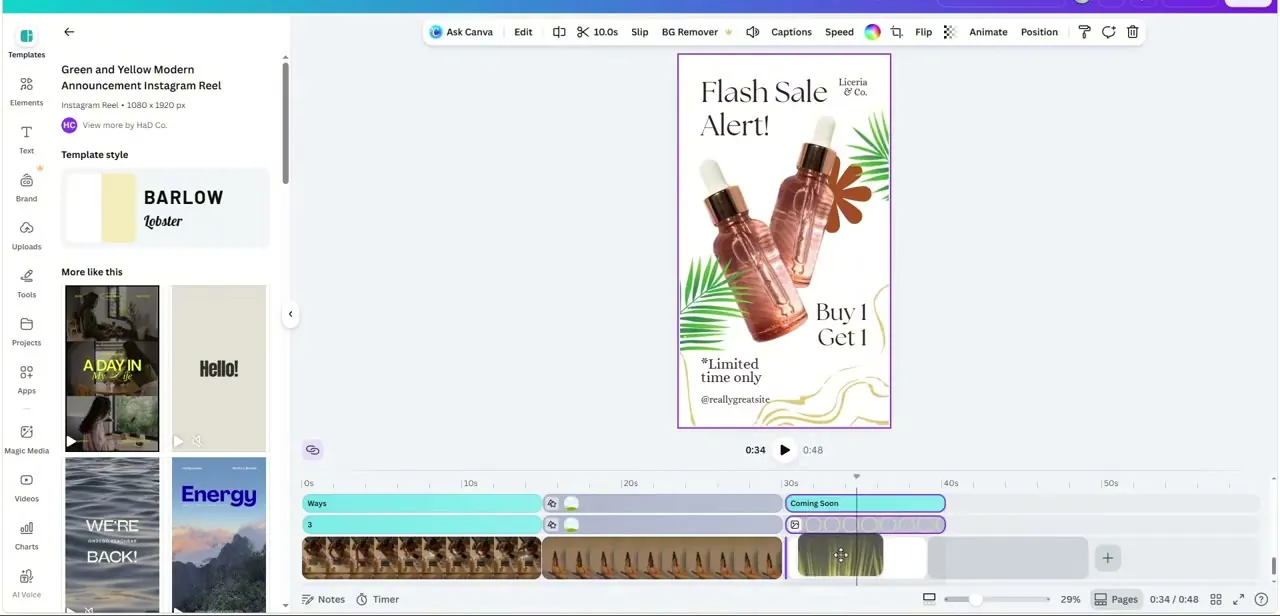
Reels rarely run on a single clip start to finish — opening the Templates panel mid-project lets you browse ready-made scenes, like a "Flash Sale Alert!" announcement layout, and drop one in as a new segment on the timeline rather than building every scene from empty elements. Each template here shows its own preset fonts (Barlow paired with a Lobster script in this example) and a "More like this" row for finding additional scenes in the same visual style, which keeps a multi-scene Reel looking cohesive instead of stitched from mismatched pieces.
04Assemble the full timeline
As you add clips and template scenes, they stack left to right along the bottom of the editor, each with its own duration bar, and text elements get their own separate tracks above the video so they can be trimmed or repositioned independently of the footage underneath them. Scrub through the full assembled timeline before moving on — this is where you catch a scene that's lingering too long, a text overlay that doesn't clear before the next clip starts, or a jarring jump between visual styles.
05Check pacing against Reels' short attention span
Reels live or die on the first couple of seconds, so front-load whatever's most attention-grabbing — the boldest text, the most striking clip — rather than building up to it. Trim dead air between scenes tightly; a Reel that drags in the middle loses viewers before they reach whatever payoff or call to action comes at the end, no matter how good that ending is.
06Export and publish
Once the timeline plays cleanly start to finish, export at Canva's Instagram Reel preset so the resolution and aspect ratio match what the platform expects without any extra cropping on your end. From there it's a straight upload to Instagram — the file is already sized and shaped correctly, so there's no need to run it through another tool before posting.
Frequently asked questions
Do I need video editing experience to make Instagram Reels in Canva?
No — Canva's timeline editor works by dragging clips and template scenes into place rather than requiring traditional editing skills, and text, transitions, and pacing are all adjustable with simple controls.
Can I combine my own video clips with Canva's templates in one Reel?
Yes — this is the core workflow: start with your own footage, then layer in template scenes from the Templates panel as additional segments on the same timeline.
How long should the text overlay stay on screen?
Keep hook text readable within the first second or two of a scene, since that's the window a scrolling viewer uses to decide whether to keep watching.
How do I keep multiple scenes looking consistent in one Reel?
Templates in Canva come with their own paired fonts and color styling, and the "More like this" suggestions surface scenes designed to match, which helps keep a multi-scene Reel visually cohesive instead of mismatched.
How do I export my Reel for Instagram?
Export using Canva's Instagram Reel preset, which matches the platform's expected resolution and aspect ratio, so the file uploads directly without needing to be resized elsewhere.
Watch the full walkthrough
The same steps, demonstrated on screen from start to finish.