Easy Tech Tuts
Google Sheets Tutorial for Beginners, How to Use Google Sheets in the AI Era Easily 2026
By Impran M N
Most Google Sheets tutorials start with a blank grid and a list of formulas to memorize, which is exactly the part beginners find least useful. This one starts differently — from a real weekly schedule template, built out with actual entries, conditional formatting rules, and a share step at the end.
That's a more honest picture of what day-to-day spreadsheet work looks like: importing data you already have, adapting a template instead of building from scratch, and getting the file in front of other people. Follow along and you'll come away knowing how to bring outside data in, use a prebuilt layout productively, and share the result.
01Import an existing file instead of starting blank
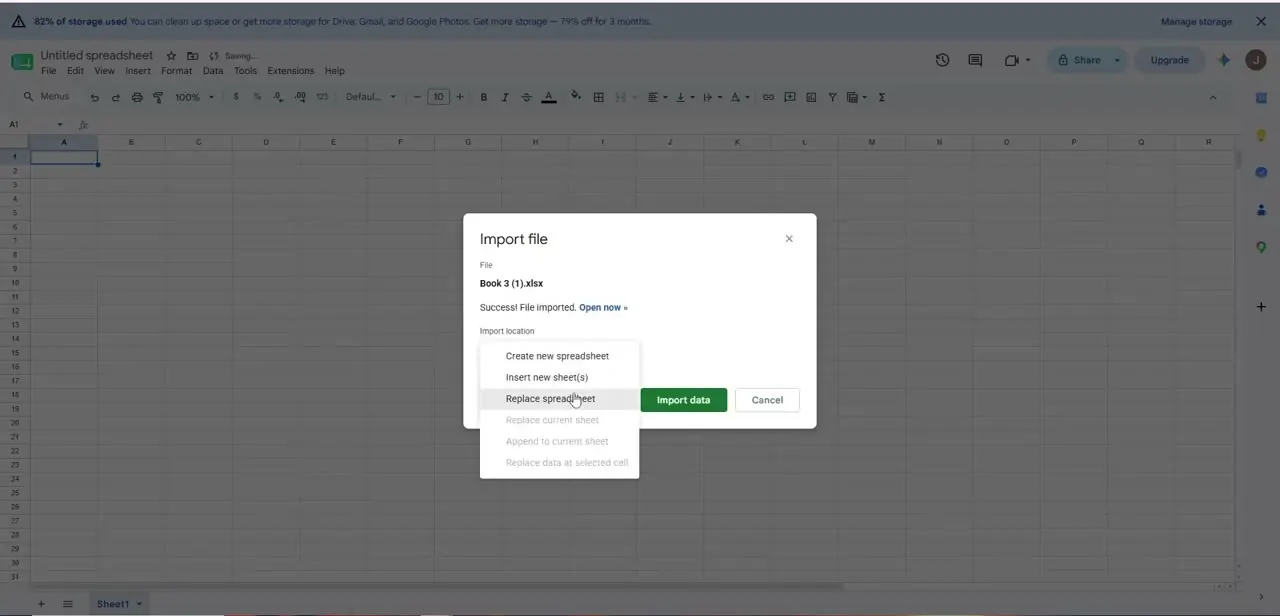
If you already have data in Excel or another format, Google Sheets can bring it in directly rather than making you retype everything. From File, choose Import, and select the file you want — the dialog confirms once the upload succeeds and gives you an "Open now" link.
The more important choice is the import location underneath it: Create new spreadsheet, Insert new sheet(s), Replace spreadsheet, or a few other options for merging into what's already open. Picking the wrong one here is the single most common beginner mistake, since "Replace spreadsheet" wipes out anything already in the file.
02Start from a template instead of a blank grid
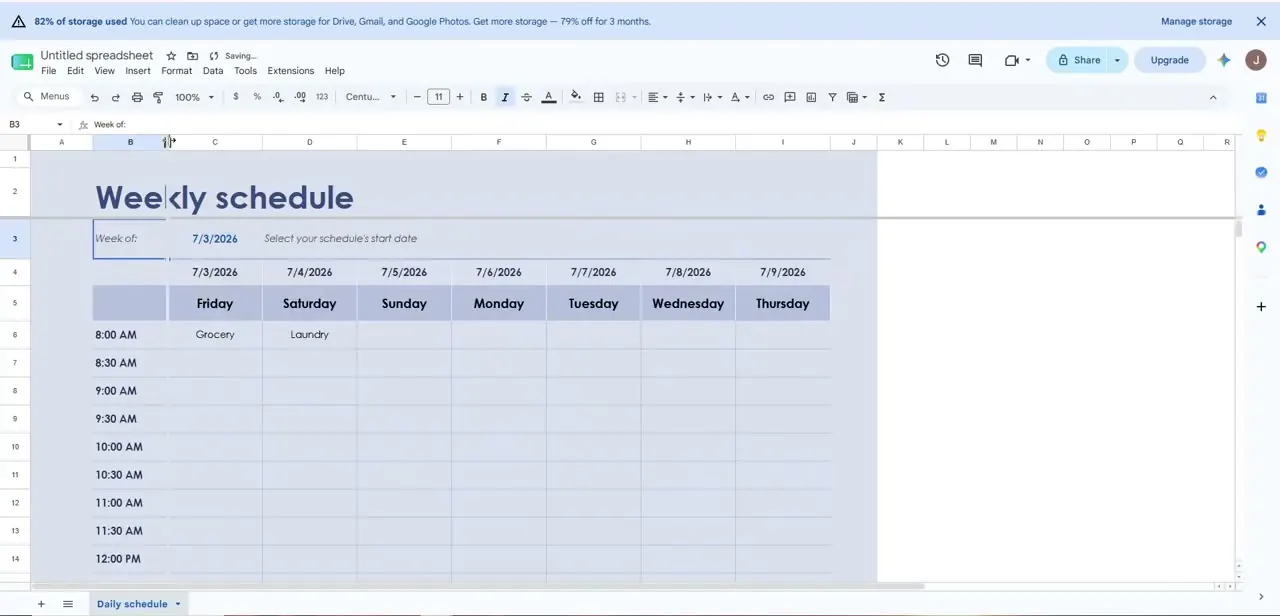
Rather than building row and column structure from nothing, Google Sheets' template gallery includes ready-made layouts like a Weekly schedule, with a "Week of" date selector at the top and a day-by-day grid already formatted below it. Clicking into the date field lets you set the schedule's start date, and the days across the top update to match. For a beginner, working inside a template like this teaches spreadsheet structure — headers, merged cells, labeled rows — far faster than staring at an empty sheet trying to decide where to begin.
03Enter data and apply conditional formatting
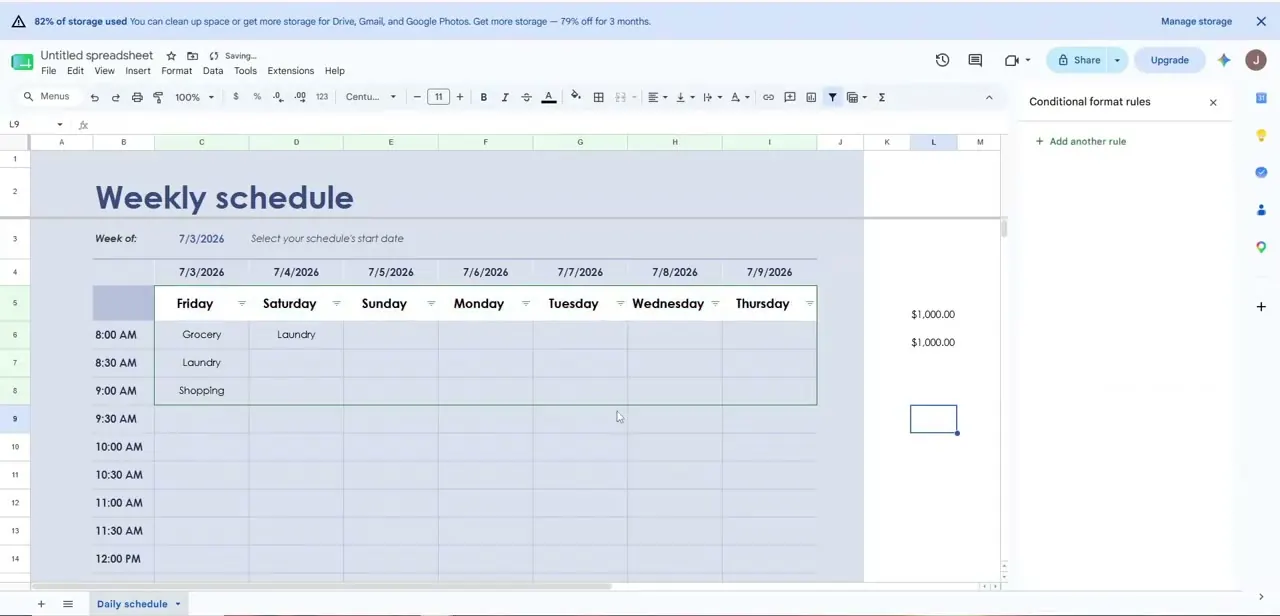
Typing entries into the schedule — Grocery, Laundry, Shopping against specific time slots — turns the template into an actual working document. From here, open Format and choose Conditional format rules to have cells change appearance automatically based on their content, which is visible in the panel on the right alongside a couple of dollar values sitting outside the main grid. This is where Sheets starts doing real work for you: instead of manually color-coding entries, a rule does it consistently every time new data goes in.
04Use core formulas to summarize your data
Once a sheet has real entries, formulas are what turn raw rows into answers — SUM for totals, AVERAGE for typical values, COUNTIF for tallying entries that match a condition. Reference a range like B6:B14 rather than retyping numbers, since formulas recalculate automatically the moment the underlying cells change. For a schedule like the one in this template, a simple COUNTIF across the week can tell you at a glance how many time slots are still empty.
05Keep data clean as the sheet grows
A schedule or tracker that starts tidy tends to stay usable longer if you're consistent about formatting dates the same way, avoiding stray blank rows in the middle of a range, and using Data validation to restrict a column to a fixed set of entries where that makes sense. Sheets' filter and sort tools only work reliably when the underlying data is consistent, so a few minutes of cleanup discipline early on saves much more time later.
06Name and share the file
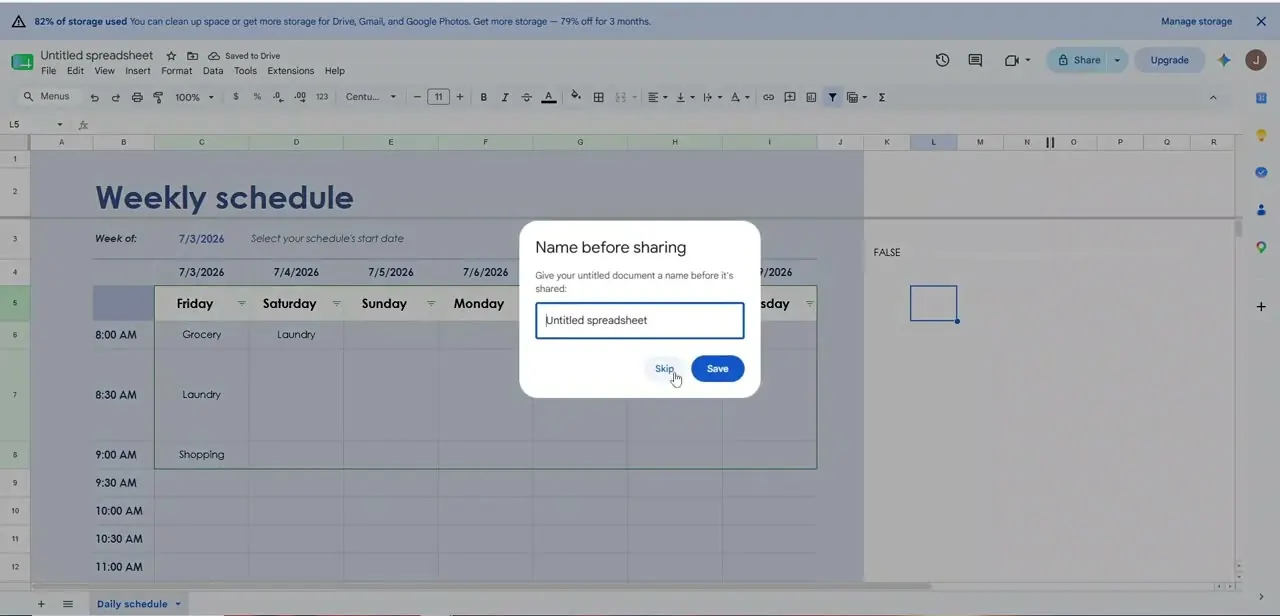
Sharing an untitled document prompts a "Name before sharing" dialog, asking you to give the spreadsheet a real name before it goes out — you can Save a name or Skip and share it as-is. Naming it properly matters more than it seems: an "Untitled spreadsheet" landing in a collaborator's Drive is easy to lose track of, while a clear name like "July Weekly Schedule" is instantly identifiable in a shared folder full of other files.
07Bring in AI-assisted features where they save time
Modern Sheets includes AI-driven suggestions for formulas, formatting, and even generating a first draft of a table from a plain-language description, which is worth exploring once you're comfortable with the manual basics covered above. Treat these as an accelerant rather than a replacement — knowing how a formula or a conditional rule actually works means you can verify what the AI suggests instead of accepting it blindly.
Frequently asked questions
Do I need any prior spreadsheet experience to follow along?
No. This walkthrough starts from importing a file and working inside a template, which is a more approachable entry point than building formulas from a blank sheet.
What's the safest import location option when bringing in a file?
"Insert new sheet(s)" is generally safest for beginners, since it adds your imported data as a new tab rather than "Replace spreadsheet," which overwrites everything already in the file.
How does conditional formatting help with a schedule or tracker?
It automatically changes a cell's appearance — color, bold, and so on — based on rules you set, so entries that meet a condition stand out without you manually formatting each one.
Why does Sheets ask me to name a file before sharing it?
An untitled file is hard for collaborators to identify once it lands in their Drive alongside other shared documents, so Sheets prompts for a real name at share time if you haven't already set one.
Should beginners rely on AI features in Sheets right away?
It's better to learn the core formulas and formatting tools first, so you can check that an AI suggestion is actually correct rather than accepting it without understanding what it did.
Watch the full walkthrough
The same steps, demonstrated on screen from start to finish.