Easy Tech Tuts
How to Write a Book on Google Docs Easily 2026
By Impran M N
Turning scattered notes into a structured, publication-ready manuscript is much easier with the right Google Docs setup from day one, rather than retrofitting structure onto 60,000 words later. The tools that matter most for a book-length project — page setup, heading styles, page breaks, and version history — are ones most people never touch in a short document. This guide walks through configuring each one using a real sample manuscript as the working example, so you can see what a properly structured chapter actually looks like.
01Name your file and pick a working title
Open a new Google Doc and rename it from Untitled document to your working title right away — Google Docs autosaves continuously, so there's no separate "create project" step, but naming the file early keeps it easy to find in Drive once you have a dozen other documents open. Treat this file as your single master copy rather than splitting chapters into separate documents, since that's what makes the outline and table of contents features actually useful later.
02Configure your page size and margins
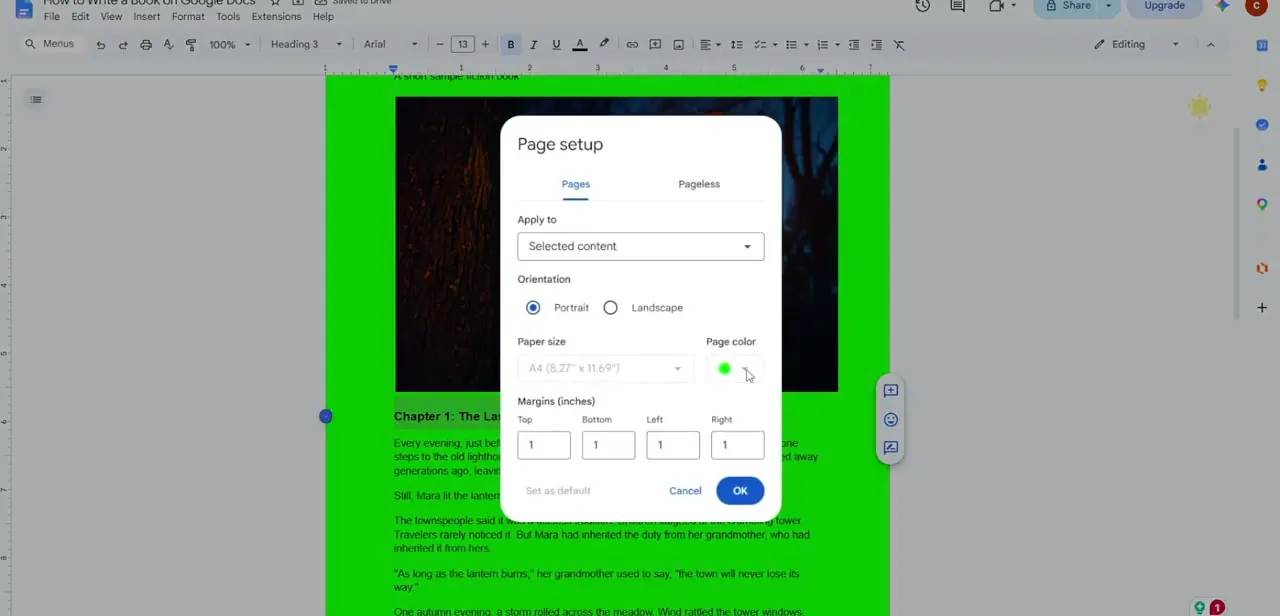
Click File, then Page setup, to open the dialog controlling paper size, orientation, margins, and even a page color if you're formatting for a specific print trim size. The margins here default to 1 inch on all sides, which works for a standard manuscript, but if you're targeting a specific print size you can switch the Paper size dropdown away from the default and adjust from there. You can also apply these settings to just the selected content rather than the whole document, which is useful if your front matter needs different margins than your chapters.
03Build a proper title page
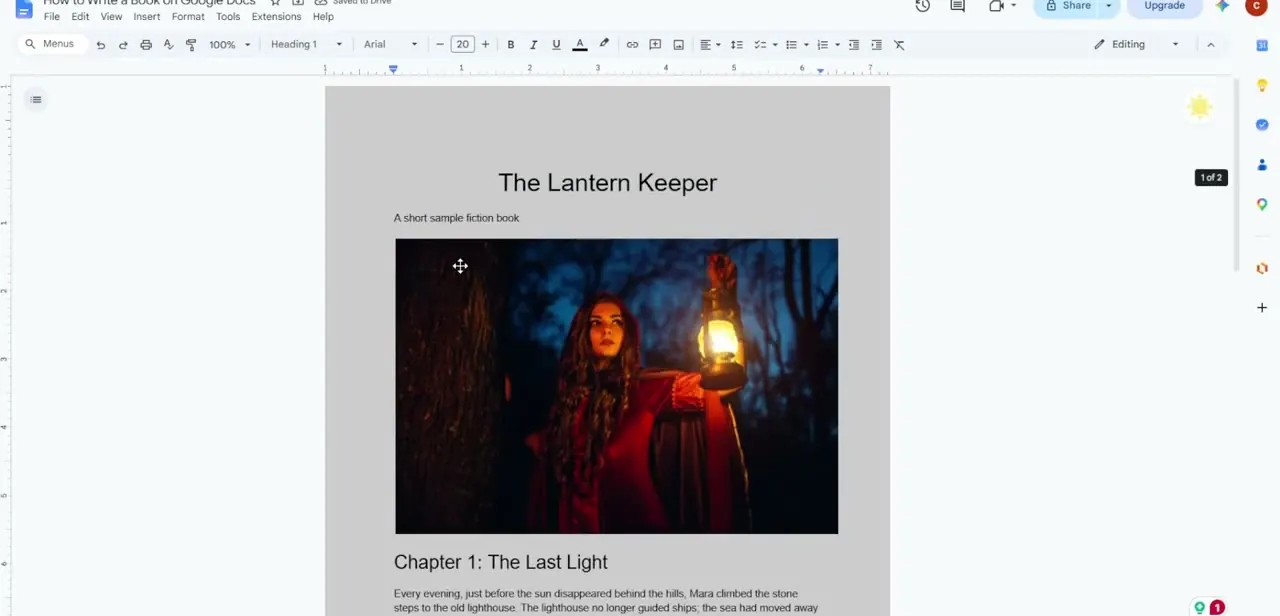
On your first page, type your book's title and apply the Heading 1 style so it's visually distinct from everything else in the manuscript, then add a subtitle line beneath it in regular text. A cover image or hero graphic can sit right below the title if you want the front matter to feel like something closer to a finished book rather than a plain draft. This page becomes the first entry in your outline once you've applied that heading, which is what lets you jump straight back to it later.
04Style every chapter heading consistently
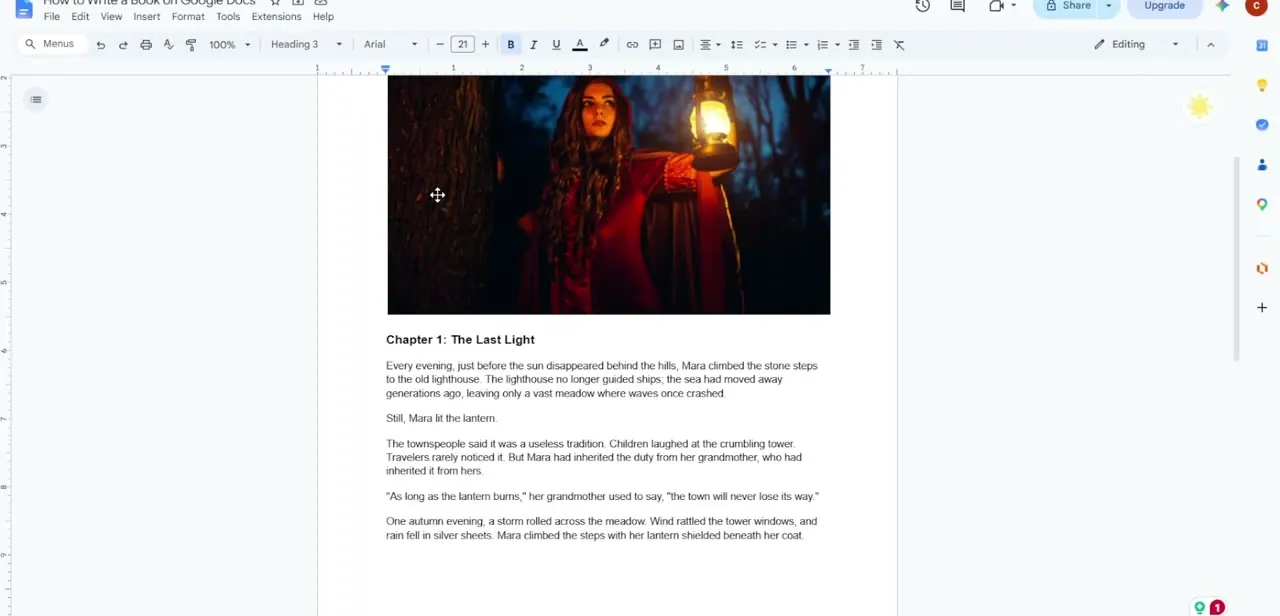
For each new chapter, type the title — something like "Chapter 1: The Last Light" — and apply a consistent heading style throughout, whether that's Heading 1 for every chapter or Heading 3 if chapters sit beneath a higher-level part or section heading. Consistency matters more than which level you pick: mixing heading levels randomly across chapters is what breaks the outline navigation and the table of contents later, so decide on a scheme early and stick to it for the whole manuscript.
05Insert page breaks so chapters start fresh
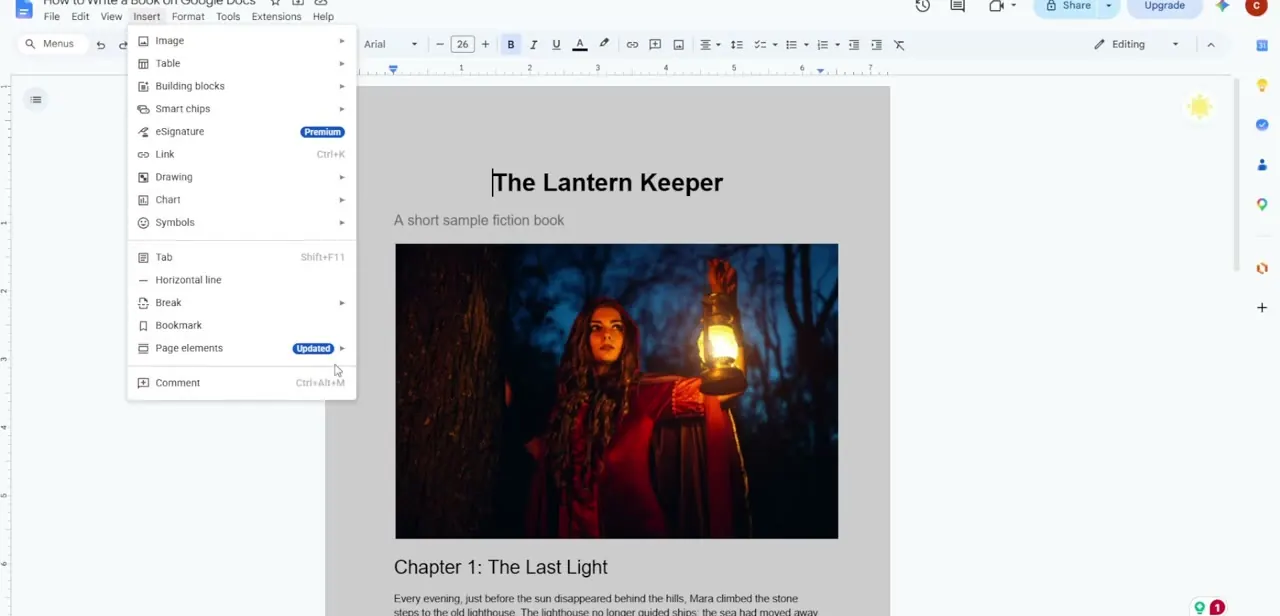
Place your cursor at the very end of a chapter, click Insert in the top menu, hover over Break, and select Page Break. This forces the next chapter to start at the top of a new page instead of continuing partway down the previous one, which is standard in any printed or exported book. The same Insert menu is also where you'll find Table for structured content, Chart if you're including data, and Building blocks or Smart chips for anything more dynamic than plain prose.
06Use the Document Outline to navigate
Click the outline icon in the top-left corner of the page to open the Document Outline sidebar, which lists every heading you've applied as a clickable link. In a manuscript running dozens of pages, this becomes your primary way of moving around — clicking a chapter title in the outline jumps you straight there instead of scrolling through everything in between.
07Add a table of contents and save named versions
In your front matter, click Insert, hover over Table of contents, and choose a layout — it builds itself from your headings and updates automatically as you add, rename, or reorder chapters. As you hit meaningful milestones, use File, then Version History, then Name current version to freeze a checkpoint you can return to later, which matters more in a book-length project than a short document since a bad revision pass can otherwise be hard to undo cleanly.
Frequently asked questions
How do I quickly jump between distant chapters?
Open the Document Outline sidebar from the icon in the top-left corner — it lists every heading and lets you click to jump straight to that section.
Will the table of contents update automatically?
Yes, an inserted Table of Contents updates live as you add, rename, or reorder headings throughout your manuscript.
Can I export my finished manuscript for publishing?
Yes, Google Docs supports exporting to formats like PDF, which most self-publishing platforms accept directly.
Does Google Docs save my progress automatically?
Yes, changes save automatically to the cloud, and named versions in Version History give you extra milestone checkpoints you can return to.
Why do my chapters need consistent heading levels?
Mixing heading levels inconsistently across chapters is what breaks both the Document Outline navigation and the automatic table of contents.
Watch the full walkthrough
The same steps, demonstrated on screen from start to finish.