 Easy Tech Tuts
How to Export the General Ledger to Excel in QuickBooks Online Easily 2026
By Impran M N
Handing a bookkeeper or accountant a live QuickBooks login isn't always practical, and sometimes you just need the numbers in a spreadsheet you can sort, filter, or drop into another report. QuickBooks Online's Export Data tool lets you pull the General Ledger, along with several other core reports, straight into an Excel file with the date range you choose. This guide walks through finding that tool, setting up the export correctly, and getting a clean file out the other end.
01Start from your QuickBooks Online homepage
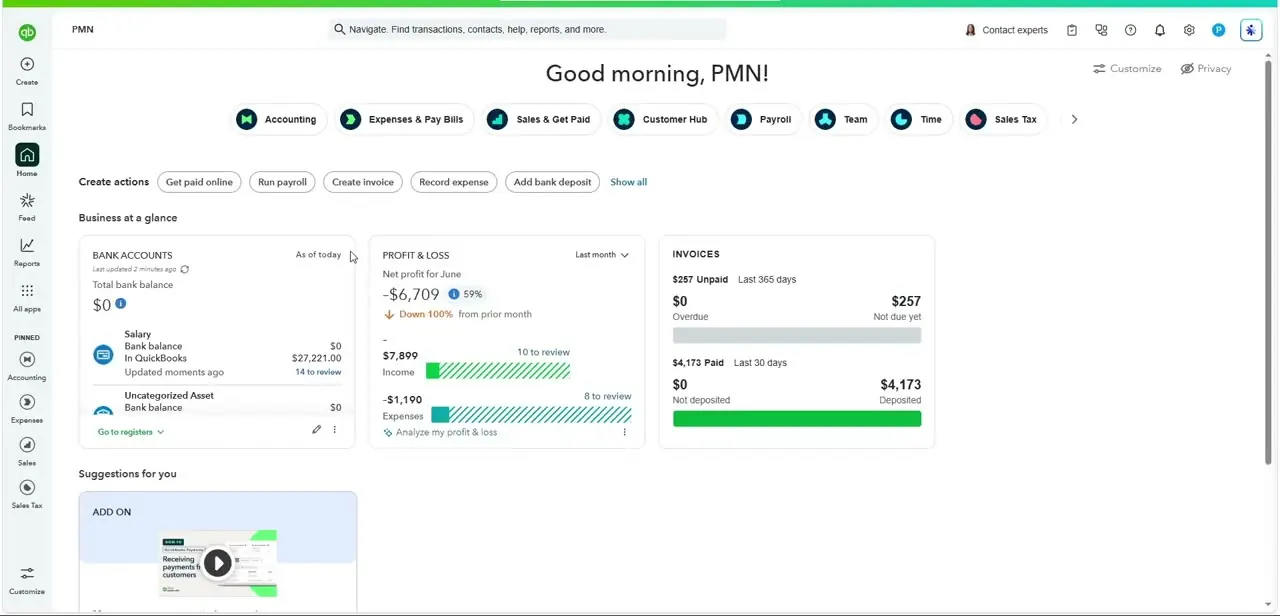
Log into QuickBooks Online and you'll land on the homepage, greeted by name with shortcuts for Accounting, Expenses & Pay Bills, Sales & Get Paid, and more across the top, plus at-a-glance cards for bank balances, profit and loss, and invoices. The General Ledger export isn't triggered from any of these cards directly — it lives inside a dedicated export tool reachable from the gear icon in the top right, under Tools, where QuickBooks groups data-management features like this one alongside things like the audit log.
02Open the Export Data screen
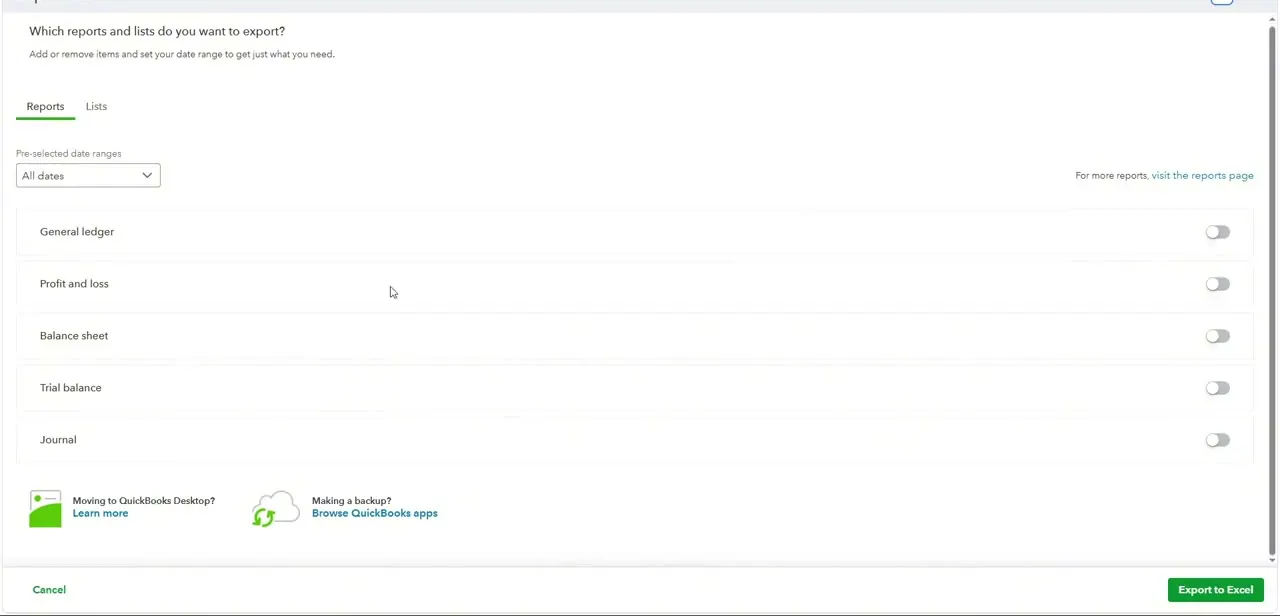
Selecting Export Data opens a screen titled "Which reports and lists do you want to export?" with two tabs — Reports and Lists — and a toggle next to each item you can include. On the Reports tab, General ledger sits alongside Profit and loss, Balance sheet, Trial balance, and Journal, all switched off by default, with a date-range dropdown above them defaulting to "All dates." This is the same tool people use for a broader QuickBooks backup, so it's worth remembering it exists next time you need more than just the ledger.
03Set a custom date range
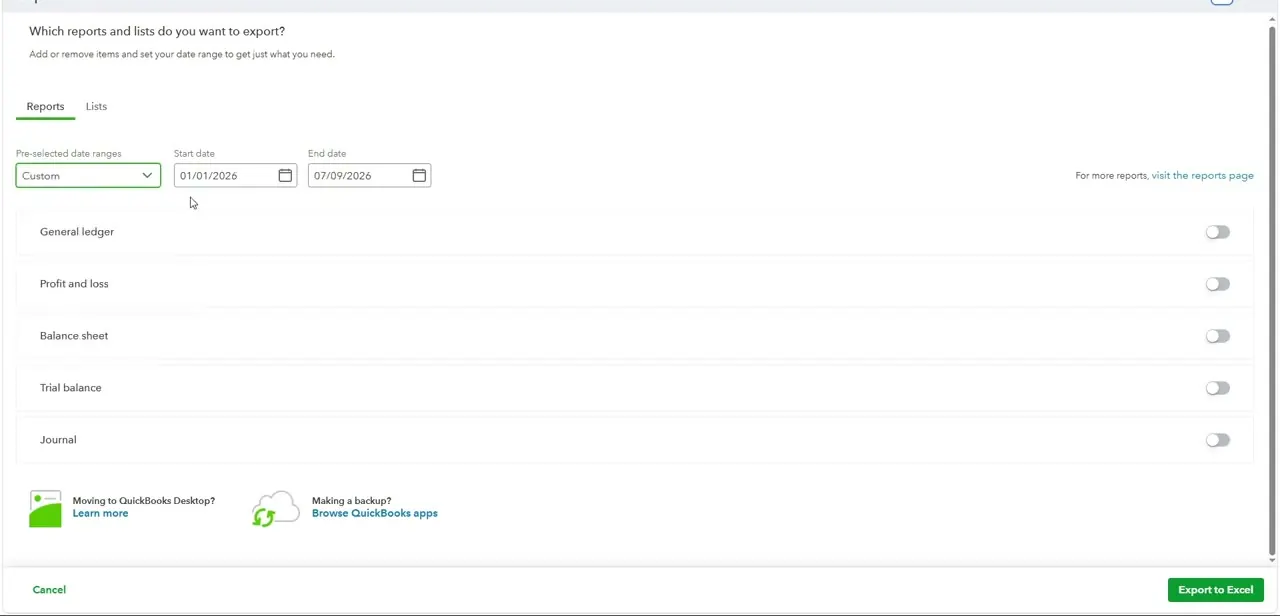
Change the "Pre-selected date ranges" dropdown from All dates to Custom, and two new fields appear for Start date and End date. Narrowing the range matters for anything beyond a full annual review — a General Ledger covering every transaction since the company file was created can run to thousands of rows, which is unwieldy in Excel and slows down anyone trying to reconcile a specific period. Match the range to whatever you're actually working on, whether that's a fiscal quarter, a single month for a bank reconciliation, or a custom window an accountant requested.
04Toggle on General ledger and any other reports you need
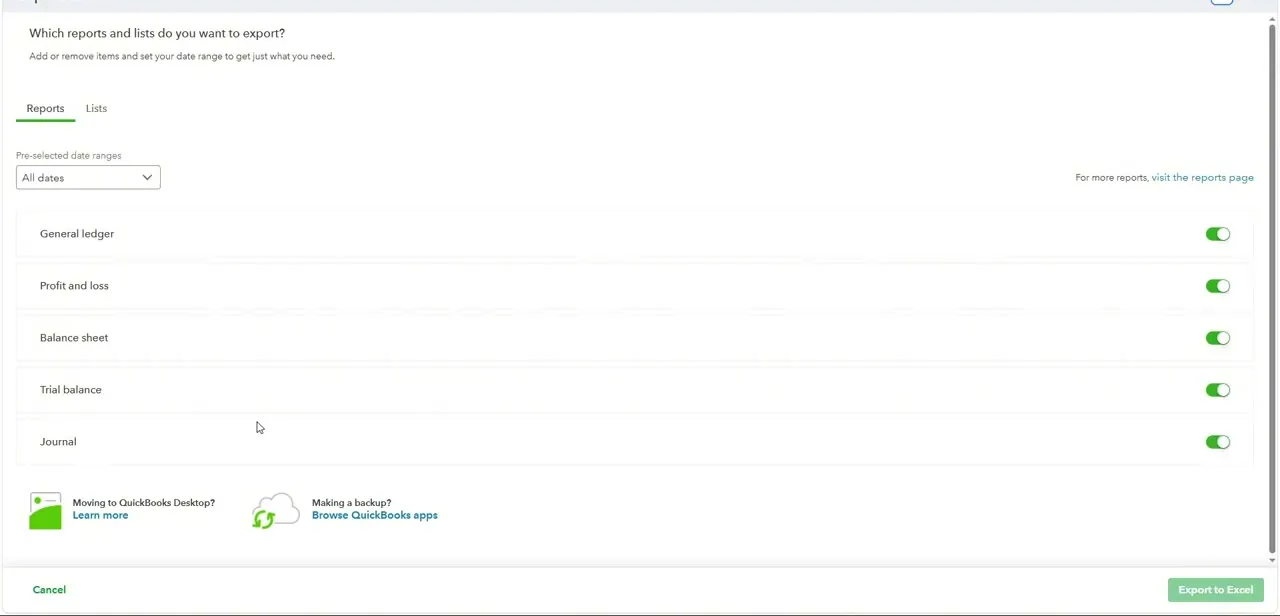
Flip the toggle next to General ledger to turn it green and include it in the export. Since you're already in this screen, it costs nothing to also toggle on Profit and loss, Balance sheet, Trial balance, or Journal if you know your accountant or your own review will need them too — each exports as its own tab inside a single Excel workbook rather than separate downloads, which keeps everything for a given period in one file.
05Click Export to Excel
With your reports selected and date range set, click the green Export to Excel button in the bottom right corner. QuickBooks compiles the selected reports for the chosen period into a single .xlsx file and downloads it through your browser, the same way any other file download works — check your browser's downloads folder or download bar if it doesn't open automatically.
06Open the file and confirm the data
Open the downloaded workbook and check the General ledger tab specifically: confirm the date range matches what you set, that account names and transaction descriptions look complete, and that the running balances tie out to what you'd expect from the QuickBooks report itself. The export brings over static values rather than live formulas, so any further calculations, subtotals, or pivot tables are something you'll build fresh in Excel rather than something that carries over automatically.
Frequently asked questions
Can I export just one account's ledger?
The Export Data tool pulls the full General Ledger for the date range you set rather than a single account. To isolate one account, open the General Ledger report directly, filter it to that account, and export that report on its own instead.
Does the export include transaction details?
Yes — the General Ledger export includes transaction dates, descriptions, account names, and debit/credit amounts for every entry in the date range you selected.
What file formats are available besides Excel?
Individual reports opened directly in QuickBooks Online can usually also be exported to PDF, but the Export Data tool covered here is specifically an Excel (.xlsx) export.
Will formulas or formatting carry over to Excel?
No — the export brings over the report data as static values and basic formatting. Any formulas, subtotals, or pivot tables you want need to be added once the file is open in Excel.
Can I export other reports at the same time as the General Ledger?
Yes — the same Export Data screen lets you toggle on Profit and loss, Balance sheet, Trial balance, and Journal alongside the General Ledger, and they all download together as separate tabs in one workbook.
Watch the full walkthrough
The same steps, demonstrated on screen from start to finish.


